Last Updated on January 5, 2024
My family loves to eat blueberries. These tasty berries are perfect in yogurt, on a salad, or even just a handful for a snack. But you know who else loves blueberries? Birds, squirrels, and deer. And every year, wildlife keeps beating us to ripe, juicy berries on our blueberry bush! But a few years I was determined to outsmart those critters (and won!)
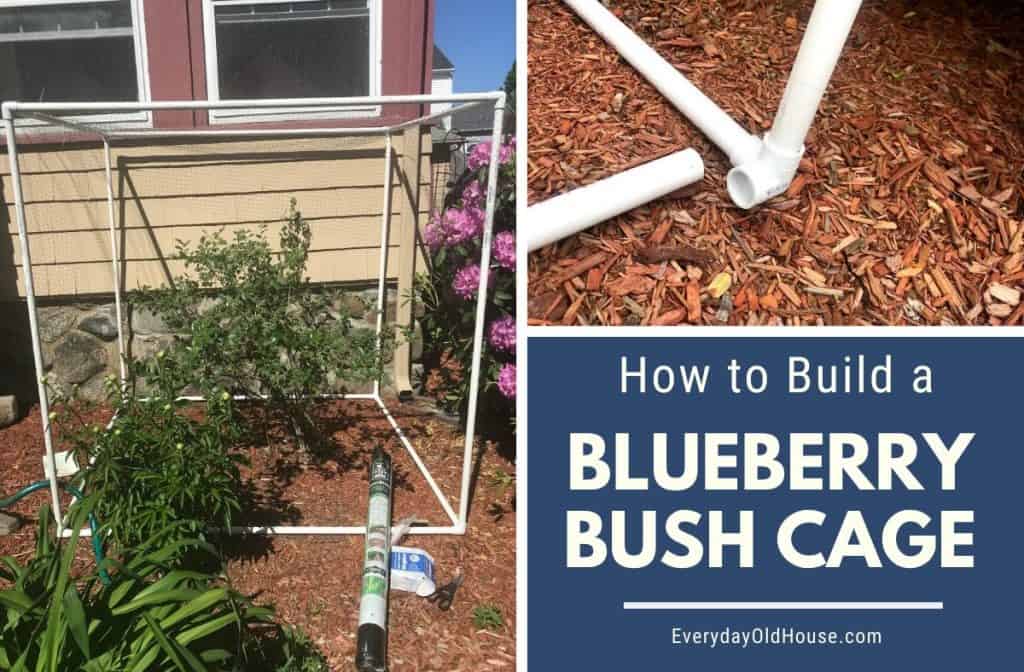
In this post, we share a simple, inexpensive DIY blueberry bush cage using PVC pipe and bird netting. We designed and installed it in under an hour (probably more like 30 minutes, but I didn’t time it….)
It was extremely easy to install, relatively inexpensive (under $50) and broke down quickly for storage at the end of the season.
This post contains affiliate links, including but not limited to, Amazon Associates. As such, I earn from qualifying purchases. Full disclosure located here.
Do Blueberry Plants Need to be Caged?
In my personal opinion, yes. If you want to grow blueberries and NOT have them eaten by birds and pests, the easiest and most foolproof way is to cage your blueberry plants. However, if you are against using netting, check out these 20 Simple Ways to Protect Your Blueberry Bushes.
Problems with Netting Only
The previous 2 years we simply draped netting over the blueberry bush. But using netting alone was a big failure. Why?
- Secure Netting to Ground: The first year I didn’t extend and secure the netting into the ground. And I couldn’t figure out how our berries were going missing until the bush was almost completely picked over and I saw a bird very nicely land on the ground and hop right under the net, and then jump up to snatch a berry. Ugh.
- Appropriate Mesh Size: The second year I placed rocks to hold the netting down to the ground. But, I made another fatal error. I used a mesh size (5/8”) that allowed both the blueberries AND birds right through the net. I proceeded to watch the birds sit right on top of the bush, reach their beaks right through the net and pick berries right off the branches. Double ugh.
I was determined NOT to be defeated. I researched covering blueberry bushes and realized that our blueberry bush needed a simple frame to support draped netting.
Online I found beautiful crop cages and pop-up tents for sale. And they looked perfect. But they were outside our budget (Over $100).
I could buy a lot of blueberries with $100 at the grocery store!
About Our DIY Blueberry Cage
Before I dive in any further, I want to touch on 2 things about our simple DIY blueberry cage to ensure this project is a fit for your garden.
- Size of Our Cage
- Material (PVC vs Wood)
1. Size of Cage/ Number of Bushes
We have just one large blueberry bush. We planted it about 5-7 years ago, I can’t quite remember exactly when. It’s about 4 ft tall by 4 ft wide now. Apparently there are four types of blueberries: highbush, lowbush, hybrid half-high, and rabbiteye. And we have the most commonly planted type – the highbush.
(Side note, production of blueberries works best with more than one bush. While blueberry are self-pollinating to an extent, they tend to grow larger fruit through cross-pollination with a second variety planted nearby. We have planted another variety blueberry bush next to this one several times. And every.single.one of these bushes died. Why? Not exactly sure…. Mystery to solve another year.)
But I digress…
My point is that the measurements and supply quantities for this tutorial applies to covering just one larger blueberry bush.
BUT this method should also work for blueberry bushes in a row with a modification in measurements.
For our cage (and this tutorial) we kept measurements nice and simple. Since PVC pipe is easily available in 10’ lengths, we decided to build a 5’ by 5’ cage for our 4’ by 4’ bush. Makes things a bit easier, doesn’t it? We just needed to cut the PVC pipes in half…. easy peazy, lemon squeezy! And it gives the blueberry bush room for growth.
2. PVC or Wood Blueberry Bush Cage?
I’d also like to touch on using PVC pipe. Admittedly, PVC doesn’t make for the most attractive cage. Especially in my front yard. A wood frame would be far more attractive.
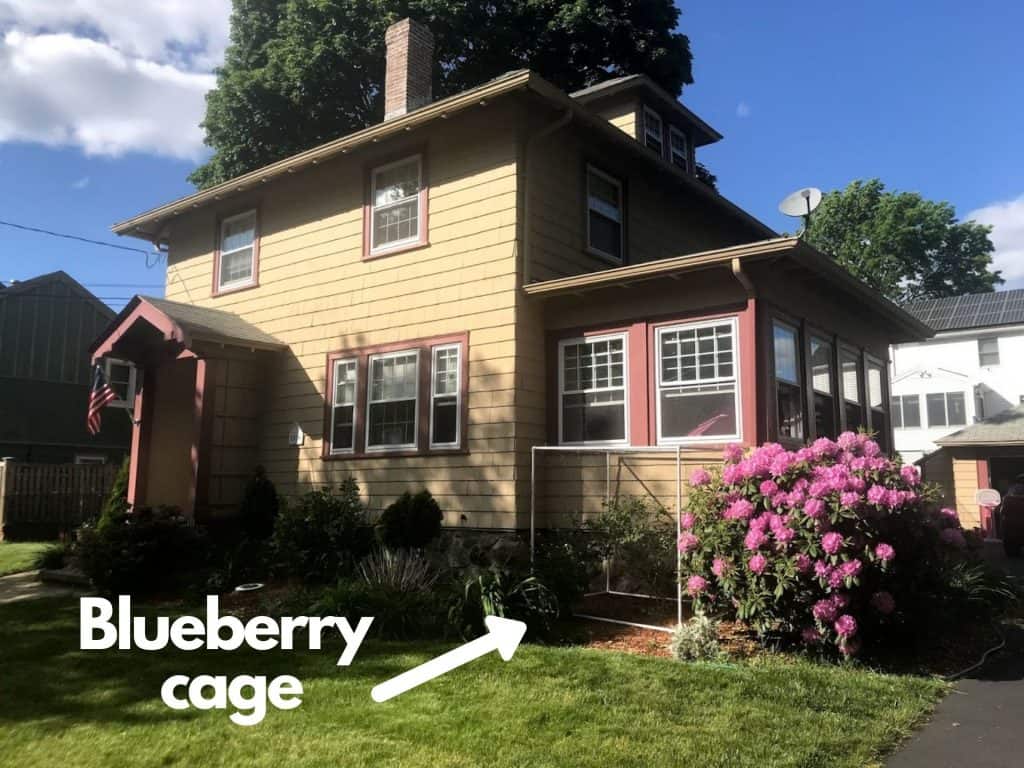
But after doing some research PVC seemed to be the better option than wood. Why? Netting slides easy over the PVC poles versus snagging and ripping on wood. Snaps and rips? I don’t need that kind of frustration…
Next year I might spray paint the PVC a nice color to blend in with the house and garden. Probably a dark green color.
When to Erect a DIY Blueberry Bush Cage
Ideally, the best time to erect the blueberry cage is when the berries start to turn color. Wildlife tend to be less picky than we humans. They are happy to eat the berries before they completely ripen. So don’t wait too long to erect your blueberry cage.
What Size Mesh to Use?
Bird netting comes in a variety of mesh openings – it ranges from 1/4” to 3/4”. While the thought of a smaller mesh sounds enticing, the medium to larger size might be a better choice since it ensures that bees and other pollinators can reach any late-blooming blossoms.
Bees are crucial to producing blueberry fruits. Without them around pollinating your blueberry bush, you’ll won’t see many berries. Ensure you are either erecting the cage after pollination season or using a mesh wide enough to let these helpers through.
We bought netting with 5/8″ mesh, which should be wide enough for bees.
Note that it was pointed out on my Hometalk page that this mesh is notorious for killing snakes. I’m going to be honest, I’m petrified of snakes. Like stop-frozen-in-my-tracks petrified of snakes. But maybe you do and maybe you are a fan of snakes. If so, perhaps consider other mesh options.
Supplies (Shopping Links)
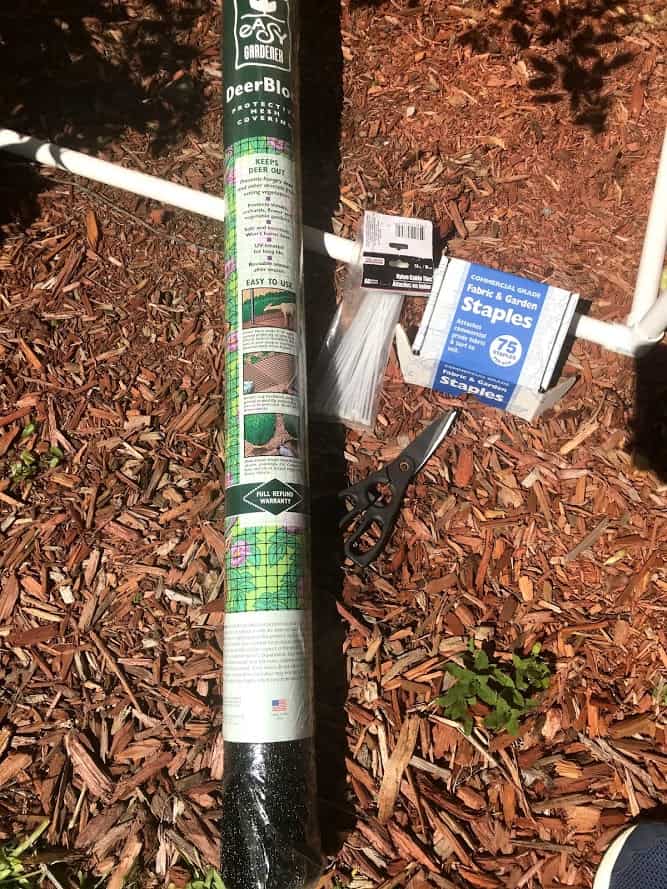
Our supplies were fairly inexpensive. We only had to buy the PVC pipe and netting – the rest of the items we already had in our basement. Our total cost was around $50.
- PVC pipe – 10’ lengths of ¾” diameter (Quantity of 6) – we bought ours at Lowes
- PVC side outlet elbows or corner connectors – ¾” (Quantity of 8) – we bought ours at Lowes
- Saw or PVC cutter
- Netting – Minimum of 6′ by 40′ roll. We found the best value in a 7’ by 100’ roll for future gardening projects
- Plastic cable zip ties (strips of fabric also work)
- Garden and fabric staples – 1″ wide. These staples come in various lengths. We already had on hand the 3.5″ long ones from another DIY project to childproof indoor floor plants.
How to Build a DIY Blueberry Cage with Netting
1. Measure
Measure the height and the width of your blueberry bush to make sure it will fit a 5’ by 5’ cage. If not, modify accordingly.
2. Cut PVC Piping
Using the 10’ PVC pipes in half using your chosen cutting tool. We used our circular saw, but PVC pipe can also be cut using a PVC scissor-style or ratchet-style cutters or hacksaw.
3. Assemble Cage
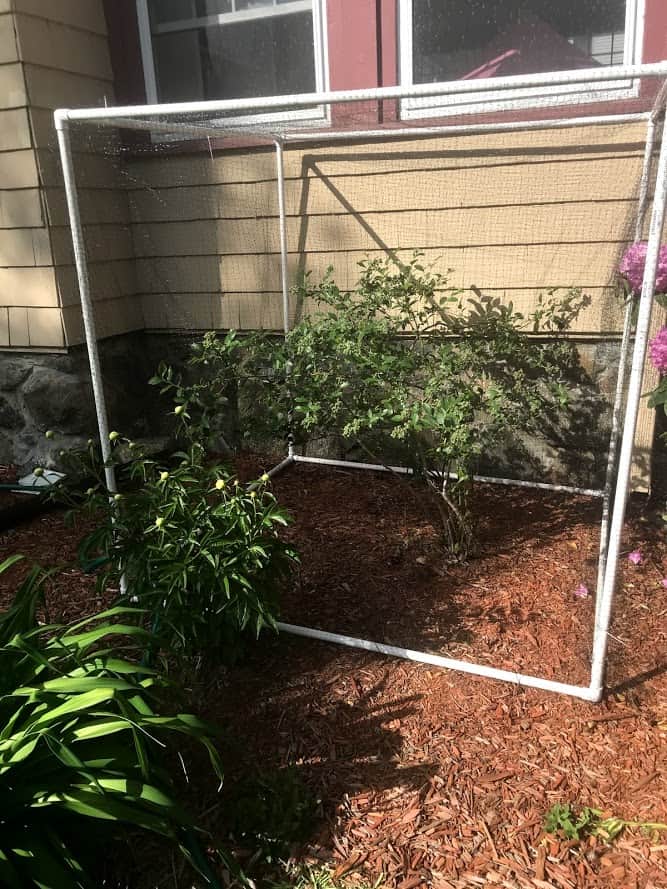
Assemble the cage into a cube using all of the pipes and corner connectors.
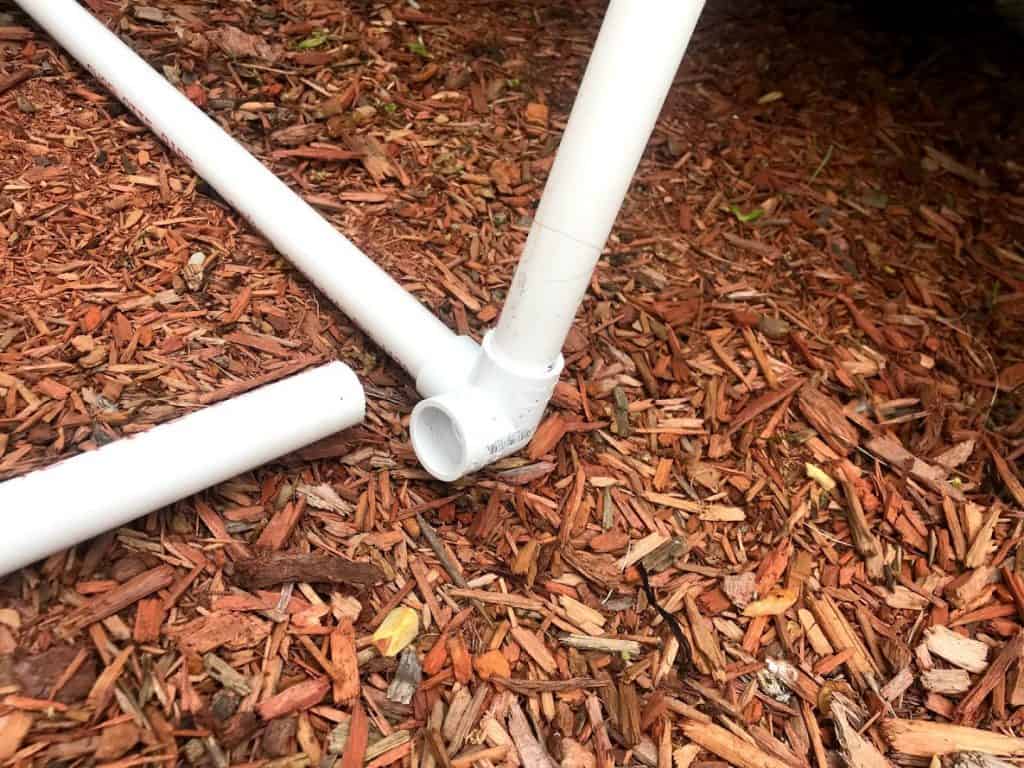
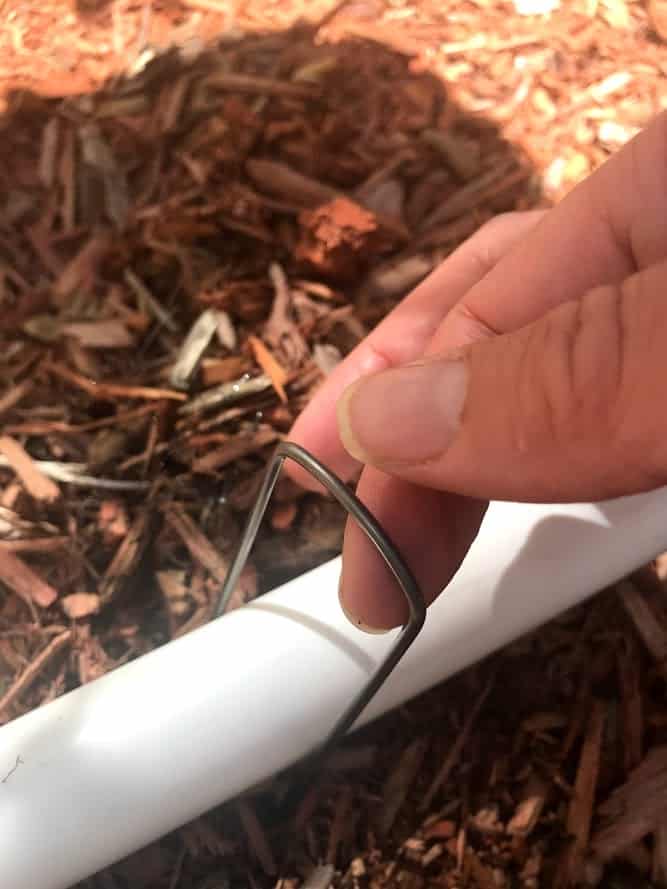
Once assembled, secure the PVC into the ground with garden staples.
4. Drape Netting
Starting from the bottom of one side, unroll netting and drape it up and over the PVC frame down to the ground on the other side. In other words, you are covering two sides and the top of the cage.
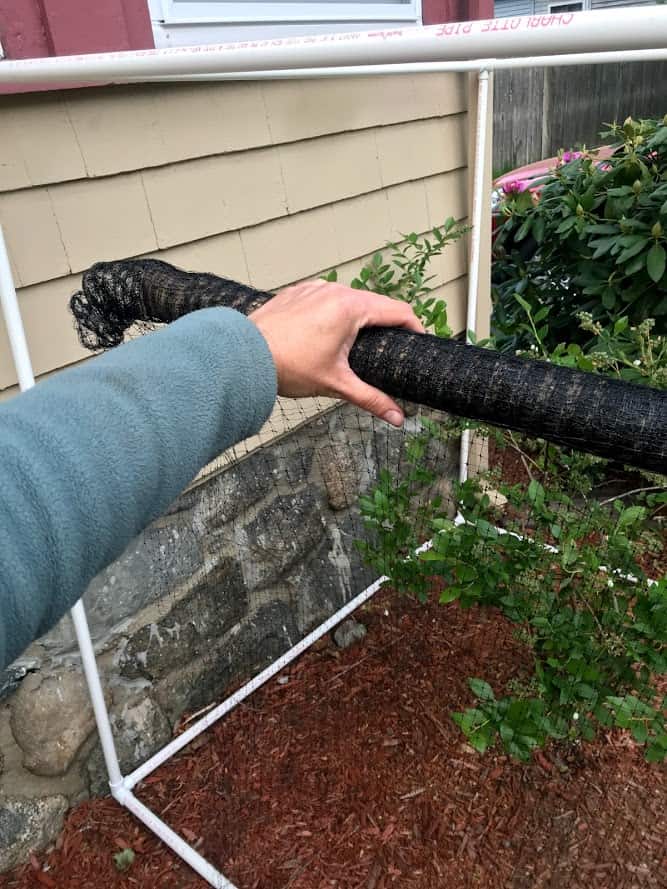
In my experience, netting gets tangled very easily, so grab a helper for this step. The netting we used was 7’ wide, wider than our 5’ cage, but I preferred the overlap.
I was impressed with the netting – lightweight yet still appears strong. It’s made by Jobes’ Easy Gardener division (they also manufacture the garden staples). Based in Waco, Texas, they focus on a wide range of products that make growing plants attainable for any level of gardener. Thank you Jobes for making gardening a little easier for this gal!
Secure the netting along the top and sides of the frame at intervals with plastic or fabric ties. If using plastic ties, leave a little room so that when dismantling the cage at the end of the season you can cut the ties without cutting a hold in the netting.
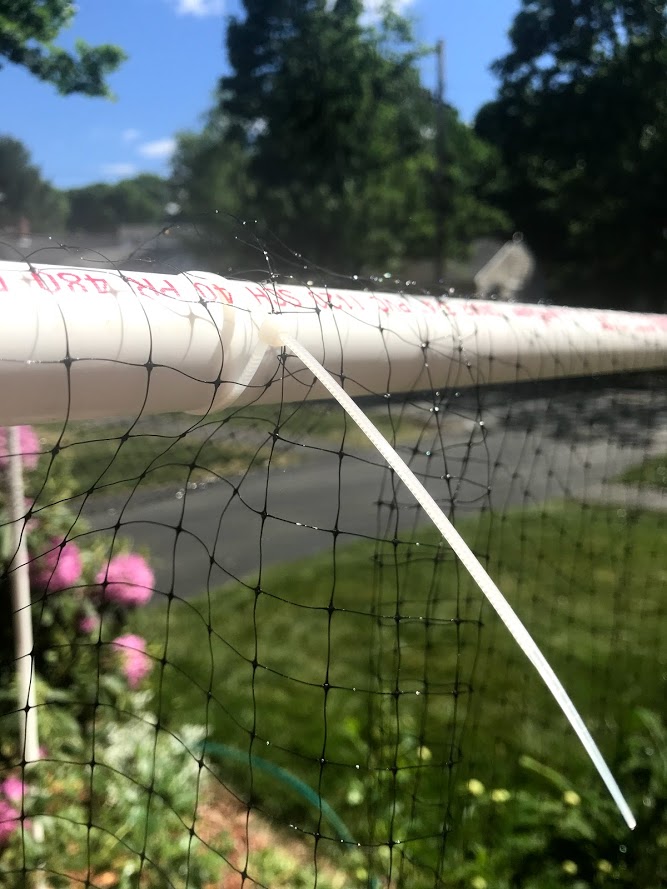
Next repeat the same process with remaining two open sides of the cube with one VERY IMPORTANT exception. To have access to the berries once they are rip, don’t use ties along the sides of the PVC pipe, but only along the top. This way, you can easily raise the netting on these two sides and collect berries.
Leave a few inches of netting along the ground so that you can weigh it down with garden staples or rocks to stop wildlife from sneaking in underneath (they are smart critters!).
Keep an eye out throughout the season, and don’t be surprised if you start seeing evidence of digging under the PVC pipes. Those critters are clever and determined to get at those blueberries! We added more rocks and pieces of wood boards on the ground inside the PVC pipe to slow the critters down.
And wa-lah! A DIY blueberry bush cage that protects blueberries so that YOU, not the birds and squirrels, can enjoy the harvest. Whoop whoop! Next project? Learning which 10+ Vegetables and Herbs Rabbits Won’t Eat in My Garden.
When to Remove Your DIY Blueberry Bush Cage
After you have enjoyed your harvest of ripe, juicy berries, simply snip the plastic ties, remove and fold the netting, and break apart the PVC pipes and connectors and prepare for storage. With proper care, the netting should last a few years.
That’s it! I was impressed with how quick and easy (and cheap!) it was to build. It worked perfectly last summer and we intend to repeat the process next year. We finally figured out a way to be a step ahead of the birds and squirrels and beat them to our own berries!
Shopping List
***This post was featured on Condo Blues Friday Favorites Linky Party***
Related Posts
Want to be the first to know about new posts? Be sure to follow me on Pinterest, Facebook, Instagram or Twitter of even Etsy! Or better yet… Subscribe below!
My monthly (admittedly sometimes more, sometimes less….) emails are like receiving a unexpected letter from an old friend WITHOUT needing to put on your slippers and walk out to your mailbox…. See? I got ya, my friend!)
[Note: My posts are proudly connected to these amazing link parties full of DIY ideas and inspiration!]


