Last Updated on October 11, 2023
I’ve been a bit of a cleaning kick this week. Admittedly, that’s rare for me, but once in awhile, I’ll get the itch/motivation to clean the house. Yesterday I decided to deep clean our guest bedroom. But as I started to collect the cleaning tools, I noticed that my vacuum dust brush attachment was, well, pretty disgusting.
This post contains affiliate links, including but not limited to, Amazon Associates. As such, I earn from qualifying purchases. Full disclosure located here.
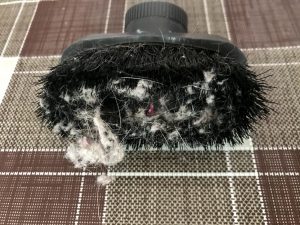
How could I expect this dirty brush to actually suck up the dust and dirt in my guest room? Quite frankly, I couldn’t. There’s no way this dust brush tool could work as intended in this yucky condition.
So, instead of deep cleaning a bedroom, I cleaned my cleaning tools. And today I’m sharing a simple and short tutorial on how to clean a vacuum dust brush tool.
What is a Vacuum Dust Brush Attachment?
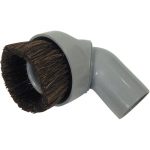
Just in case you don’t know, let me back up. A vacuum dust brush is a small, round or oval brush lined with a ring of soft bristles. It’s commonly one of the three tools that come with a vacuum: crevice tool, upholstery tool, and dusting brush.
How Do You Use with a Dust Brush Attachment?
The vacuum dusting brush tool tool is designed to dust a host of delicate places throughout your house, like baseboards, window treatments, fireplace mantels, furniture, lampshades, air conditioners and central air vents.
Why Clean a Vacuum Dust Brush Tool?
Quite simply, efficiency. If too much dust and grime has accumulated in the bristles of the dust brush, it won’t suck up debris efficiently. You might even find that your vacuum dust tool is actually leaving debris where you vacuum!
Personally, I don’t like to clean. And, chances are you don’t either. So if you must spend your time cleaning and vacuuming, don’t you want to ensure your tools are clean and working at peak performance? Otherwise, you are cleaning inefficiently, and only wasting time….
How to Clean a Vacuum Dust Brush Tool
Step 1: Vacuum
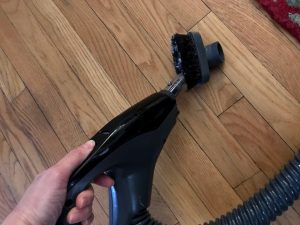
Remove the dust brush attachment off the vacuum. Using the end of the extension wand or hose, give the dust brush attachment a good vacuum. This will suck up the majority of loose dust, hair, spider webs, tumbleweeds, etc caught in the bristles.
Admittedly, this step is probably enough to get your brush mostly clean. But the next two steps will seal the deal to get this brush as clean as looking like it just came off the manufacturer’s assembly line.
Step 2: Comb
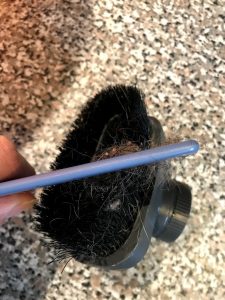
To remove the remaining, and more stubborn dust bunnies, hair, etc, off the dust brush tool, comb the dust brush. How exactly do you comb the brush? You can use old comb that you don’t use on your hair anymore, or even just your fingers.
Using your old comb or your fingers, work your way clockwise around the brush, then counterclockwise. Be sure to pull the bristles away from the plastic part to clear any dirt and grime that has built up inside the vacuum brush.
Step 3: Wash, Rinse and Dry
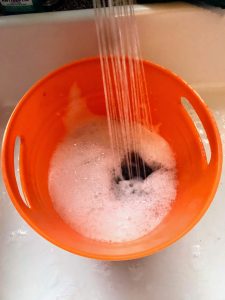
Lastly, throw the dust brush vacuum attachment into a bucket of warm sudsy water. You just need a small bucket with warm water and a squirt of mild detergent like dish soap. This should loosen up and completely remove any caked on grime or dirt left on the bristles as well as inside the tool.
Let it soak for about 30 minutes to an hour. If the inside of the tool is still dirty, use a small scrub brush and scrub the inside.
Rinse the tool, and place it on its side on a paper towel or cloth for a few hours to dry. Or if in a rush, pat dry with a clean cloth.
And Wah-la! You now have a clean dust brush vacuum attachment, and can return to cleaning your home!
Related Posts

Want to be the first to know about new posts? Be sure to follow me on Pinterest, Facebook, Instagram or Twitter of even Etsy! Or better yet… Subscribe below!
My monthly (admittedly sometimes more, sometimes less….) emails are like receiving a unexpected letter from an old friend WITHOUT needing to put on your slippers and walk out to your mailbox…. See? I got ya, my friend!)
[Note: My posts are proudly connected to these amazing link parties full of DIY ideas and inspiration!]
