Last Updated on October 4, 2025
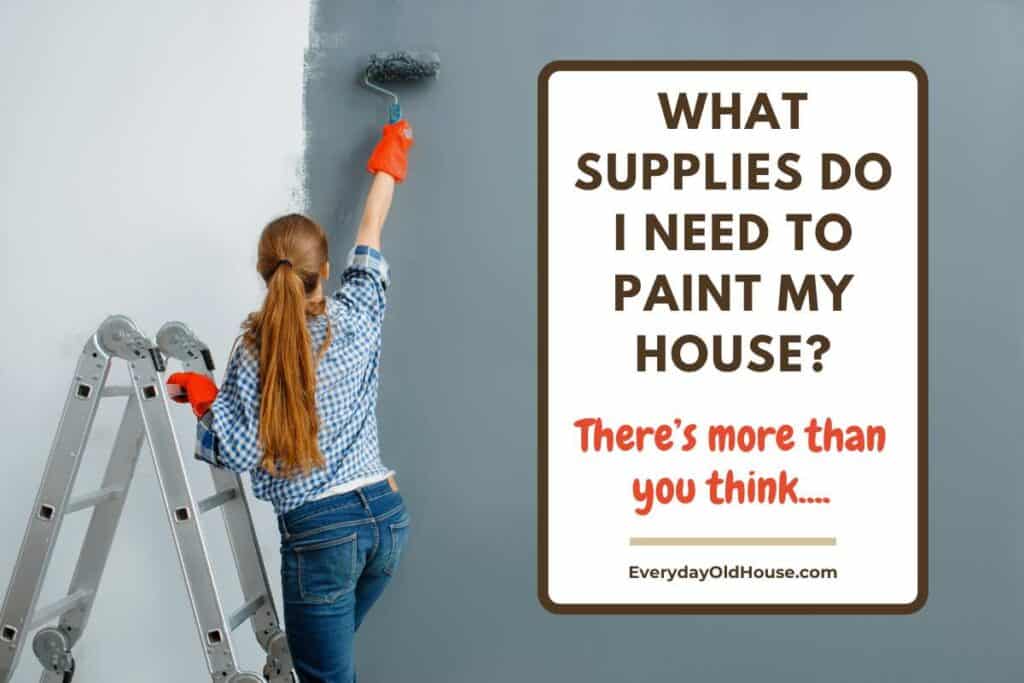
Thinking about giving your home a fresh coat of paint? Painting is one of my favorite ways to transform the look and feel of a home – with minimal cost and effort. But before you dive in and start rolling beautiful new paint colors onto your walls, let’s chat about the supplies you’ll need. I’m here to share my free painting supply checklist to make the painting process as smooth and painless as possible.
FREE Painting Supply Checklist
You’ve picked out the paint colors of your dreams. But there is more to a successful paint job than just a can of paint and a paint brush. There is a lot more to it – and trust me, having the right tools on hand before you start will save you a ton of time, energy, and trips back to the store (I speak from experience).
For ease, I’ve divided this checklist into 3 phases of paint jobs:
- Pre-Paint Prep
- Painting Essentials
- Clean-Up
Don’t want to read the whole post? I get it. Click here to go to the end and download!
1. Pre-Paint Prep
Taking the time to properly prepare your space for painting will save you a lot of headaches down the road. It might be tempting to skip this step and jump straight into painting, but a little prep work goes a long way in ensuring a smooth, professional finish.
Cleaning Supplies
The first step in any successful painting project is to make sure your walls are clean and free of dust, dirt, and grime. Even if your walls look clean, well, they aren’t. They have accumulated dust, oils, and other residues over time.
Painting over these can lead to uneven results, and no one wants that…. Here’s the right tools to get the job done correctly.
– Bucket, Mild Detergent & Sponge
A simple bucket of warm water, couple of drops of mild detergent and a sponge will do wonders for removing surface dirt and dust.
– TSP (OPTIONAL)
For most walls, a mild soapy solution is enough. However, if you’re dealing with grease or stubborn stains, especially in kitchens. TSP is a powerful cleaner that can cut through grease and prepare your walls for painting. Just be sure to rinse it off thoroughly and let your walls dry completely before moving on to the next step.
– Vacuum Cleaner
Don’t forget the nooks and crannies, especially along the baseboards and in corners where dust tends to gather. A quick pass with a vacuum cleaner will help ensure these areas are clean and ready for painting.
– Dust Cloths
After washing and vacuuming, it’s a good idea to give the walls a final wipe down with a dry dust cloth. This will pick up any lingering particles and ensure a smooth surfaces for your paint.
Surface Repair Tools
Next up on the free painting supply checklist is tackling any imperfections on your walls. Small cracks, holes, or dents may not seem like a big deal, but once you paint over them, they can become glaringly obvious (and annoy you down the road. Yup, speaking from experience).
Repairing these now will give you a pristine canvas for your paint.
-Spackle or Joint Compound
For small holes (like those left by nails) and minor dents. Easy to apply and dries quickly. For larger repairs, you might need a joint compound, which is a bit more heavy-duty.
– Putty Knife
A putty knife is essential for applying spackle or joint compound. Choose one with a flexible blade that will allow you to spread the filler smoothly and evenly.
– Caulk and caulk gun (OPTIONAL)
If you own an old house (like ours) you might find some cracks, like in the joints of the walls or window frames. that need a bit of caulk to seal and help the paint adhere better.
– Sandpaper (Medium and Fine Grit)
Once your spackle or joint compound is dry, you’ll need to sand it down to create smooth surfaces. Start with medium-grit sandpaper to remove any excess, then finish with fine-grit paper to blend the repair into the surrounding wall. If you have a larger area to sand, consider a sanding block or pole sander.
– DUST MASK
Sanding and scraping paint produces a fair amount of dust. If you have any concerns, be sure to wear a dust mask that covers your mouth and nose to avoid breathing in dust.
Protecting Your Space
One of the most important steps in any painting project is protecting your floors, furniture, and fixtures from stray paint splatters and drips (yet again, i speak from experience…). A little effort here can save you a lot of cleanup later.
– Drop Cloths or Plastic Sheeting
Cover your floors and any furniture that can’t be moved out of the room with drop cloths or plastic sheeting. Canvas drop cloths are more durable and can be reused for future projects, while plastic sheeting is inexpensive and disposable. While I love to save money, I have to admit that investing in drop cloths was ideal. I’ve used the same drop cloths for 10+ years!
– Painter’s Tape
Painter’s tape is a lifesaver when it comes to protecting areas you don’t want to paint. Use it to mask off areas where you want sharp, straight lines, like along baseboards, window frames, and around light fixtures. Make sure to press the edges down firmly to prevent paint from seeping underneath. You’ll also want to use it around light switch plates, outlets, and other fixtures.
– Plastic Bags
For smaller fixtures like doorknobs, light fixtures, and cabinet hardware, plastic bags are a quick and easy solution. Simply place the bag over the item and secure it with painter’s tape. This way, you won’t have to worry about accidentally painting over these areas (yup, guilty as charged).
With your walls cleaned, repaired, and protected, you’re ready to move on to the fun part—painting!
2. Painting Essentials
Choosing the right paint, brushes and roller covers is one of the most important decisions you’ll make in your project. The type of paint you select will affect the final look of your walls as well as durability. The quality of your brushes and roller covers will have a significant impact on how your paint goes on.
– Primer (Optional)
A good primer is essential for ensuring your paint adheres properly to the walls and gives you an even finish. Primer helps to block stains, hide old paint colors, and create an even surface for your topcoat. If you’re painting over a dark color or dealing with new drywall, a primer is a must.
Some paints come with built-in primer (which means less coats of paint), but in some cases, a separate primer will give you better results.
– Interior Paint
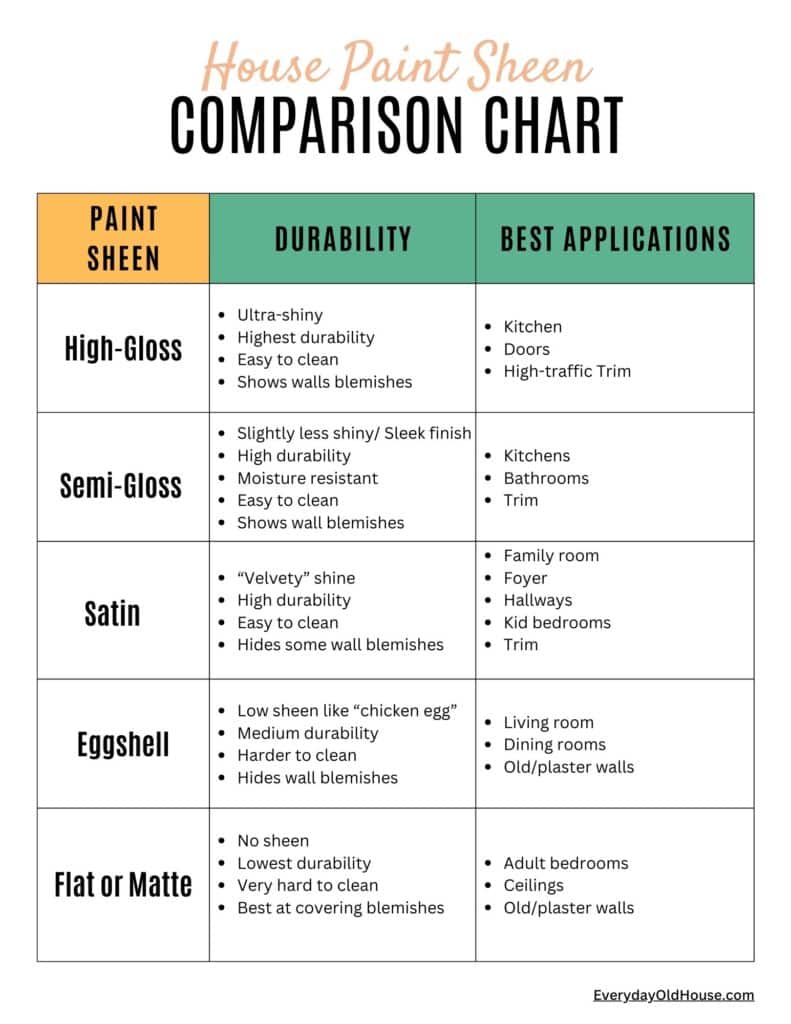
For the majority of rooms, you need 3 different kids of paint – wall color, ceiling and trim. When it comes to wall paint, there is more to just picking out a color. When selecting paint, you’ll also need to decide on the sheen or finish. For ease, here’s a comparison chart of the various sheens on the markets. And once you figure out which sheen, don’t forget to determine how many cans of paint you need with a paint calculator!
– Angled Sash Brush
An angled sash paint brush is perfect for cutting in around edges, such as along ceilings, corners, and trim. The angled bristles make it easier to get precise clean lines for a flawless finish, which is especially helpful when working with painter’s tape. (Some may argue that you need an edging tool, but I think a sash brush does the job just fine)
– Flat Brush
A flat paint brush (especially 2-inch) is great for detail work, such as painting around light switches, outlets, and other tight spaces where a roller won’t fit. It’s also handy for touching up small areas or applying paint to trim and molding. Admittedly, you can get away with just using the angled brush.
– Paint Roller & Covers
Rollers are essential for covering large areas quickly and evenly (I think better than a paint sprayer). When choosing a roller cover, consider the nap (the thickness of the roller cover), which is determined by the texture of your walls.
Invest in a good roller frame that feels comfortable in your hand. The frame should be sturdy, with a smooth, easy-to-spin roller.
– Paint Tray
A paint tray is essential for loading your roller cover with paint. If feeling lazy (which sometimes I am….) use tray liners to make cleanup easier—you can simply toss the liner when you’re done, keeping your paint tray clean for future use. Look for a paint tray with a sturdy metal frame and a deep well to hold plenty of paint.
– Extension Pole
An extension pole is a lifesaver when painting high walls or ceilings. It allows you to reach those areas without having to constantly climb up and down a ladder, saving you time and effort. Look for an adjustable pole that can be extended to different lengths based on your needs.
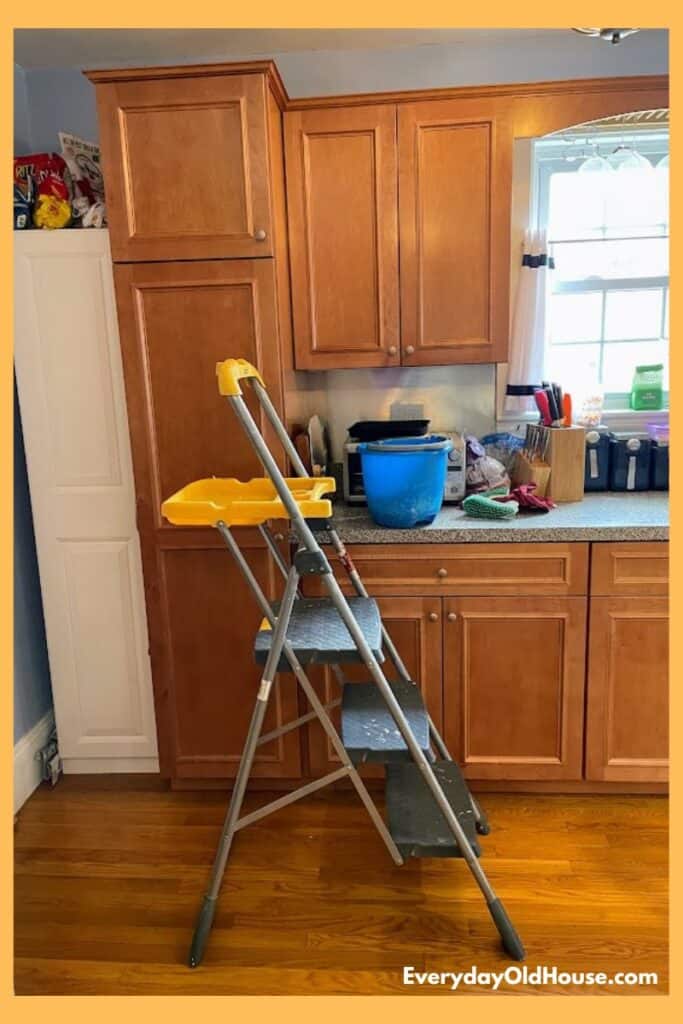
– STEPSTOOL/ LADDER
Speaking of heights, make high up surfaces easier to access with a stepstool or ladder. We invested in a fancy ladder with a paint can shelf pictured below and it was a gamechanger!
– Paint Stirrers
Even if you’ve had your paint professionally mixed at the store, it’s a good idea to give it a thorough stir before you start. Paint can settle and separate over time, so stirring ensures that the color and finish are consistent throughout. Wooden paint stirrers are usually free at most paint stores, but you can also use a mechanical stirrer that attaches to a drill for larger batches.
– Paint Can Opener (Optional)
A paint can opener is a small, inexpensive tool that makes opening paint cans a breeze. It’s designed to easily pry open the lid without damaging the rim, which ensures a tight seal when you close it up again. However, in my experience, a flat-head screwdriver does the job just as well.
– Paper towels OR RAGS
I’m a bit of a slob, so it’s always a good idea to have a roll of paper towels or rags handy to wipe up spills or set the brush down for a minute while you take a break.
3. Cleaning Up
You’ve finished covering your walls with fresh, new paint colors – yahoooooo!!! But before you call it a day, you do need to clean up – boooooooo……………Here’s a list of essential supplies you’ll need to complete the job and preserve your supplies for future projects.
– Paint Thinner or Mineral Spirits (Oil-Based Paint)
If you’ve used oil-based paints, you’ll need paint thinner or mineral spirits to clean your brushes and other tools. Fill a container with the thinner, and swirl your brushes in it to remove the paint. Once clean, wash the brushes with soap and water to remove any remaining solvent and let them air dry. Be sure to dispose of the used thinner safely according to local regulations.
– Soapy Water (Latex Paint)
For latex paints, clean-up is a bit easier. Simply wash your brushes, roller covers, and trays with warm, soapy water until the water runs clear. Rinse them thoroughly, and shake out any excess water before allowing them to dry. A bit of extra care here can extend the life of your tools.
– Rubber Mallet
You likely have some leftover paint to store for future touch-ups. To avoid this paint drying out, seal the can up by hammering the cover with a rubber mallet. Store paint can in a cool, dry place, and make sure to label the container with the paint colors, finish, and the room it was used in. This way, you won’t have to guess which paint belongs where if you need to do a touch-up later.
RELATED POST: 6 FREE Ways to Keep Track of House Paint Colors
– Brush Comb or Wire Brush (Optional)
A brush comb or wire brush is a handy tool for getting paint out of the bristles of your brushes, especially near the base where it tends to accumulate. After soaking the paint brush in water or thinner, run the comb or wire brush through the bristles to remove any stubborn paint. This not only cleans the brush more thoroughly but also helps maintain the shape of the bristles. Personally, I don’t use a comb – instead, I just take a few extra minutes to rinse the paint brush using my .
– Plastic Wrap or Ziplock Bags
If you’re taking a break or need to pause your project overnight, good news!!! You don’t have to clean your brushes and rollers every time. Wrap them tightly in plastic wrap or place them in a ziplock bag to keep the paint from drying out (and place in the refrigerator overnight). This trick can save you a lot of time and effort, allowing you to pick up right where you left off.
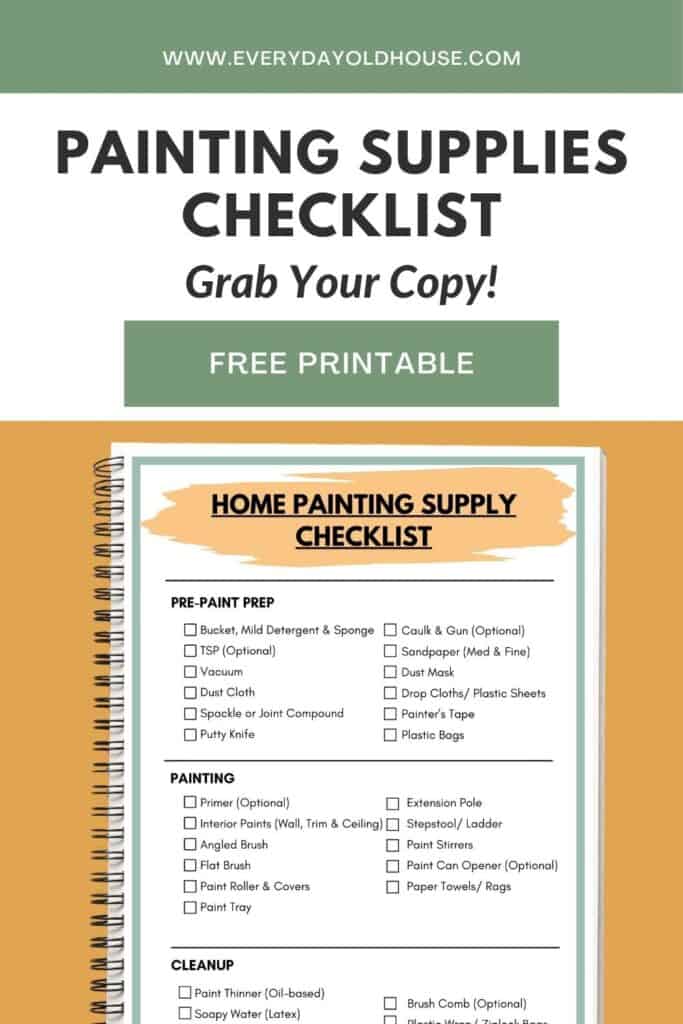
Free Painting Supply Checklist
To make your painting project the envy of professional painters, I’ve created a free, downloadable free painting supply checklist of all the materials we’ve talked about.
Now you have all the right tools on one page – how easy is that???
Just print it out and take it with you to the store! Click here to download your free painting supply checklist, gather your supplies at your local paint store and get painting!
Related Posts

Want to be the first to know about new posts? Be sure to follow me on Pinterest, Facebook, Instagram or Twitter of even Etsy! Or better yet… Subscribe below!
My monthly (admittedly sometimes more, sometimes less….) emails are like receiving a unexpected letter from an old friend WITHOUT needing to put on your slippers and walk out to your mailbox…. See? I got ya, my friend!)
[Note: My posts are proudly connected to these amazing link parties full of DIY ideas and inspiration!]