Last Updated on March 20, 2024
It finally happened. Our garbage disposal broke. It actually lasted a lot longer than we expected. Luckily it broke during the weekend when my husband and I were both home so we could tackle replacing the garbage disposal together.
Neither of us had replaced one before, but we weren’t terribly worried. It didn’t seem like it would be too difficult of a DIY project. And after installing our new garbage disposal, I must share one simple, yet effective tip for a garbage disposal replacement for first-timers.
Fix or Repair the Garbage Disposal?
Before you run out and buy a new garbage disposal, first determine if you actually even need a new one. You might be able to fix your current garbage disposal.
(And no, that wasn’t isn’t the “essential tip”. You have to keep reading ?).
I mention it because this isn’t the first time I’ve run into problems with our garbage disposal. My husband and I have, uh, let’s call them “discussions” on what does and what doesn’t belong down a garbage disposal (see video below to learn more). And let’s just say, I’m the liberal one in the family.
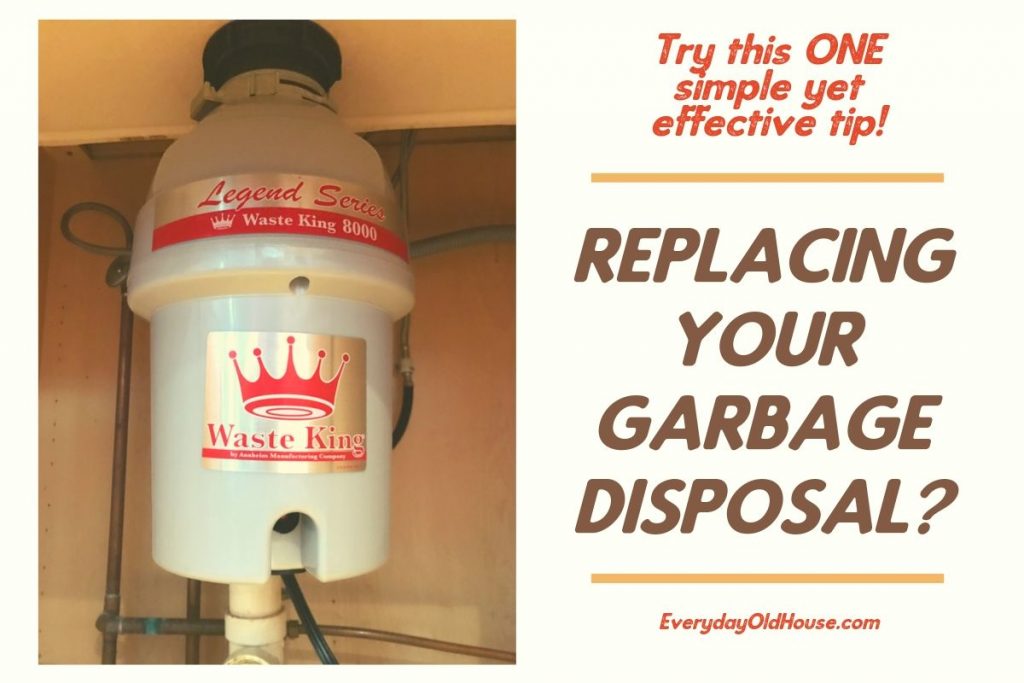
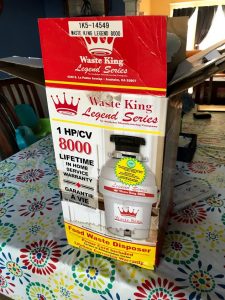
A few years ago I thought I broke the garbage disposal. I must have put something down it that didn’t belong, so I admitted defeat to my husband over our garbage disposal “discussions”. And he gracefully bought a new, more powerful one – a Waste King Legend Series 8000.
However, when we went to install it we realized that the current garbage disposal was merely jammed. It was completely fixable just by pressing the reset button (whoops).
We bought this off of Amazon and at the time, would have had to pay shipping costs to return. It didn’t make sense. So under the kitchen sink it went.
under our kitchen sink for its turn to be used.
And it has been patiently sitting there waiting its turn to be used.
And this this weekend it got it’s call to action.
Yesterday, I encountered water on the floor around the kitchen sink. At first, I didn’t think much of the water on the floor. I figured one of the kids spilled water while trying to put their cups in the sink.
But it happened again later that day. I looked under the sink and there was a pool of water in the cabinet floor. So I ran the faucet and saw water leaking out of the bottom of the garbage disposal.

Huh. That’s not good.
According to the experts, the location of the leak in a garbage disposal can determine if it is fixable or needs to be completely replaced.
For example, if it is leaks from the top or side, it may be fixable. If the leak is from the bottom (like ours), then it’s time to invest in a new garbage disposal.
Our leaking garbage disposal was here when we moved in 7 years ago (average life expectancy of a garbage disposal is 8 to 15 years), so it was time to for a new one.
#1 Garbage Disposal Replacement Tip for First-Timers
Not pat ourselves on the back, but my husband and I are actually a great team when it comes to home projects. I’m the reader, my husband is the doer. So when we opened the Waste King Legend 8000 garbage disposal box, Brad went right to the disposal parts and I grabbed the instruction manual.
And what did I learn within the first 10 minutes of opening the box?
- Garbage disposals are comprised of numerous parts. These components comprise the mounting system, which is responsible for securing the garbage disposal under the kitchen sink. And these parts all look very similar to the untrained/ amateur DIYer eye.
- Even if the manufacturer’s installation instructions are clear and include detailed illustrations of the mounting system, it’s still easy to get these parts confused.

box assembled… for you to disassemble.
The mounting system usually comes in the box already assembled. But one of the first directions in the instruction manual is to separate all the components.
Why? It sounds counterproductive, but in hindsight it makes complete sense. I think the manufacturer must recognize that installation can get confusing so it wants homeowners like myself who are replacing their garbage disposals for the first-time to fully understand the mounting system configuration before embarking on the installation.
The manufacturer for garbage disposal, Waste King, flat out says in the instructions “Pay close attention to the order of mount assembly parts, as they have been correctly assembled by the factory.”
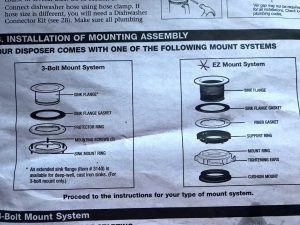
As an aside, I have to give a shout-out to Waste King. Their instruction manual provided several detailed diagrams on the mounting system. It was well written and illustrated, including directions for two mounting assembly options – the 3-bolt mount system and EZ mount system.
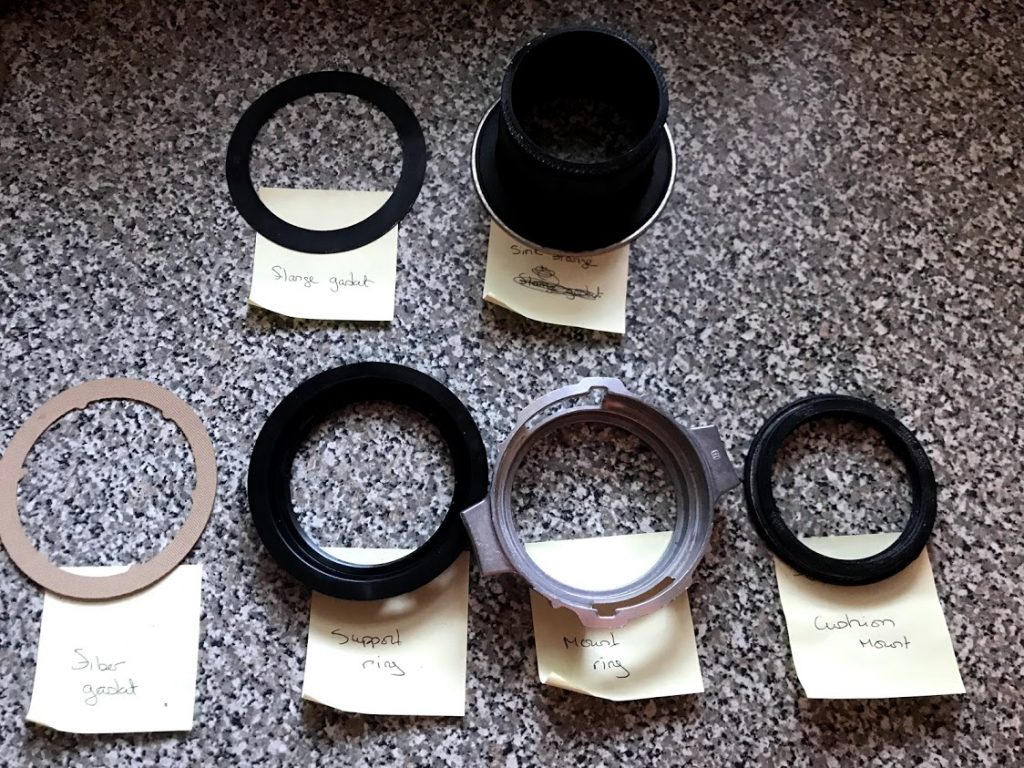
But even though we carefully reviewed the diagram before separating all the parts, once we started disassembling the mount system, it got confusing fast. Really fast. We started second-guessing ourselves. Which part is this again? What goes where? Two questions you really don’t want to hear said during a home improvement DIY project….
We stopped, regrouped and found a solution to get organized. We pulled out post-it notes and wrote out the different parts of the mounting system as illustrated in the installation manual. We then laid out all the separated parts of the mounting system on a flat surface with its corresponding post-it note.
So my simple yet effective tip for a successful garbage disposal replacement for first-timers?
Clearly label the parts of the mounting system as they are disassembled.

Labeling the parts removed any further second guessing and fostered a quick, easy, and painless installation. Ultimately, this one little tip saved us time and provided a frustration-free installation experience (and likely avoided a husband and wife argument…whoops I mean “discussion”)
That’s it! Simple, yet still effective.
Have you installed a garbage disposal? Any useful tips? Comment below to share!