Last Updated on January 5, 2024
If you are like me, the kitchen is the heart of your home. And is in constant use. Whether it be grabbing a bowl, cup and silverware out of the cabinet for breakfast. Or pulling out pot and pans out of the cupboard to start dinner. And all that continual use makes kitchen surfaces (including cabinet knobs and drawer pulls) some of the most touched surfaces in homes.
With all this action, layers of grime and grease build up on these metal knobs and pulls, dulling the shine and making your kitchen look dingy and tired. Today I’m going to show you the method I devised to clean kitchen cabinet knobs and pulls.
This post contains affiliate links, including but not limited to, Amazon Associates. As such, I earn from qualifying purchases. Full disclosure located here.
Backstory
A few months ago, I decided to tackle cleaning my dirty, grimy kitchen. I researched the best ways to clean wooden kitchen cabinets. And it worked – my kitchen cabinets looked SO much cleaner!
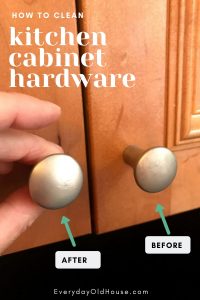
Or, at least the wood portion looked amazing. Now the metal cabinet knobs and drawer pulls looked dingy against the clean, rich color of the wood cabinets. Yikes!
Now I had to figure out the best way to clean and polish metal kitchen cabinet knobs and pulls.
But I had a problem. I didn’t know what type of metal finish was on my kitchen knobs. The previous owners had renovated the kitchen and chosen the knobs and pulls.
Which Hardware Finish?
After some searching via Google Images, I’ve narrowed down the knob finish to some sort of nickel – probably satin nickel.
(As a side note, I didn’t realize that there were SO many different kitchen cabinet hardware finishes. For example, Berenson in upstate NY offers over 50 finishes! Yikes! BTW, I used to travel up to Buffalo where they are located and LOVED that city. Visit – you’ll be pleasantly surprised).
But since I still wasn’t 100% sure of the finish, I was concerned about using a cleaning method that might scratch or damage the knobs.
While I like the idea of using a mild abrasive to remove layers of caked-on dirt and grime was appealing, I just couldn’t risk it. But after some research and experimenting in the kitchen, I found an easy way to clean kitchen cabinet knobs and pulls that cleaned and polished without abrasive products.
And here I’m going to share with you this method, that with a little elbow grease and time, your kitchen cabinet knobs and pulls can look new again!
Now as a warning, don’t expect your kitchen cabinet knobs and pulls to look completely new after this process. But you should be able to remove layers of built-up grime, grit and grease while also restoring shine.
Before We Start….
I am not a kitchen cabinet hardware expert – I am the average homeowner with a mission to help others create a home that is fun and functional. And I don’t want you to ruin your kitchen cabinet hardware. This method worked for me, it may not work for you.
So if you aren’t sure of the metal or finish of your hardware, proceed with caution. Some metals need special care, while others can be cleaned with just basic cleaning supplies. If unsure, reach out to the hardware manufacturer for cleaning recommendations.
So, if you try the tutorial below, be sure to first test on an inconspicuous spot on your hardware.
How to Clean Kitchen Cabinet Knob and Pulls
Below is my simple 5 step formula to remove the years of built-up grime, grit and dirt and clean kitchen cabinet knobs and pulls.
Supplies
Here is all you will need to clean your kitchen clean cabinet knobs and pulls:
- Screwdriver
- WD-40
- Buckets or bowls
- Old toothbrush
- Sponge or cleaning cloth
- White distilled vinegar
- Water
- Dishwashing liquid (Dawn)
- Chamois or soft polishing cloth (Supercloth)
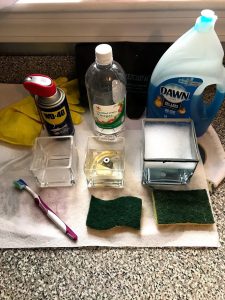
Just a quick note on my photos. I took pictures of cleaning one or two knobs in glass bowls for ease of the tutorial. I actually cleaned in a bigger batch of knobs in a larger bucket.
Step 1: Remove cabinet knobs and pulls
Remove knobs and pulls from the back of the cabinet or drawer by simply unscrewing it using a screwdriver (usually a Phillips Head for newer hardware). Or even just twisting the knobs off with your hand.
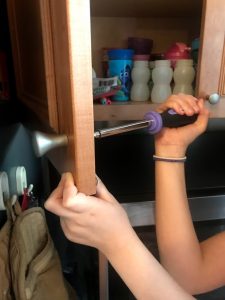
Stuck screw? Check out Hunker’s tips to coax it out.
You probably don’t have to clean the screws, so be sure to either keep them all in a safe place (store in a plastic bag) so you don’t lose. Or even just leave the screws right in the cabinet door.
Step 2: Kick-start Grime Removal with WD-40
Gather up supplies and set up your work area with at least two bowls (or buckets). Lay supplies on top of a towel or paper towels to help soak up spills. And since you will be rinsing kitchen cabinet hardware in between some steps, you might want to set up near the kitchen faucet.
Next, is my secret ingredient to kick-starting the grime and grease removal: WD-40! When I researched ways to clean kitchen knobs and pulls, there was a consistent trend in suggesting just dishwashing soap/ water and vinegar/water solutions. And I tried those. But they just weren’t effective enough at cutting through the grease and grime.
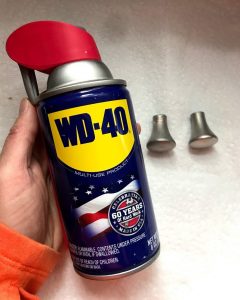
In my opinion, WD-40 is a miracle product. As a kid, my father used to say “if it’s stuck and it shouldn’t be, use WD-40” (he wasn’t the first one to say it…). And now that I’m grown and a homeowner, I’m realizing WD-40 can do SO much more than just lubricate. (As an aside, if you are curious about how else can WD-40 help a homeowner, check out 20 Brilliant Ways to Use WD-40).
To get started, put on your gloves and pick up a knob or pull. Spray the knob with WD-40 and then place in bowl or bucket. Continue with other knobs until no more room in your bucket or bowl. Give a few more squirts to ensure the knobs and pulls are coated.
Set a timer for 15-20 minutes. Honestly, this amount of time is arbitrary. Since it is the harshest cleaning solution in this process, I was nervous about damaging the knobs and wasn’t comfortable going any longer.
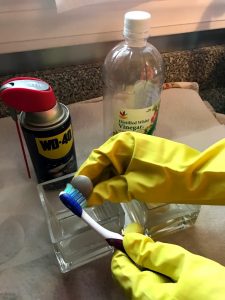
Once the timer goes off, give the knobs a quick rinse under the faucet. Then gently scrub the knobs with an old toothbrush or sponge. If you use a sponge, ensure that you use a non-abrasive one. I’m a fan of the 3M scrubby sponge for removing the grime and gunk. I like the non-scratch scouring pad on one side and sponge on the other, both of which cut through stuck-on grime while still protecting surfaces.
Oh, and if you don’t have WD-40, some of my online friends recommend Greased Lightening. I’ve never used this product, so I can’t give it a thumbs up or down. If you use it, I’m love to hear your thoughts in the comments.
Since we are working in a kitchen, please note that WD-40 Multiuse oil is NOT a food safe product. I repeat, is it NOT a food safe product. It’s not an all natural cleaner. But it works, especially if you have layer upon layer of grease and grime built up over the years.
If you follow the rest of this tutorial, you should rinse all the WD-40 off your knobs and pulls before reinstalling, but I still feel that I need to post this warning….
Step 3: Soak Kitchen Cabinet Knobs and Pulls in Vinegar Solution
Prepare a cleaning solution with a 1:1 ratio of warm water and white vinegar in a bowl or bucket. Add a few lemon peels. Not only does it cut the vinegar smell (which I hate!), lemon peels also kicks up vinegar’s cleaning power.
(As a side note, I recently learned this lemon peel cleaning hack while listening to to the Home School’d podcast, one of my favorite podcasts for homeowners. Specifically listen to the April 14, 2020 episode with Monica at House of Esperanza where she divulges a few more homeowner hacks.)
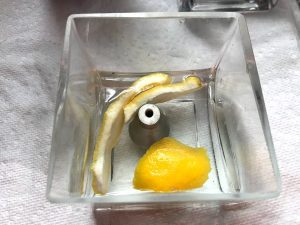
Submerge the cabinet knobs for a good soak. Ensure that they are complete submerged. My picture doesn’t quite do it justice. I added more vinegar and water, but forgot to take more pics.
After a few hours, take out one piece and gently rub it with a sponge to see if the layers of greasy gunk has loosened. If not satisfied (or if, like me, you start this project at 9pm after the kids go to bed) let the cabinet hardware sit overnight.
And while the cabinet hardware is soaking, this is your opportunity to wash the now exposed portion on the cabinet with a soapy rag. For tough grime built-up, dip a soft toothbrush into the water and scrub.
Step 4. Rinse with Dishwashing Liquid
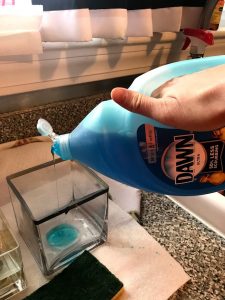
Remove the hardware from your bucket and pour out the vinegar and water mixture. Rinse out your bucket or bowl and then fill it back up again with warm water and a squirt of dishwashing soap.
Make suds in the water with your hands by moving your hands around in the water. Add the knobs and pulls back into the bucket and leave for another soak.
After an hour or two, remove the hardware from the bucket or bowl of soapy water one piece at a time. While giving it a rinse, gently scrub the piece until any remaining dirt or grime is gone.
Step 5: Dry and Polish Kitchen Cabinet Hardware with Soft Cloth
Dry knob and pulls with a clean soft cloth. Lay the clean hardware on paper towels or another clean towel to completely dry. As part of the drying process, I stood up the knobs and pulls so that water could easily drip out of the screw holes.
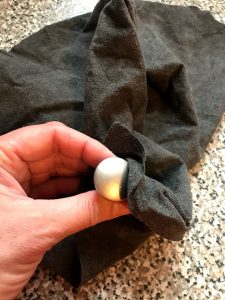
For a little extra shine, buff knobs and pulls with chamois. Unfortunately, I didn’t have a polishing chamois on hand so I used a microfiber cloth.
But it’s an awesome cloth. A few years ago my mother-in-law gifted me the Supercloth and I use it for SO many things. Imported from Italy, this patented durable fabric is designed to grab dust, dirt and oil from any hard surface and leave a streak free shine in one pass without the use of chemicals. It’s my go-to cloth for cleaning a variety of surfaces: mirrors, glass, bathroom and kitchen fixtures and counter tops, stainless steel appliances, etc.
Re-install the knobs and pulls on the doors and drawers once completely dry.
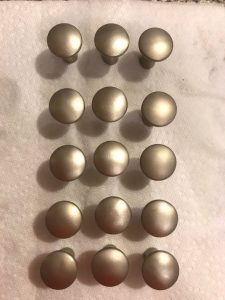
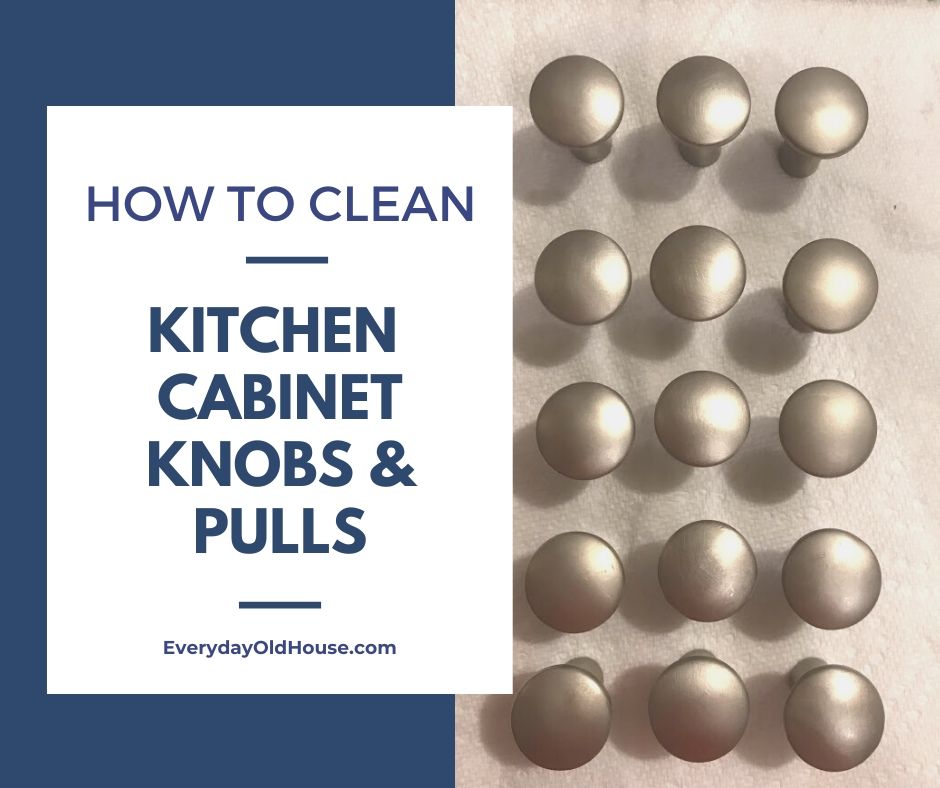
That’s it! You’re done! Here’s a pic of a clean batch of knobs. Sure, they don’t look brand new. They are actually over 20 years old. But they look a lot better than they did before!
What do I like about this process? One, it uses products that you likely already have in your home. So not a high-cost project. Second, the three different soaks (WD-40, vinegar, and dishwashing liquid) does the work for you! Soaking the hardware eats away at the grease and grime before you have to actively scrub – and who doesn’t love that?
***This post was featured in Marilyn’s Treats Over the Moon #223***
Related Posts
- 5 Ways to Clean Wooden Kitchen Cabinets – Straight from the Experts
- How to Clean a Vacuum Dust Brush Tool (3 Easy Steps)
- How to Clean Cast Iron Radiators
- Printable Move-in Cleaning Checklist For Your “New” Old House
Want to be the first to know about new posts? Be sure to follow me on Pinterest, Facebook, Instagram or Twitter of even Etsy! Or better yet… Subscribe below!
My monthly (admittedly sometimes more, sometimes less….) emails are like receiving a unexpected letter from an old friend WITHOUT needing to put on your slippers and walk out to your mailbox…. See? I got ya, my friend!)
[Note: My posts are proudly connected to these amazing link parties full of DIY ideas and inspiration!]
