Last Updated on October 4, 2025
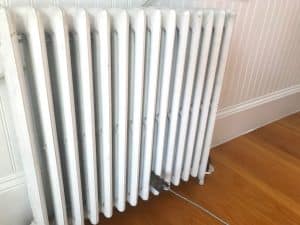
Many old houses still have cast iron radiators, including my 100+ year old home. Cast iron radiators are the work-horses of radiators – they provide an efficient and comfortable heating source (second to none in my opinion). But cast iron radiators accumulate dust, dog fur, cobwebs, and grime in all its crevices. Here’s my method on the best way to deep cast iron radiators.
First, I’ll admit it. I don’t look forward to cleaning my cast iron radiators….
But I know that the dirt and dust built-up on a radiator blocks heat from getting into our rooms. And a dirty radiator is an inefficient radiator. Which means higher energy bills. And who likes high energy bills? Not this gal.
So I’m motivated to keep my cast iron radiators clean. It’s just part of the challenges of owning an old house.

This post contains affiliate links, including but not limited to, Amazon Associates. As such, I earn from qualifying purchases. Full disclosure located here.
Quick History about Cast Iron Radiators
Cast iron radiators were first manufactured in the United States in the mid-1800s. According to This Old House, American heating contractor Joseph Nason designed “an accordion–shaped iron manifold with a central rod to hold its sections or fins together”. It’s efficient heating design was based on maximizing the cast iron’s surface area in the smallest amount of space.
What does that mean to us today? That all that cast iron with its nooks and crannies make our house warm and toasty on a cold winter’s day. BUT also collects a boatload of dust and dirt. It’s one of the considerations for Should I Keep or Replace my Cast Iron Radiators?
BTW – If you are curious about a more detailed history of cast iron radiators, check out Reclaimed Radiator.
Quick Thank-You
Before we go any further, I have to give a virtual high-five to Beth (@circa1903home) on Instagram for the inspiration for this post. Beth posted about cleaning and painting her cast iron radiators a beautiful shade of green. It started a conversation between us about the best ways to clean cast iron radiators. Thank you Beth!
How to Deep Clean Cast Iron Radiators
I’ll be right upfront and tell you that this method won’t clean out every dust bunny in your radiator. BUT it will give your cast iron radiators the best deep clean without having to remove and reconnect them (which can be expensive and very tricky to reconnect)
There’s 7 easy steps to deep clean your cast iron radiators:
- Turn Off Heat
- Protect Surrounding Area
- Protect Yourself
- Vacuum Large Bits
- Dust with Radiator Brush
- Wash Radiator
- Dry Radiator
When Should You Deep Clean Cast Iron Radiators?
Personally, I think once a year is all you need to deep clean cast iron radiators. I try to do it on an annual basis, but admittedly sometimes I’m lazy and skip a year.
Once you’ve have deep cleaned your cast iron radiators, you only really need to do step #5 (i.e. dust with radiator brush) on a regular basis to maintain their cleanliness.
Materials
- Old towels or sheets
- Masking or painter’s tape
- Old cardboard box
- Vacuum with brush and crevice attachments
- Safety glasses
- Dishwashing gloves
- Radiator brush
- Compressed air
- Bucket
- Dishwashing or general purpose cleaning fluid
- Sponge or rag
- Dry towel or rag
- Murphy’s Oil Soap (for hardwood floors)
Note that some of these items (for example, safety glasses and compressed air) could be viewed as optional, but I’d rather include here for completeness.
Step 1: Turn Off Heat
I know, I know, making sure your heat is off so that the radiator feels cool sounds obvious. But I feel like I need to say it. Don’t burn yourself while cleaning your radiator.
If you are ultra-organized (aka not me….) clean your cast iron radiators during the summer when they are definitely off.
Step 2: Protect Surrounding Area
The first step is to prepare the space. Your radiator contains a lovely mixture of dirt, grime, filth and in my case, pet hair, that is about to be shaken up. It’s about to get messy in here!
First look underneath and behind the radiator. You actually might see some surprises.
The first time I cleaned the radiators in our “new” old house, I found an insane amount of stuff. Barrettes, combs, pencils, crayons, little toys, sunglasses, even a small can of coffee! WTH!?!?!
If it’s particularly dirty underneath your radiator, first run the vacuum with the long crevice tool attachment underneath it.
Next, place a towel or sheet on the floor directly underneath and around the radiator and secure it with masking or painter’s tape. (This is so it doesn’t get sucked up by the vacuum in Step 4).
If you want to be extra safe, cover all the surfaces a few feet near the radiator to avoid additional cleaning. Furniture nearby? Throw an old sheet over it to protect. Floor-length Curtains? Take them down or roll them up towards the ceiling.
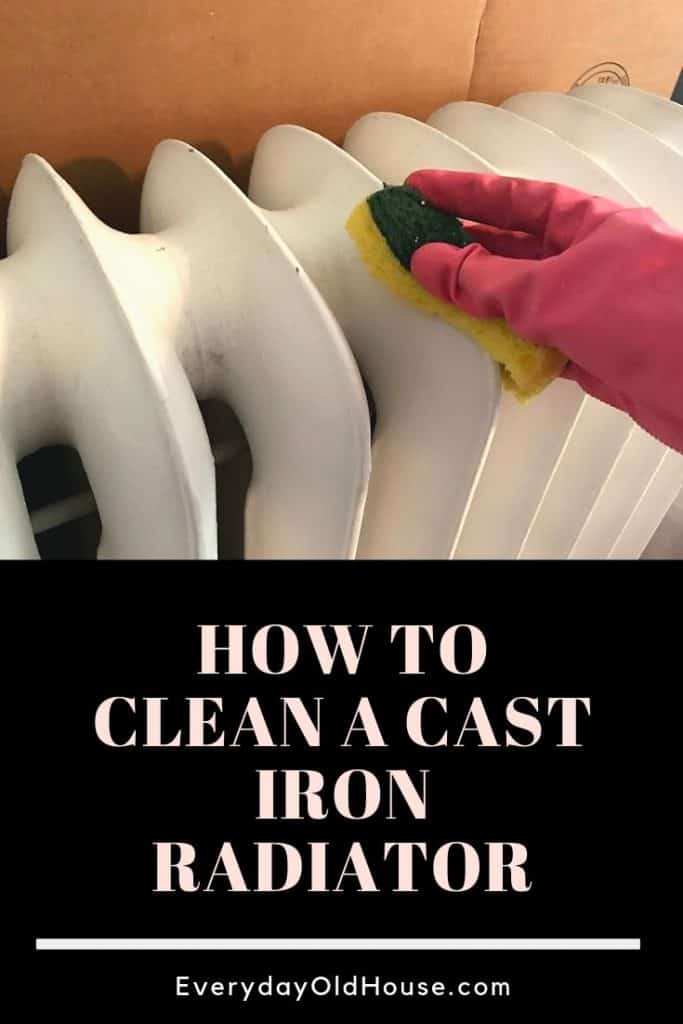
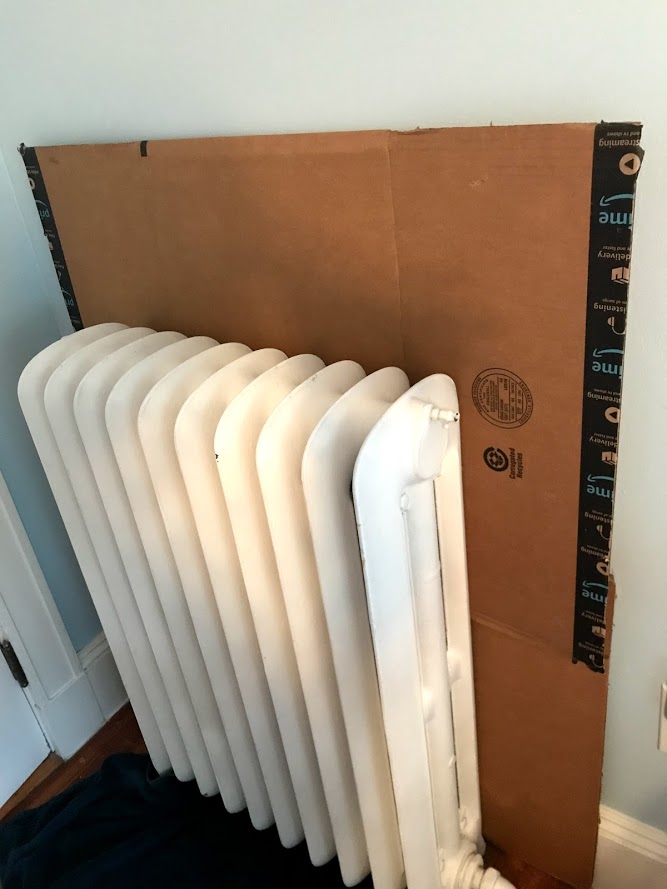
And don’t forget the wall behind the radiator. Tape a large piece of cardboard on the wall behind the radiator. Please, please, PLEASE do this. I speak from experience. The first time I cleaned our cast iron radiators I didn’t cover the wall behind the radiator. And when washed the radiator, flecks of dirty water flung all over the wall behind the radiator. That was fun to clean – UGH! (I used a wet rag wrapped around a measuring stick).
Step 3: Protect Yourself
When was the last time you cleaned your cast iron radiator? Or maybe you are new to this old house and cleaning it for the first time. If your cast iron radiators get as dirty as mine, you need to protect yourself from airborne dust.
Pick up a pair of safety glasses (or at a minimum any type of glasses) to protect your eyes and dust mask to minimize inhaling dust. It’s a sexy look, I know, I know. But rather be safe than sorry.
Step 4: Vacuum – Suck It Up!
I like to start cleaning cast iron radiators with a vacuum since it will suck up a lot of the dust, versus just kicking it up into the air. Tackle the large cobwebs and dust bunnies by running the brush attachment of your vacuum over the radiator. The soft bristles on the brush attachment minimizes the risk of scratching or chipping paint.
Note that the brush attachment doesn’t reach inside the radiator fins as well as the long crevice tool. Mind you, the crevice tool could scratch your radiators, so proceed with caution…. My radiators are not in the most pristine condition and also don’t have elaborate detail (or really any detail for that matter, they are fairly plain….), so I don’t mind using the long crevice tool to get further into the radiator fins.
Step 5: Dust Crevices With Radiator Brush
Now that you’ve removed as large dust and cobwebs as possible using the vacuum, it’s time to tackle those harder-to-reach spaces with a brush specifically designed for cleaning cast iron radiators.
Starting from the top and working down, run the radiator brush back and forth through the radiator openings (see video below).
To help minimize dust, I hold the brush in one hand, and the vacuum in the other. Hold the vacuum underneath so it can catch the falling dust bunnies. if you use the crevice tool, turn it upside down so it the suction is right under the radiator brush.
OK – disclaimer on the video. This is my first YouTube video. It’s a bit embarrassing. And you can barely hear me….. I need to work on my video skills!
So what kind of brush do you use? Not overly complicated – just a long, narrow brush with soft bristles.
Radiator Brushes
There are a variety of radiator brushes to choose from currently on the market. These types of brushes also work well to clean refrigerator coils (ahh, the dreaded dust behind the refrigerator) and dryer vents. And who doesn’t love a cleaning tool that can multi-task???
After trying a few brushes, this first one is my favorite….
1. Redecker Natural Pig Bristle Radiator Brush with Oiled Beechwood Handle, 18-1/2-Inches
This brush, handcrafted by Redecker based in Germany, has spent decades specializes in designing and manufacturing brushes. Precedence is given to natural, sustainable raw materials and all of their brushes are made of domestic woods, bristles, hair, and plant fibers.
This particular brush has a handle made from all-natural oiled beechwood highly resistant to wear and tear. The brush consists of natural extra-soft pig bristle, meaning it can clean gently yet thoroughly.

2. Carlisle 4541103 Commercial Narrow Radiator Brush, 24″ Length, Polypropylene
Slightly cheaper, but still durable, alternative has a plastic slip-resistant handle and a mixture of horsehair and polypropylene for bristles. [Apologizes I can’t seem to get the Amazon image to work – use the link in the title to see this brush.]
The manufacturer, Carlisle, a Oklahoma-based company founded in 1954 producing food service equipment and supplies and sanitary maintenance tools and supplies for commercial, industrial, and institutional facilities.
When I first started cleaning my cast iron radiators I actually didn’t know there was such a things specifically as a “radiator brush”. I bought a general boiler brush from one of the big box stores. It’s the brush you see in the video.
Since then, I’ve purchased the Redecker pig bristle brush. And for the most part, I recommend it.
It’s a high-quality brush that has a nice weight to it. It’s jammed-packed with bristles that effectively clean the inside of radiators. The center wire is flexible and can be bent to reach the inner crevices inside the radiator. It’s an impressive little brush. And the bristles hold up to a number of cleanings.
How To DIY a Radiator Brush
If you aren’t looking to buy a new radiator brush just yet, here’s two options: :
- Wrap a dry, clean cloth around the end of a long stick, such as a measuring stick, and secure the cloth with tape. I tried this method – sometimes it worked, sometimes it didn’t. Personally, I thought it worth my money to buy a brush.
- If you happen to have babies in your house, you might have a spare baby bottle brush. Use that as a brush to clean your radiators (and obviously no longer use it on bottles). I don’t have babies anymore, so I haven’t tried this method.
Compressed Air – a Non-Brush Alternative
Instead of sucking up the dust, why not push it out using a compressed air duster? (Thank you for the tip Jeff @macrokilla on Instagram).
How do you do it? Simultaneously blast a stream of compressed air at the radiator in one hand while holding the vacuum in the other. This compressed air will stir up dust, but the vacuum will suck it up and minimize dust bunnies blowing up into the room or into your face.
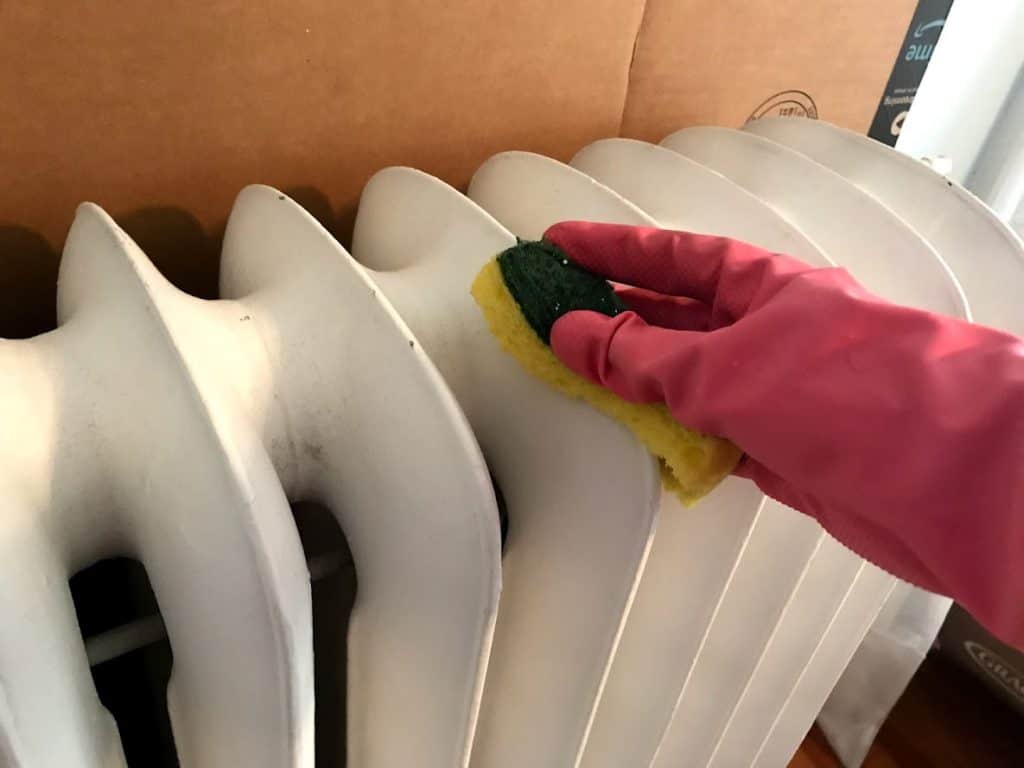
Step 6: Wash Radiator – Scrub-A-Dub-Dub!
Strap on your gloves, grab your bucket and fill it with warm water and a few squirts of either dishwashing or general household detergent.
I usually first do a general wash all over the radiator, then go back to tackle the trouble spots and hard-to-reach areas.
General Wash
Start with a general wash all over the radiator. Dampen a sponge or rag. Start from the top of the radiator and work downwards on each fin, rinsing the sponge or rag after each fin is finished.
Hard-To-Reach Spots
I’ve found two options for washing those trouble spots hard-to-reach places.
- Wrap a wet rag around the head of a radiator brush (or yard stick), hold in one hand, and with the other hand, run the brush through the fins. Sometimes it works, sometimes the cloth just gets stuck in the fins. But doesn’t hurt to give it a try, right?
- Try using an old toothbrush to clean into cracks and crevices. It works, but it’s incredibly time-consuming. Oh, and remember not to use the toothbrush for its primary reason afterwards ? (seems obvious, but I feel it needed to be said)
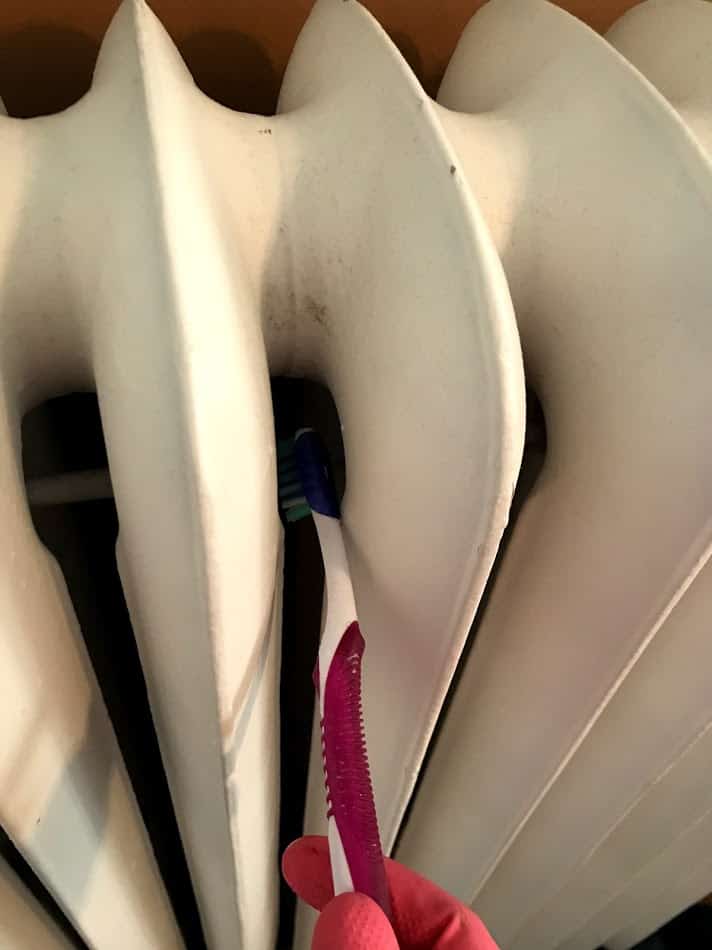
A note on sponges. Avoid using abrasive sponges that will scratch and damage the radiator, or chip paint. (Don’t even THINK about a Brillo pad!) I prefer Scotch-Brite Non-Scratch Scrub Sponges. The scouring pad side (or as I call it, the “scrubby side”) is tough enough to get at tough stains or dirt on the radiators without scratching.
Now that the radiator is washed, clean up the area. Remove the towel or old sheet underneath it. Clean the floor underneath the radiator. For hardwood floors, I’ll use Murphy’s Oil Soap and warm water to scrub the floor under the radiator with a sponge, or rag. When complete, run the sponge under the bottom of each of the radiator’s fins and capture any rogue dust or dirt missed during the other steps.
Step 7: Dry radiator
Now that your cast iron radiator is sparking clean, wipe it dry with a soft cloth or old towel. Cast iron tends to rust, so removing as much water and moisture as possible helps prevent any rusting.
Last – consider sprucing your clean cast iron radiators with new flanges (also known as escutcheon rings). These rings are functional as well as decorative. They hide the unsightly hole in the floor and stop cold air from coming up from an unheated basement or crawlspace. Signature Hardware offers a few gorgeous radiator flanges as well as these on Amazon.


Wah-la! That’s it! I’m curious to hear any tips, suggestions, opinions, etc on dusting and cleaning – just use the comments section below.
What’s next? How about increasing energy-efficiency by installing a radiant (aka reflective) barrier?

Related Posts

Want to be the first to know about new posts? Be sure to follow me on Pinterest, Facebook, Instagram or Twitter of even Etsy! Or better yet… Subscribe below!
My monthly (admittedly sometimes more, sometimes less….) emails are like receiving a unexpected letter from an old friend WITHOUT needing to put on your slippers and walk out to your mailbox…. See? I got ya, my friend!)
[Note: My posts are proudly connected to these amazing link parties full of DIY ideas and inspiration!]
Photo credits: Jonathan Willis on Unsplash