Last Updated on October 4, 2025
A few weeks ago I decided to dive into emergency preparedness and home inventories – what they are and why they are so important for homeowners. Now I’m taking the next step and actually documenting our personal belongings and creating our home inventory with HomeZada.
There are a variety of methods to document your possessions – paper, computer spreadsheets, and software. After debating all these options, I decided to try a free home inventory software – from HomeZada.
And after using their program, I am very impressed. Why? Quite simply, I found this program straight-forward and easy-to use. I bet you won’t find a home inventory software program as comprehensive or as intuitive as HomeZada.
To help you get your arms around HomeZada and if it’s the perfect home inventory solution, I’ve divided this post into three sections:
- Account set-up tutorial (quick and easy)
- Overview of HomeZada’s free capabilities
- Detailed HomeZada review from a homeowner prospective
Note that this post contains affiliate links from various programs, including HomeZada. As such, I earn from qualifying purchases. Full disclosure located here.
First, What is HomeZada?
HomeZada describes itself as a digital hub for homeowners that provides “management solutions for home maintenance, improvements”. It has ” full home inventory plan that lets customers catalog belongings, upload receipts, and create reports”.
Sounds impressive, right? And recently, HomeZada won first place at a national insurance conference for its innovative approach to helping homeowners manage and maintain their homes. Those insurance geeks usually know what they are talking about (I know, I used to be one….. ?)

On a personal note, I was intrigued by HomeZada when I read about their partnership with Chubb, the insurance company where I worked for over a decade. It’s the world’s largest publicly traded property and casualty insurance company with roots waaaaay back to 1792. For me, this partnership indicated that my old employer gave HomeZada’s platform a “two thumb’s up” and viewed it as a valuable tool to both homeowners and the insurance industry.
And as soon as I got into HomeZada’s program, I could see why Chubb partnered with them. Simply put, it’s an incredibly easy and quick strategy to create a home inventory that will document all your personal belongings.
How to Set-Up a HomeZada Account
Here’s 5 easy and quick steps to create your HomeZada account.
1. Sign Up and Download App
Signing up is free and easy. You can sign up via web browser using any device you want, such as your mobile phone, tablet or laptop. Just click here to signup. HomeZada Mobile is available on both iphone and Android.
After you create an account with username and password, it’s time to start entering information about your home. Don’t worry, it doesn’t take long and actually not that boring….
2. General Home Information
This section requests general information about your house – address, number of bedrooms and bathrooms and property type (single-family, townhouse, timeshare, commercial, etc…). It literally takes about 3 minutes. That’s the length of the commercials you are forced to watch during your Hulu television show.
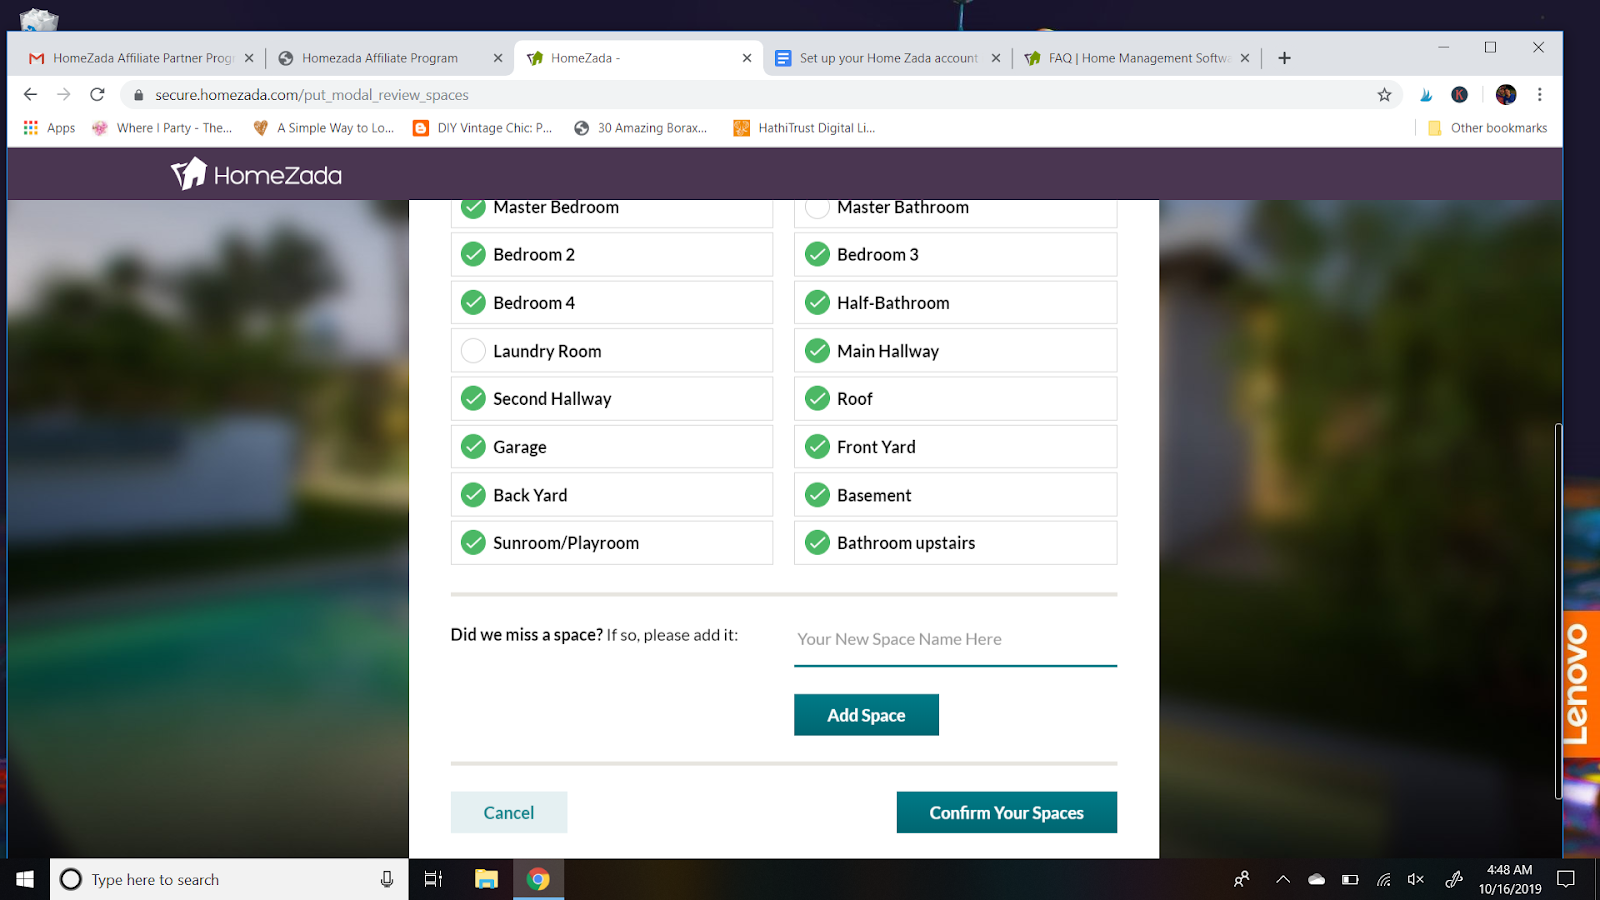
3. Confirming Your Spaces
Based on the general information you entered, HomeZada generates a list of Spaces (aka rooms) for to you review and modify, and confirm. This is where it gets fun and HomeZada starts to impress.
For me, in the blink of an eye (or one tap on my keyboard), HomeZada generated a list of approximately 20 different Spaces for our single family home with 4 bedrooms and 1.5 baths.

Now of course, this predicted list of Spaces is not 100% accurate, but surprisingly close! The program provides the ability to easily delete and add Spaces. For example, we don’t have an Office nor Nook nor Dedicated Laundry Room (sigh…. although those do sound nice) so we simply deleted them to the list. And simply added other Spaces. For example, HomeZada didn’t predict our Sunroom/Playroom.
In addition to adding and removing Spaces, you have the capability to modify names of autopopulated Spaces. For example, I changed the “Master Bathroom” on HomeZada’s Space List to “Bathroom Upstairs”. Most old houses don’t have a master bathrooms (which is unfortunate in my humble opinion). Our old American Foursquare home has one full bathroom upstairs shared by all 4 bedrooms. Maybe one day my husband and I will have our own private bathroom separate from our 3 girls (hopefully before they hit the teenage years…).
Completing this section only took a few minutes and super easy. Easy peasy lemon squeezy! ?
HomeZada wowed me with how quickly I had an organized list of rooms in my house already in a list. It’s only Step 3, and I’m already feeling more organized and prepared for an emergency!
4. Populate Your Space (Item List)
After Confirming Your Spaces, HomeZada then autopopulates your Spaces by generating an Item List (i.e. the items in each Space). HomeZada divides these items into Fixed Assets (i.e. furnace, air conditioning units and appliances, etc) and Possessions (i.e. furniture, televisions, clothing, dishware, etc).
(Side note: You also have the opportunity to confirm exterior Fixed Assets, like an in-ground pool. We unfortunately do not. If you do have an in-ground pool and live in the Boston area, please reach out. I’d love to be your new best friend. ?)

Note that unlike the Confirming Your Space step, you are NOT taken to a subsequent page to review and modify details of your Fixed Assets and Possessions. I learned later that this happens later in the process when you get into the nitty-gritty of creating your home inventory.
For now, click “Populate My Space” and your basic account set-up is complete.
Wa-la! You’re done! with setup! Hooray!! ??
How easy was that? It takes longer to stand in line at Starbucks for a latte than complete the basic set-up. (plus this doesn’t cost you anything..).
From here HomeZada takes you to your Dashboard.
5. Take HomeZada Dashboard Tour
As soon as you arrive at the dashboard, there is a pop-up with a quick 9-step tour of HomeZada’s platform. Honestly, I despise pop-ups. I want to plunge right into the program and get into the thick of things.
But I took the tour. And you should too – it takes in less than a minute. Actually, you can probably finish the tour while holding your breath (hmmm….. that’s a fun idea. Try it and let me know in the comments below how many seconds it took). The tour provides you with the lay of the land and how to navigate the dashboard. Don’t roll your eyes at me, just do it! (insert Mom voice here).
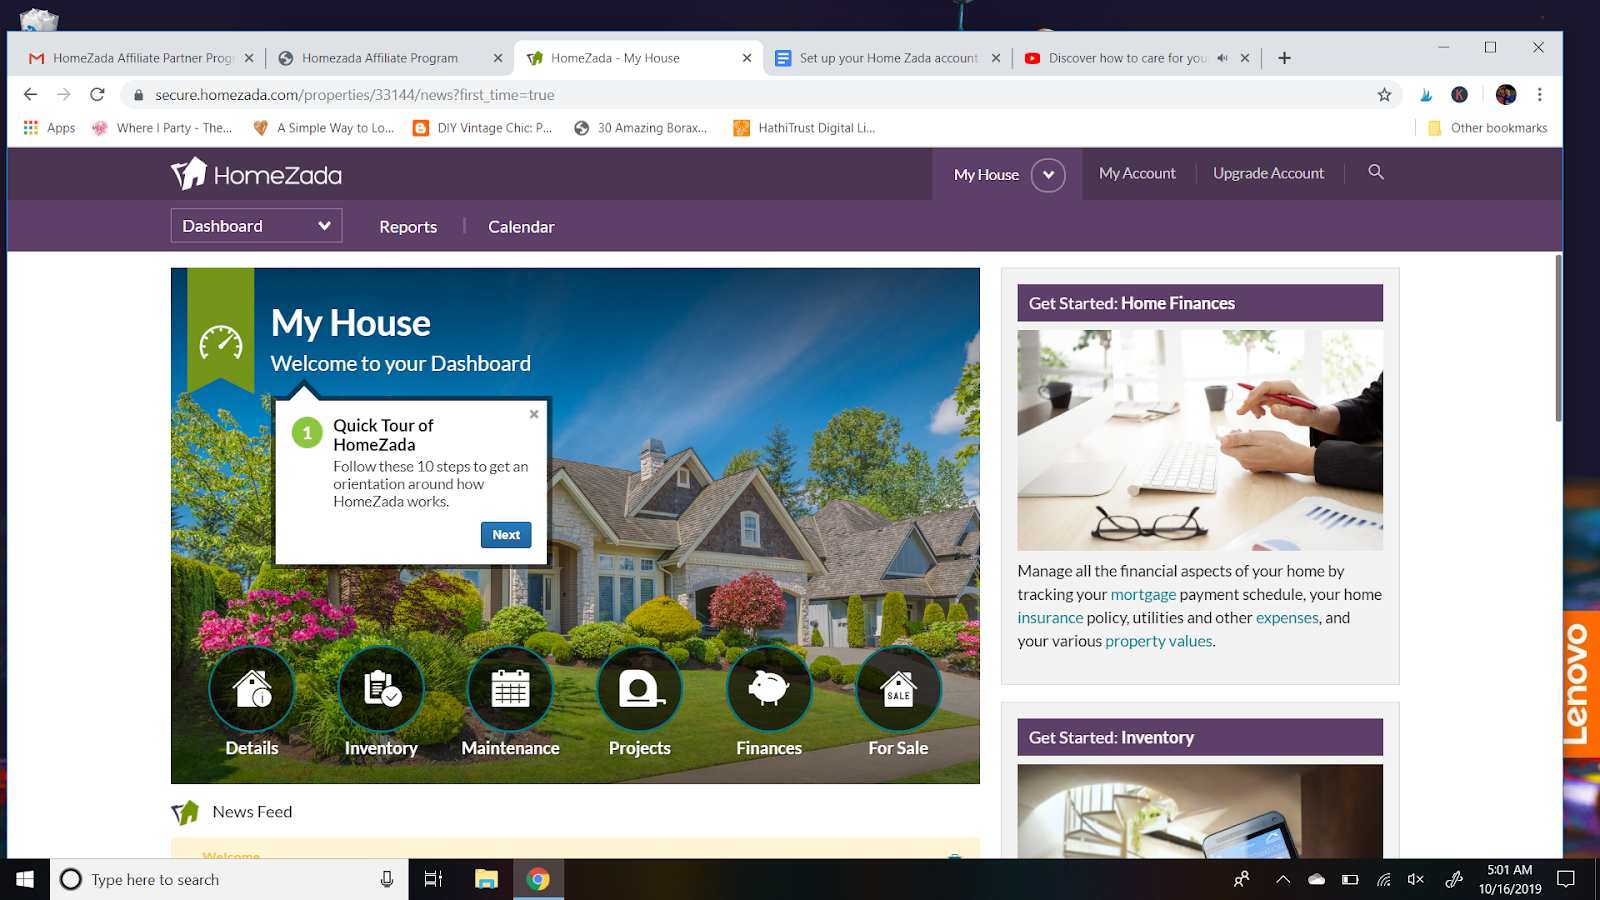
The dashboard is organized into 6 different buckets (section? categories? I’m going with buckets. It sounds more fun). Two buckets are included in the free version – Property Details and Inventory. The other 4 buckets require a paid Premium or Deluxe Plan subscription.
- Property Details – Free Version
- Inventory – Free Version
- Maintenance – Premium Feature
- Projects – Premium Feature
- Finances – Premium Feature
- For Sale – Deluxe Feature
As of this post date, the Premium Plan is $59 per year (or $9.95 per month) and includes a Maintenance Schedule, Remodeling Project planner, and Finances. The Deluxe Plan is $99 per year, which covers multiple homes and For Sale transactions.
I have to admit some of these paid services sound intriguing, especially the Maintenance Schedule.
How to Use Free HomeZada Features

But if you follow my blog, you will know that we are currently living on one income. Last year I quit my job in finance to stay at home with our little ones until they get a bit older. We carefully evaluate every penny that leaves this house.
And while the Premium Plan is only $9.95 a month I’m not quite ready to pull the trigger. We will dive into Premium Plan in the future.
For now, I’ll evaluate the two free features:
- Property Details Feature
- Inventory Photos and Video Feature
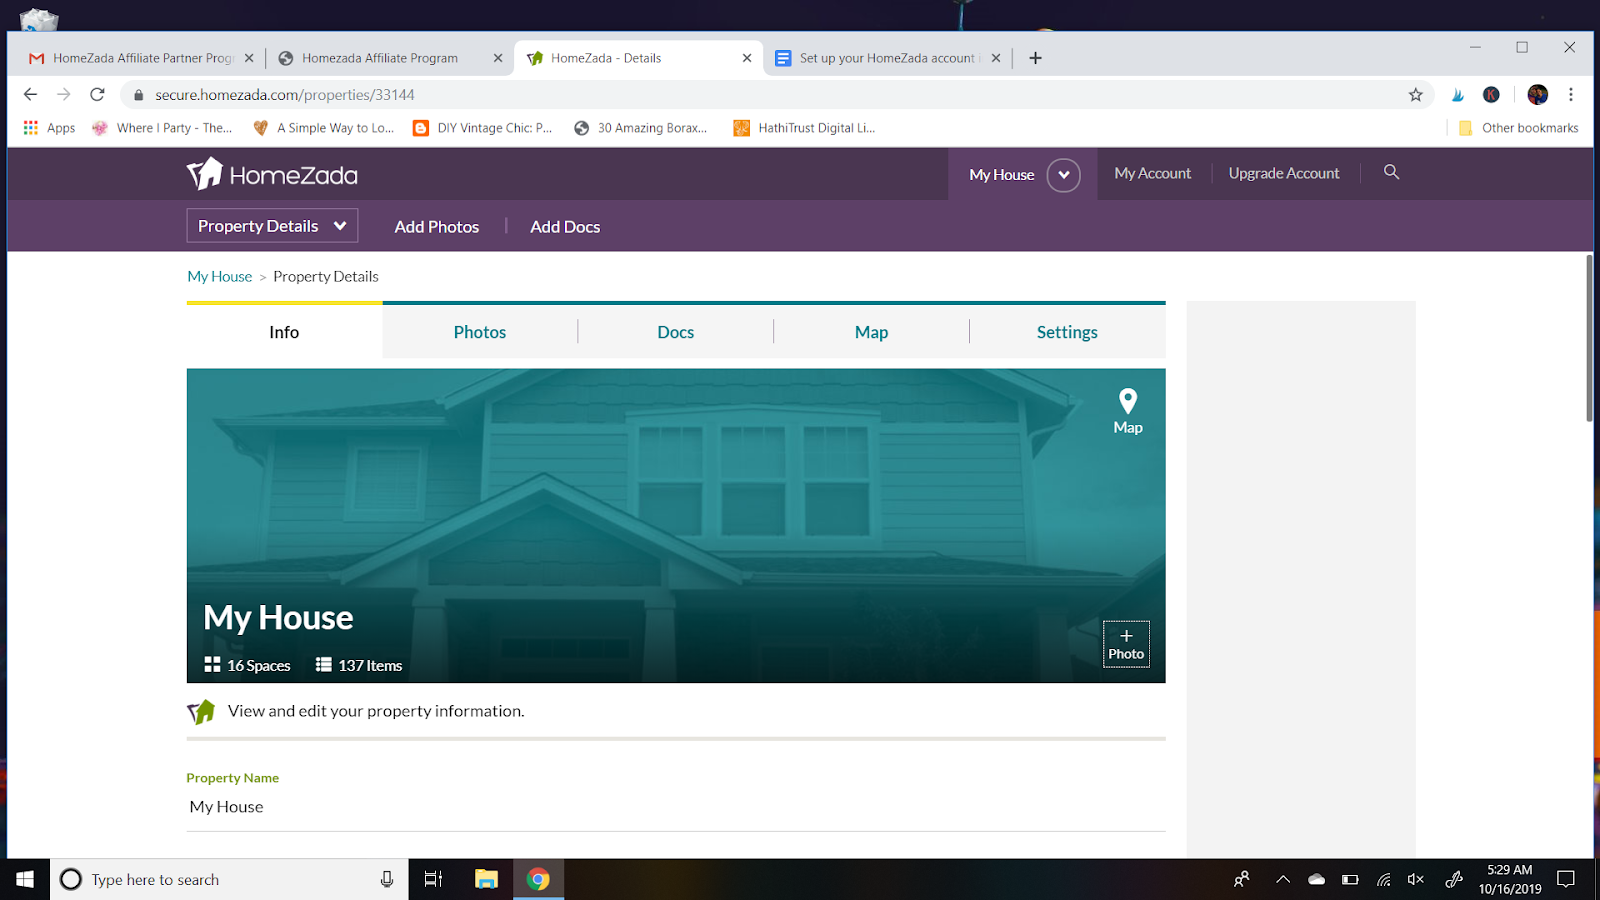
1. Property Details Feature
Property Details outlines basic (yet essential) information and statistics about your house. HomeZada automatically populates most of this information for you based on your original account set-up. (Don’t you love it when others do your work for you?)
Review the populated information, and add or edit information where applicable. For example, I added our home’s construction date and total lot square footage, as well as its heating and cooling system sources.
You’ll notice under “My House” a listing for “Spaces” and “Items”. As you can see in the below screen-shot, I have 16 Spaces and 137 Items. Obviously it will show different numbers on your screen.
2. Inventory Feature
This Property Details feature connects directly with the other free feature on HomeZada, the Inventory. This is the feature where you can get into the nitty-gritty of logging your home’s possessions.
As you can see in the picture below, HomeZada provides a nice visual marker for each Space. It’s almost like seeing a book laid out by chapter. You can click each of those Spaces and add room-specific information such as square footage and paint color. I LOVE the idea of having a place to include the name of the room’s paint color. Maybe it’s just me, but I keep forgetting where I store my paint chips.
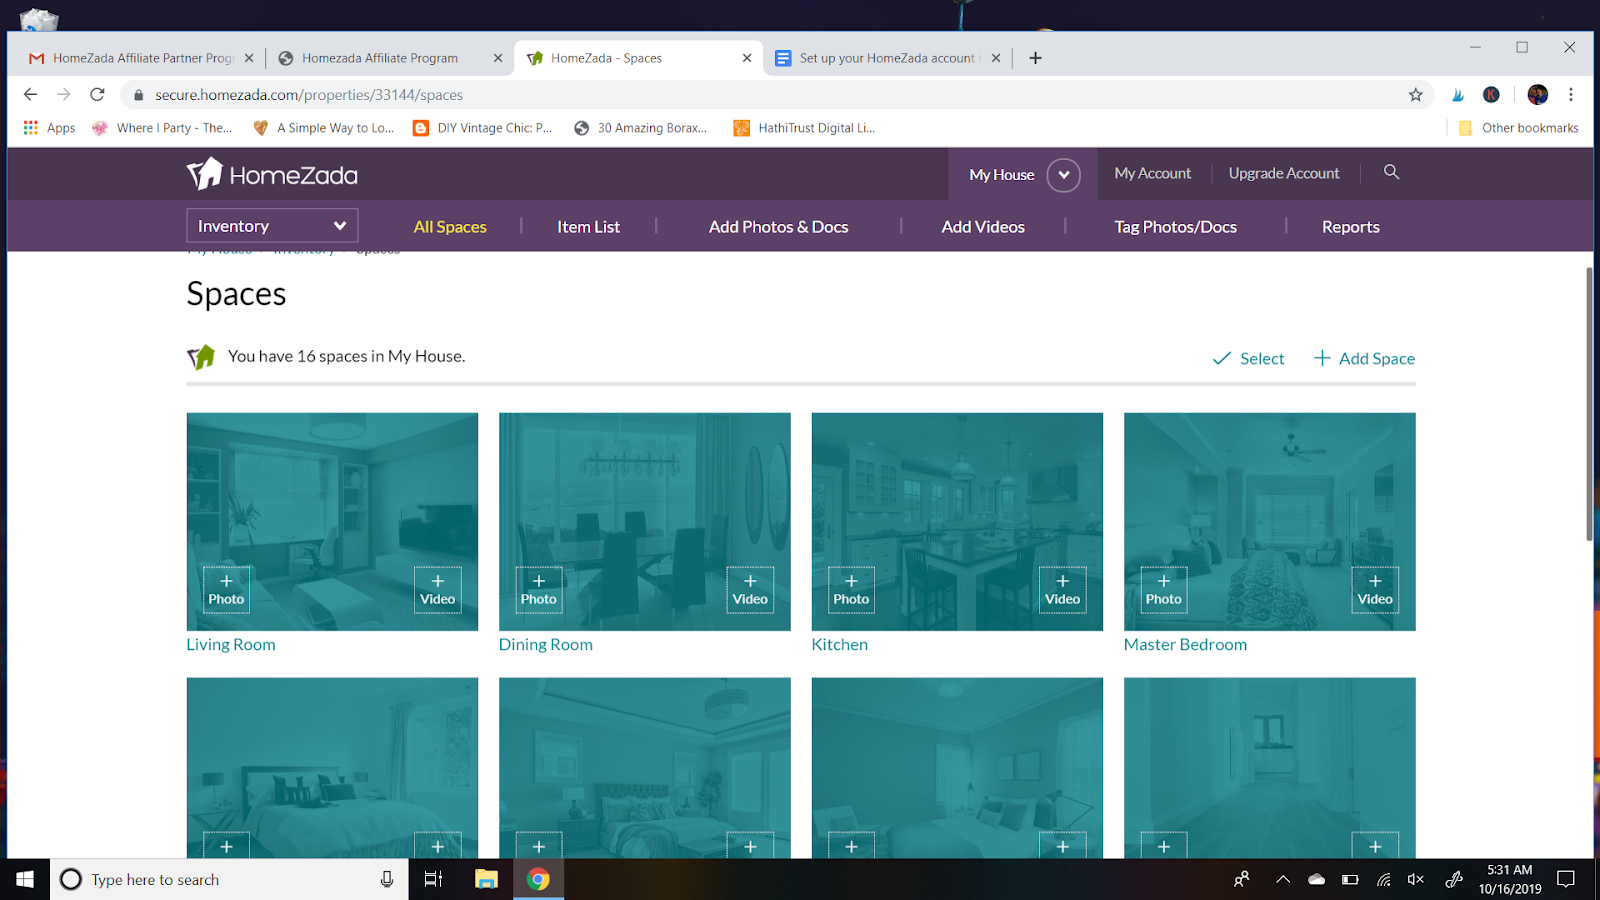
For each Space, you have the ability to upload photos or videos. (Note that video requires a Premium Plan subscription. So for now, I’ll stick to just the photos.)
HomeZada has made uploading fast and efficient. My favorite part of HomeZada’s upload? The ability to bulk upload pictures. Not only can it accept a bunch of pictures at once, it uploads all these pictures fast. Super fast.

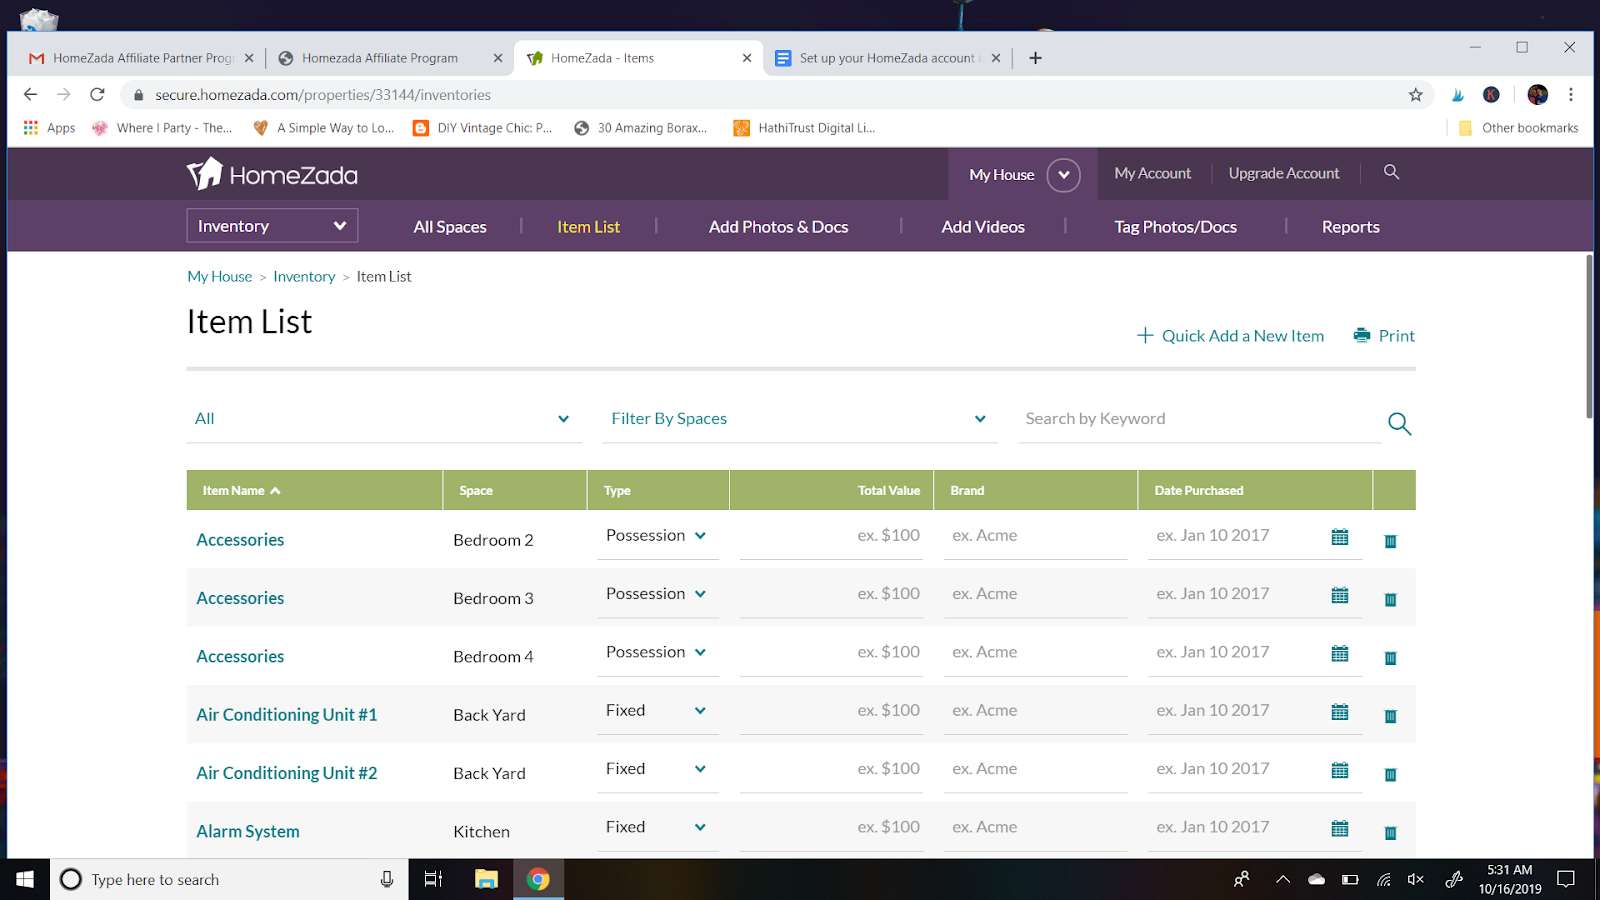
Once uploaded, you can then tag the photo to the applicable Space (i.e. room). You also have the ability to tag items in the photo that fall under Fixed Assets (for example, your oven) or Possessions (for example, your DVD player). With these tags, you ultimately end up with an Item List that could look like this.
(Note that this is a template and not my actual list. I haven’t decided if I like you and trust you enough to show you exactly want I have in my house ?).
Any questions? This video walks you through how to bulk upload photos and tag spaces and Items. It’s definitely worth a watch.
Note that in the app, there is an option for HomeZada Photo Recognition. As of the date of this post (October 2019) it’s an experimental feature that tries to automatically tag an item based on the photo. I’d recommend opting into this feature. It will take some of the burden of tagging off of you and automatically populate the Item List for you. (Did I mention how much I love it when someone else does my work for me?)
I was able to upload my photos from my iphone directly to my HomeZada account via the HomeZada mobile app. For my first time, I uploaded and tagged 15 pictures as a test run (I snapped pictures of our two bathrooms). The upload and tagging took less around 4 minutes (and that includes figuring out how to delete a duplicate picture I mistakenly uploaded). It takes longer for me to wrangle one of my toddlers into her coat, shoes and hat (I speak from experience).
HomeZada Review: The Verdict
While there is a lot more to explore in this program (future posts. hint, hint), so far I’m very impressed with the free features available on HomeZada. What exactly do I like about it?
- Ease: The platform is simple to use, yet still provides a comprehensive suite of services. It’s user-friendly – navigating around the site is easy even for not-exactly-tech-savvy homeowners like myself.
- Quick: The bulk upload of photos is crazy fast. Like Mario Andretti fast.
- Intuitive: After answering just a few quick questions, HomeZada autopopulated my Spaces (i.e. rooms) and Item List, which made entering a home inventory easier. HomeZada did some of the work for me. Gotta love that.
- Comprehensive: HomeZada is a complete digital home management system. It holds a plethora of vital information to help you take care of, and even improve, your home. Most importantly, it holds essential data needed to file insurance claims in case of an emergency.
- Affordable: And OF COURSE, that’s affordable. ? But if the other capabilities under the Premium Plan (especially the Maintenance Schedule with reminders) are as valuable as the Inventory feature, spending $9.95 per month is well worth the money. (discounted annual subscriptions available too!)
Creating a home inventory is an excruciatingly tedious task. But HomeZada makes it a lot less tedious. Click HERE to learn more about HomeZada or even try it out (go ahead, I dare ya ?). If you sign up, I’d love to hear about your experience below in the comments section.
Related articles:
Want to be the first to know about new posts? Be sure to follow me on Pinterest, Facebook, Instagram or Twitter of even Etsy! Or better yet… Subscribe below!
My monthly (admittedly sometimes more, sometimes less….) emails are like receiving a unexpected letter from an old friend WITHOUT needing to put on your slippers and walk out to your mailbox…. See? I got ya, my friend!)
[Note: My posts are proudly connected to these amazing link parties full of DIY ideas and inspiration!]

These are such great tips! I pinned this for later. Perfect timing as my hubby and I were just discussing this.
So glad you were discussing it. Home inventories are nowhere on people’s radar until tragedy strikes and it’s too late. I’m actually amazed at how fast I’m going through my house. It’s only takes just a few minutes to capture some pictures of the walls, floor, open the drawers/ cabinets and upload to the HomeZada system, all with my iphone. (I’m doing a room or two every other day) If you decide to download the app and have problems, feel free to reach out!