Last Updated on August 16, 2024
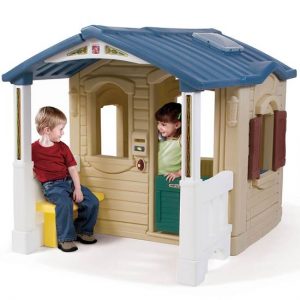
A few weeks ago, I lucked out and scooped up a second-hand Step2 plastic playhouse for free! It was a well-loved hand-me-down from a neighbor whose children had outgrown it. While it was a bit faded and looked tired, it still had a lot of life left in it. But with a good cleaning and a few coats of fresh paint, this drab, tired-looking house was invigorated with new life with just a bit of elbow grease and a few coats of paint!
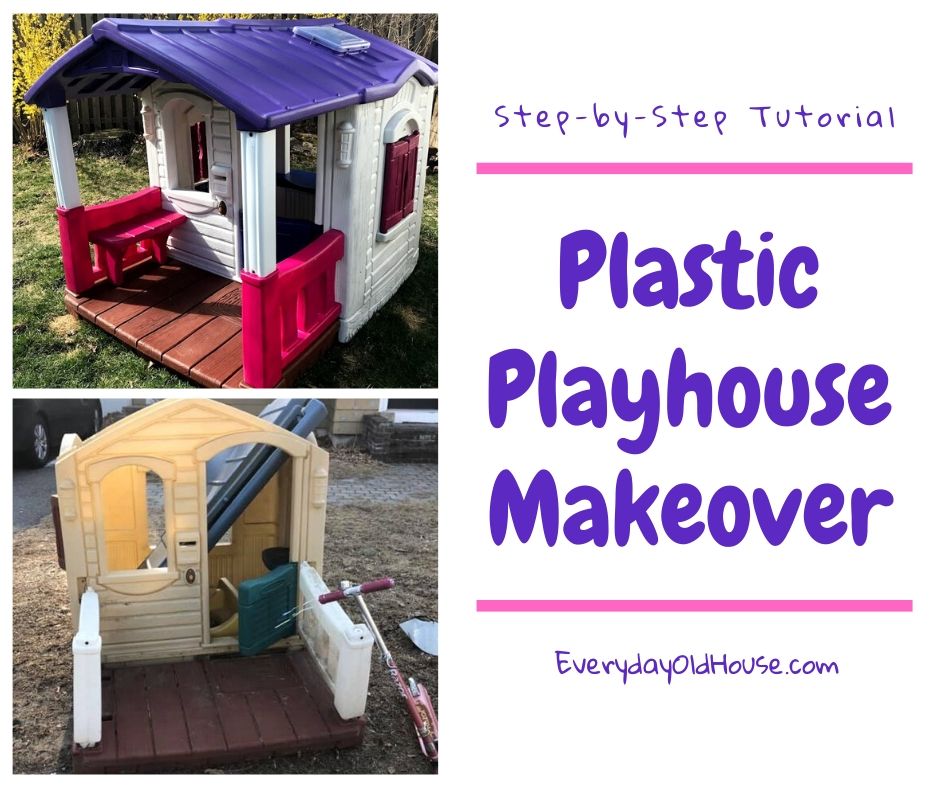
And today I’m going to show you how to spray paint a Step2 plastic playhouse and transform it into an eye-catching focal point in our backyard. This makeover project was super easy, and took a couple hours over a few days to complete!
This post contains affiliate links, including but not limited to, Amazon Associates. As such, I earn from qualifying purchases. Full disclosure located here.
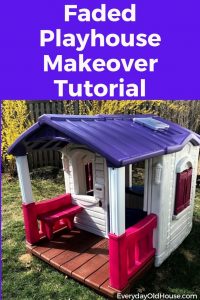
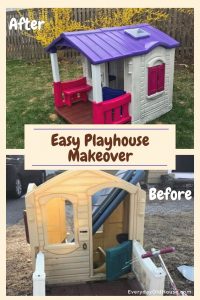
Before and After
I’ve wanted a playhouse for our girls for awhile. But buying a brand new one seemed frivolous when living on one income. So, over the past few months, I kept an eye out on Facebook Marketplace and Yard Sale groups for a second-hand playhouse.
And a few weeks ago, SUCCESS! My neighbor, who knew I was looking, tagged me in a local Facebook Yard Sale group advert for a free Step2 plastic playhouse sitting out on another neighbor’s curb.
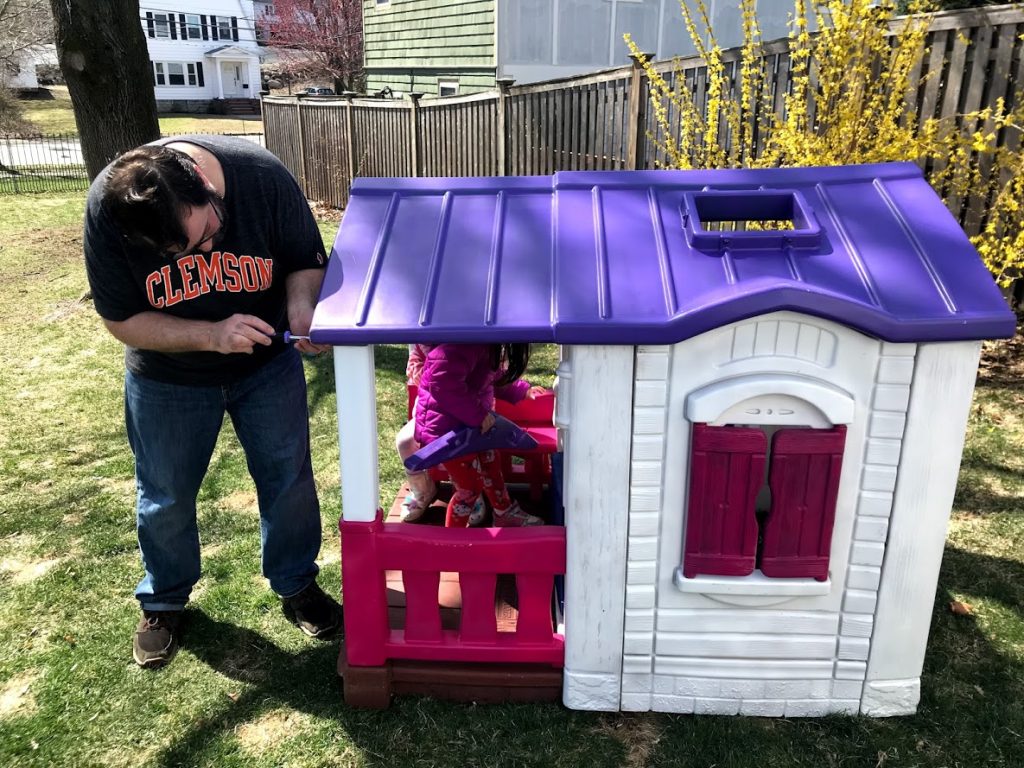
I made my husband drop everything and go pick it up. He brought a screwdriver with him, took it apart and stuffed into in the back of our SUV.
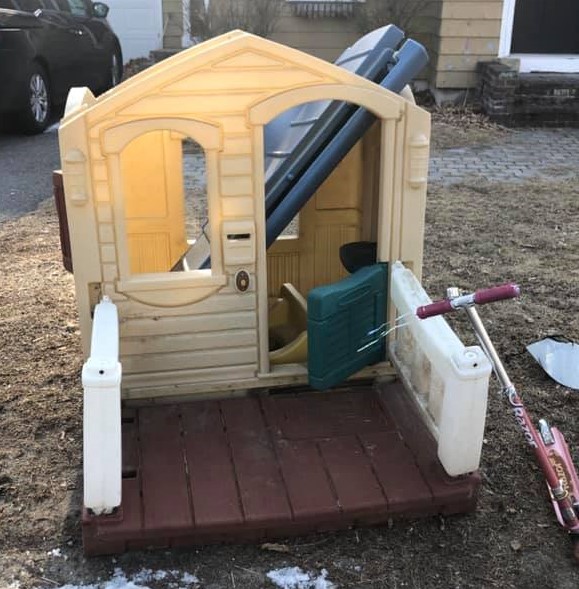
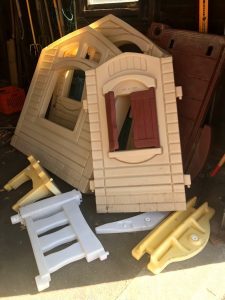
Check out the “before” playhouse……
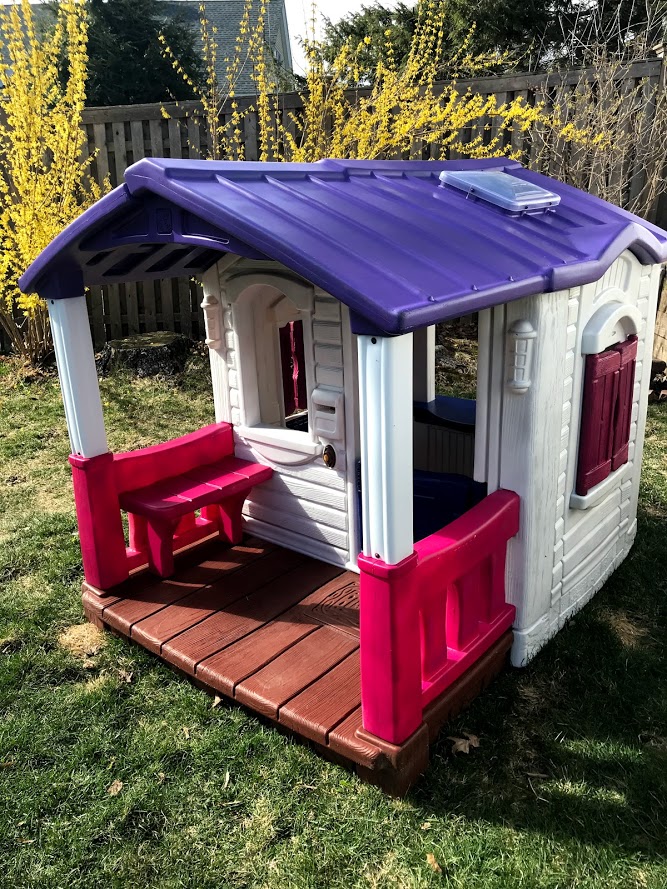
and the “after!”
How did I do it? Read on!
Before we start, I want to note two things:
- While this makeover project focuses on a Step2 playhouse, these instructions will work on any plastic playhouse.
- Step2 distinctly says that any modifications to their playhouses invalidate the warranty. So if you have a newer house, please proceed with caution. But if you have an old playhouse past the warranty period, grab your supplies and let’s go!
Supply List
For this Step 2 plastic playhouse makeover, you don’t need a lot of supplies. And bonus points – the cost is a fraction of the price of buying a new playhouse!
- Phillips and slotted/flat screwdrivers
- Hose or power washer
- Bucket, scrub brush and dish soap
- Canvas drop cloths
- Drill
- Safety goggles
- Gloves
- Spray paint – see below for discussion on number of cans and colors
Lastly, while options, I’d highly recommend a spray paint holder, especially Rust-Oleum’s Comfort Grip.
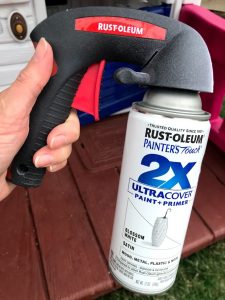
Admittedly, I’m a bit frugal and at first was hesitant to buy. But I decided to splurge and am incredibly grateful! Trust me, buy this gadget and your trigger finger will thank you!
Details on Spray Paint
I want to talk a bit about the spray paint I used for this plastic playhouse makeover.
Which Type of Spray Paint Do You Use?
There are a variety of spray paints on the market that will work for this project. If you want to dive deeper into your options, check out The Spruce’s 8 Best Paints for Plastic of 2020.
But if you read my tutorials on rejuvenating an outdoor metal patio side table or updating a brass fireplace door, then you know that I’m a fan of Rust-Oleum spray paint. Their spray paint has yet to let me down. (And I’m NOT paid to say this! I’m not important enough to get paid to market home improvement products – I’m just the average homeowner ?)

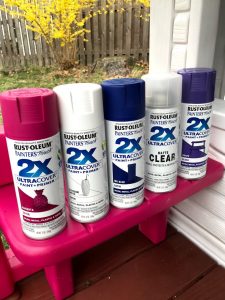
Rust-Oleum makes the Painter’s Touch 2X Ultra Cover spray paint, which is designed to cover make types of surfaces including plastic. It’s a primer and paint in one, so I don’t have to buy separate primer and paint. And supposedly, my project should be done twice as fast. And with 3 young kids impatiently waiting for their new plastic playhouse, getting this project done ASAP is essential.
Which Color Combination is Best?
Honestly, it’s all up to you. For color combination ideas and makeover inspiration, do a Google Images search. You will probably find a substantial number of plastic playhouses updated using neutral and pastel colors. These houses are beautiful and admittedly, more sophisticated, than ours.
But my girls love bright colors. My oldest loves purple, while my 3-year old twins love hot pink. Honestly, I’m a little concerned that the brighter, more vivid colors may fade faster. But my ultimate goal is to create a dream playhouse for my girls, so I decided to move forward with the brighter colors they love.
And if I need to re-paint it in a year or two, then so be it. Plus, they will probably outgrow this playhouse in a year or two. And I can pass it on to the next family to update with their own color combination and style.
For our Step2 plastic playhouse, here’s the color combination:
- Roof: Grape (color #249113)
- Interior/Exterior: Blossom White (color #249843)
- Door and Shelves:Ink Blue (color #314754)
- This blue color was chosen by Rust-Oleum as one of their Colors of the Year for 2020!
- Shutters and Patio: Magenta (color #283188)
How Many Cans of Spray Paint Do You Need?
The answer to this question depends on the size of your playhouse. The dimensions of our playhouse are about both 50 inches high and wide, and 58 inches deep.
Admittedly, I originally underestimated how many cans of spray paint I needed, which resulted in a second trip to Home Depot. So I recommend getting a few extra cans. Nothing more annoying than running out midway through a project (I speak from experience….)
Ultimately, here’s the breakdown of cans:
- Roof: 2 cans (Grape)
- Interior/Exterior Walls: 5 cans (Blossom White)
- Door and Shelves: 1 can (Ink Blue) Shutters and Patio:2 cans (Magenta)
- Sealant: 2 cans (Clear Matte – I’ll tell you about sealant later…)
While we painted both the exterior and interior, you can save yourself a few cans of paint (and time) by not painting the interior of the house.
You’ll notice that I didn’t paint the porch floor. Why? I was concerned about wear and tear with all those little feet coming in and out all day. If I was a bit braver, I would have sprayed it grey color that would match the purple and pink better. But I chickened out. And luckily the floor was amazingly good shape. Maybe I’ll buy a doormat or little outside rug to cover it up.
Which Sheen of Spray Paint Works Best?
Corey, a blogger at Hey There, Home, tested the longevity of two different types of spray paints on her plastic outdoor furniture. And she found that the chair painted with a satin sheen looked better than the one painted with a gloss finish.
So I bought the satin finish option if available at my local Home Depot.
Fortunately, all but one color was available in satin. And that was the Grape purple for the roof. For that color, they only had gloss available.
I actually really like the gloss. Glad I ended up having to use it. I’m curious if the gloss sheen will hold up as well as the satin. I’ll keep you posted next year.
Tutorial: How to Spray Paint a Step2 Plastic Playhouse
Here’s the full step-by-step tutorial on how to spray paint a Step2 plastic playhouse.
Step 1: Disassemble Plastic Playhouse
It’s nearly impossible to neatly spray paint this kind of house when fully assembled. Don’t cut corners and try to spray paint the parts different colors while assembled. It will be a big mess. And, yes I speak from experience. At first I admit I was lazy and tried it. It wasn’t pretty. I had to start over.
And don’t even think you can tape sections of the house and paint. Tape will pull off any fresh paint….
Now that we got that out of the way….
To disassemble the plastic playhouse, remove all the screws with a screwdriver. Our playhouse has Phillips screws. Collect the screws in a plastic bag and save in a safe place. Otherwise, we all know that you are going to lose the screws and will tear the house apart looking for them when it’s time to put the house back together!
For those pieces that are attached to the house without screws (like the shutters and door), try to pop out with your hands and a bit of muscle. I found that they are most likely to pop out when pulled up from the bottom.
But if that doesn’t work, CAREFULLY pry these pieces out using a slotted, or flat screwdriver.
Any Missing or Broken Pieces?
If your playhouse has missing or broken pieces, don’t despair. Most playhouse manufacturers, like Step2 sell replacement parts. Even for old models, like ours, that are no longer being manufactured.
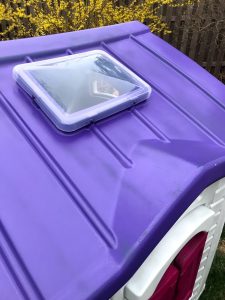
When I found a picture of our specific Step2 playhouse online, I discovered that we were missing a few pieces. We were missing the two roof supports and the skylight.
Our playhouse had a model number embedded into an interior wall of the playhouse. I called Step2’s customer service and was guided to the right webpage to order my replacement parts.
I have to give a shout-out to Step2’s customer service. It was impressive – friendly and knowledgeable.
And the cost for our replacement parts were extremely reasonable. I was able to order 3 replacement parts for around $40, including shipping.
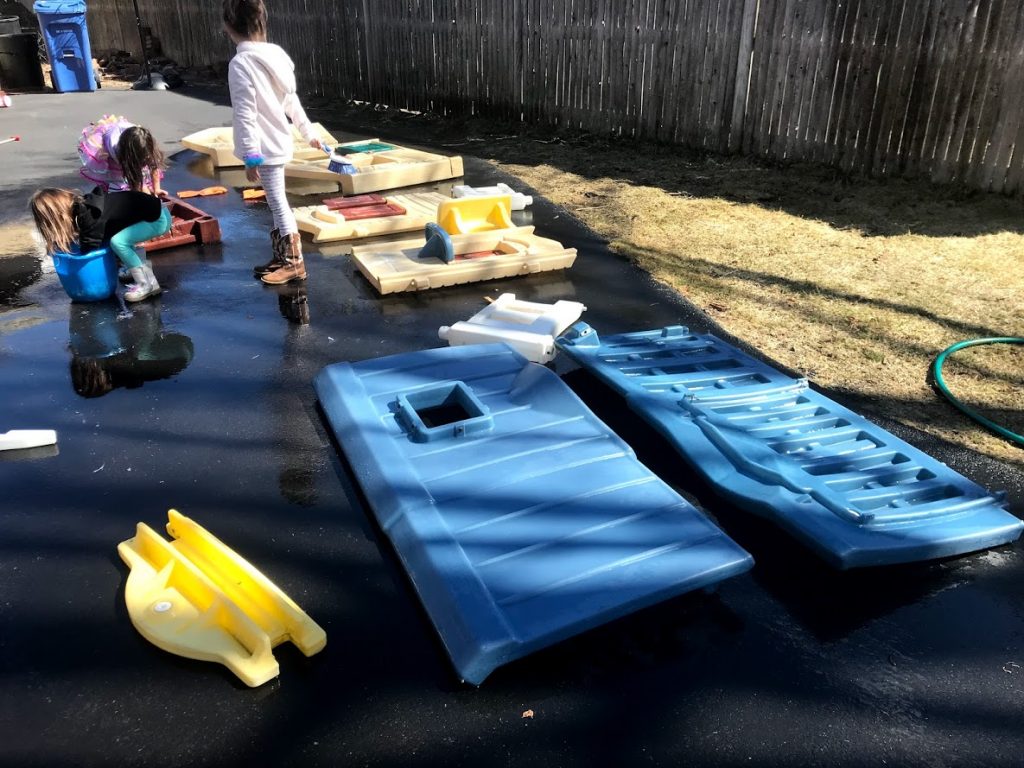
Step 2: Clean the Plastic Playhouse
Ideally, the best way to remove all the stubborn dirt and grime, and old stickers would be through using a pressure washer.
But I don’t have one (yet).
So we cleaned the playhouse the old fashioned way. Manual child labor. On a bright, sunny day, we handed our 3 children scrub brushes and a bucket filled with warm water and dish soap and told them to get to it. My husband first sprayed it with a hose to remove the big stuff, and I was on hand when one of the kids encountered a “scary” spider web that needed removing. It ended up being a fun family project.
Our playhouse didn’t have any stickers or decals left on it. But if you don’t have a stubborn sticker on your playhouse, Goo Gone is my go-to to remove sticky adhesives. Apply per instructions, let it sit for a bit, and it should easily come off. Remember to subsequently wash the area with soap and water. Otherwise Goo Gone residual will impede fresh spray paint from completely adhering to the playhouse.
One thing I noticed about our play sets is that they had all acquired rainwater inside them over the years.
Drilling Holes to Remove Rainwater
Unfortunately, one of the cons of these plastic playhouses is that over the years they ten to accumulate rainwater inside the components. We could hear rainwater shushing around in 2 of the walls and the front porch.
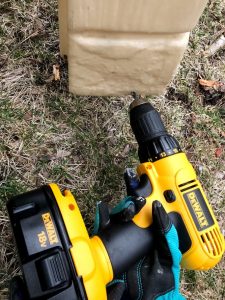
But that’s an easy fix.
If you hear any slushing, drill small holes in the bottom of the pieces that touch the ground and release that old rainwater (and future rainwater too)!
At this point, you are chomping at the bit to get right to painting. And I don’t blame you. I know my girls were! But STOP! Be patient and wait for the structure to dry. It’s essential that your playhouse is clean AND completely dry before advancing to Step 3. Otherwise the spray paint won’t stick.
Step 3: Set Up Work Area
Either later that day (or the next day), it’s time to paint. Remember to pick a day that is warm, but not too humid. And also not too windy. On windy days, the paint doesn’t spray as effectively nor efficiently. And that means you waste paint, needing to buy more cans.
First, place a canvas drop cloth in your yard (preferable on grass and not on concrete or a paved driveway that can be ruined).
A canvas drop cloth is preferred versus plastic. A plastic drop cloth might peel off fresh paint. I didn’t have enough canvas drop cloths, so I used an old bed sheet that worked just as well.

Place the playhouse in sections on your drop cloths, spacing them out enough to avoid any spray paint splatter.
To keep the drop cloths from blowing, set some large rocks in the four corners of the drop cloths. I learned this the hard way. I didn’t place anything on the drop cloths except the playhouse parts. And while there was no breeze while I spray painted, a breeze kicked up and the drop cloth covered some of the parts while they were drying. UGH! Luckily the pieces were already mostly dry and there was no damage.
Step 4: Spray Paint Step2 Plastic Playhouse
It’s time to put on gloves, strap a spray can into its holder, shake up those spray paint cans and get rolling!
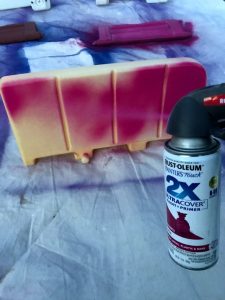
Make sure you shake the spray paint can for at least one minute, listening to the mixing ball rattle. Please don’t skimp on this step. Otherwise the paint won’t be sufficiently mixed, resulting in splotches. (oops, guilty as charged)
Per Rust-Oleum’s instructions, hold the can about 10-16 inches from the playhouse and spray in a steady back-and-forth motion, slightly overlapping each stroke. Honestly, I struggled keeping the can 10-16 inches away and sprayed closer. Sigh…. oh well.
How Many Coats of Spray Paint?
Ah, the million dollar question. When I started this project, I hoped that I could successfully complete it with just one coat of spray paint. But deep down, I anticipated that the parts with drastic color changes would require a second coat.
But that wasn’t the case.
For all parts of the house, the spray paint completely covered the old colors with just one coat with one exception – the walls. The walls were only changed from tan to white. This wasn’t a drastic color change so I was a bit surprised the walls looked splotchy after the first coat. So I held my breathe hoping a second coat would do the trick. And luckily, SUCCESS!
Ultimately, I did two coats (plus a clear coat of sealant, more later on sealant) on all the pieces.

So, should you do two or more coats on your playhouse? Entirely up to you. You may get away with just one coat.
BUT, if you decide to do multiple coats, wait a few minutes between coats. Or however long it takes to refresh your drink of choice and talk to your spouse or partner about take-out options for dinner that night.
Step 5: Reassemble Plastic Playhouse
Let the house dry completely before reassembling. We let our pieces dry overnight for full 24 hours in our garage to allow the paint to cure properly.
To reassemble the plastic playhouse, snap the pieces, like shutters and door, back into the walls. If you can’t snap them back in with a bit of muscle, CAREFULLY pry them in with a slotted/flat screwdriver. Secure the roof and walls with screws.
Once reassembled, I sealed the whole house for added durability with Rust-Oleum’s Clear Matte Spray. Adding this clear coat supposedly protects your paint job, and keeps an updated playhouse looking new a bit longer.
Ideally, I would have sealed each piece individually before reassembling. And I would have done two coats.
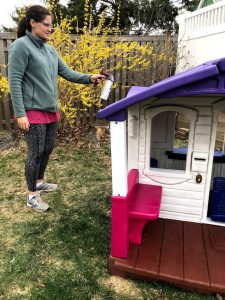
But I only had one can of clear spray paint and we were under corona’s “shelter-in-place” directive. And I didn’t feel it was essential to run out to Home Depot. So for now, one coat will suffice on the finished, assembled playhouse.
Once we can get past this corona pandemic, I’ll buy another can or two of sealant. I plan to apply another coat to the entire house. And maybe a third coat to the door and surrounding area. Why? With the girls going in and out of the playhouse all day, I expect the paint on and around the door is the most likely area to see wear and tear, and rub off.
Step 6: Accessorize Plastic Playhouse (Optional)
Now that the plastic playhouse is reassembled, it’s time to add little details to make it a cozy and welcoming playhouse for your kids!
There is a ton of unique finishes you could add to tailor a plastic playhouse, including:
- Window box with flowers
- String Lights/ lanterns
- Door bells
- Door knobs
- House numbers
- Doormat
- Flooring
- Shelving inside to hold toys and books
- A “take-out” food or ice cream menu placed next to a window
- Enhanced curb appeal with a small picket fence or Adirondack chairs
But right now, I’ve decided to wait to add unique touches to their houses. Why? Two reasons. One, these poor girls were waiting so patiently for this house, I couldn’t deprive them any longer! Plus, there are SO many creative ideas to improve this house. Almost too many to choose from. I love them all. But, realistically I can’t add them all.
So I’m going to wait and observe how my girls play with the house, and then decide. And of course I’ll post updated pics!
Which features and details do you think we should add? Comment below!
Related Family-Friendly Posts
- 5 House Projects You Can Do With Kids and Actually Finish (I Promise!)
- How to Create a Wall-Mounted Space-Saving Diaper Organizer
- How to Childproof Houseplants (Pet-proof too!)
- 5 Best Resources to Help You Develop a Fire Escape Plan
Want to be the first to know about new posts? Be sure to follow me on Pinterest, Facebook, Instagram or Twitter of even Etsy! Or better yet… Subscribe below!
My monthly (admittedly sometimes more, sometimes less….) emails are like receiving a unexpected letter from an old friend WITHOUT needing to put on your slippers and walk out to your mailbox…. See? I got ya, my friend!)
[Note: My posts are proudly connected to these amazing link parties full of DIY ideas and inspiration!]