Last Updated on March 20, 2023
Is your baby’s nursery a bit too small? Mine is.
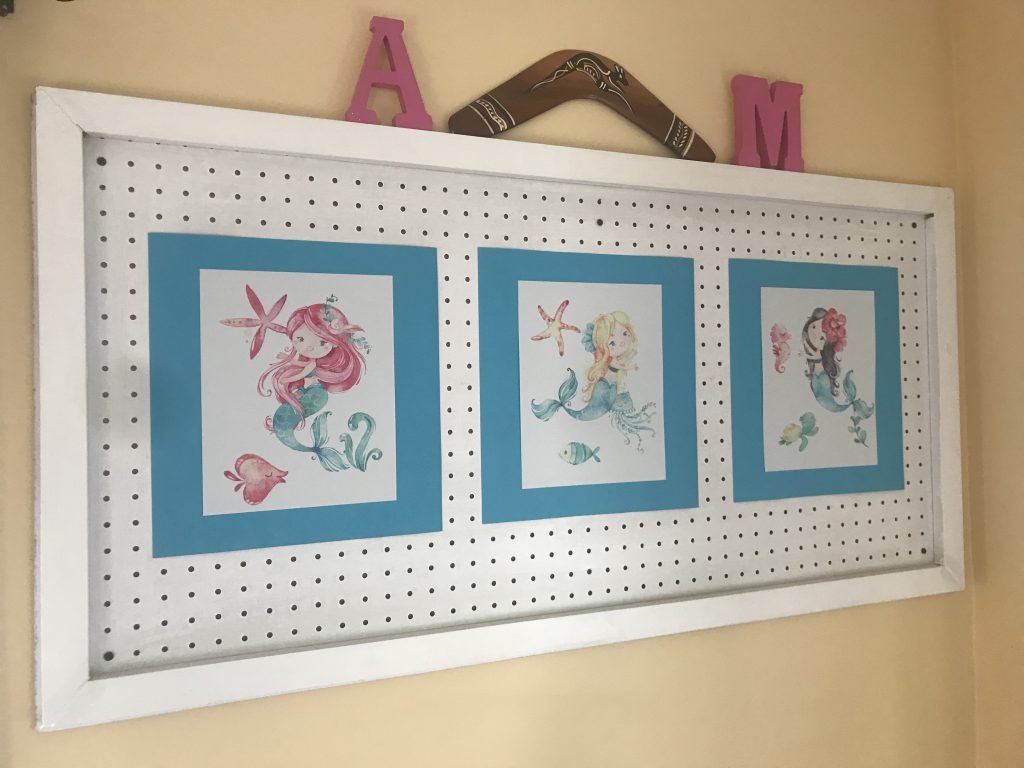
(As an update, my twins are now 3 years old! Scroll to the bottom of this post to see how we converted the changing station pegboard into their updated mermaid-inspired toddler bedroom!)
Are you confused and frustrated over where everything is going to fit – crib, rocker, bureau, blankets, clothes, diapers? Yup, me too. I mean, how can someone so small need sooo many things??? Don’t know why, but they just do.
So we needed to use every inch of space to our advantage when setting up our nursery, including this trick for using vertical wall space as a diaper organizer. And what’s great about this diaper organizer? It MORE than just holds diapers and wipes. It can hold tissues, lotions, anti-bacterial soap, thermometers, medicine, anything that you can think of for baby’s needs.
Intrigued? Read on!
Why am I Making a Pegboard Diaper Station?
We live in a small-ish (1,700 square foot) house. It’s about 100-years old. A beautiful Arts & Crafts style home, but a bit lacking in space for 5 people. Short on room space as well as closet space.
When we were pregnant with our twin girls (Surprise! Yikes!) we needed to fit them in a bedroom about 8 ft by 10 ft. Not much bigger than my office cube at work. Tiny. Let me re-phrase. Minuscule.
I love my old house, but its small rooms and minuscule closets don’t meet today’s needs. So when we converted the home office into a nursery we had to be extremely creative and space-conscious.
We already have one child, but her room was much spacious (about 12 ft x 14ft). When it came to a changing table, we opted against the traditional stand-alone. Instead we attached a contoured vinyl-coated changing pad to the top of her dresser.
An added plus was that the bureau was long enough to also hold a diaper caddy next. Or rather, it worked well when she was an infant. Once Emma was a toddler, she would fight us during diaper changes to get to the caddy and play with all its contents. Diapers and wipes everywhere!!!
Luckily, her room was large enough that we could move the diaper caddy off the bureau. Problem solved!
But that is not the case for the twin’s room. We had a bureau that fit perfectly snug in a corner of that tiny room. But there was no space on either side for cute nursery side tables. There is a cast-iron radiator on one side. Obviously can’t move that – the twins need heat, right? And on the other side, a closet door. Sure you could make an argument that we could remove the door, but where would I hide all the mess? (Kidding! No, I take that back. I’m not kidding. Closets contain messes.)
As I stood in front of the dresser pondering my dilemma, the solution was staring right back at me. The freshly-painted wall literally in front of my face. Where I did have space? Up! On the wall!!!
But how exactly would I store diapers and other supplies against the wall?
A Pinterest search found the perfect solution. (Isn’t Pinterest great?) We could build a space-saving diaper organizer out of pegboard and add shelves.
Brilliant!
A few other DIYers had already created similar organizers. I especially liked Taryn Whiteaker’s DIY diaper station. It had a clean crisp look. Plus she made it for only a few dollars…. How could I go wrong? Thank you Taryn for the inspiration! This pegboard diaper organizer is super easy to create, and can be done (including drying time) within one day
Materials Needed for Diaper Organizer
- Tape measure
- White pegboard (2′ x 4′) – 1 piece from Home Depot
- White wood trim – the style and width is up to you. Just make sure that you have enough length to frame the pegboard.
- Wood Glue (I used Elmers)
- Screws ( about a dozen)
- ClosetMaid 2-Tier Racks (2) – I bought mine at Home Depot, but Amazon has this as well. The assembled size is 10.5″ H x 11.375″ W x 5″ D. On Amazon they have a 3-tier rack (18.52″ H x 18.75″ W x 5″ D) which might be interesting to try.
- Electric drill
- Level
Instructions for Diaper Organizer:
- Measure the length of the bureau.
- As a side note, Consumer Reports recommends bureau height around 36-43 inches tall, so that you can stand comfortably with your baby within easy reach.
- Cut the length of pegboard two inches shorter than the length of the bureau. Cut the width of the pegboard using your judgment.
- Using the measurements of the pegboard, measure and miter the trim pieces.
- Using Elmer’s Wood Glue, glue the trim onto the pegboard to make a frame.
- Hang the framed pegboard on the wall over the bureau using an electric drill and screws. Use screws at each of the four corners as well as two additional in the middle
- Position the ClosetMaid 2 Tier Racks where you can easily get supplies and screw through a hole in the pegboard right into the wall. Attaching the shelves right into the wall provides an extra level of security, especially with our old plaster walls. Considering these shelves are over my twins’ changing table, I’m feel more confident that the shelves won’t pop out and fall down as I’m changing diapers.
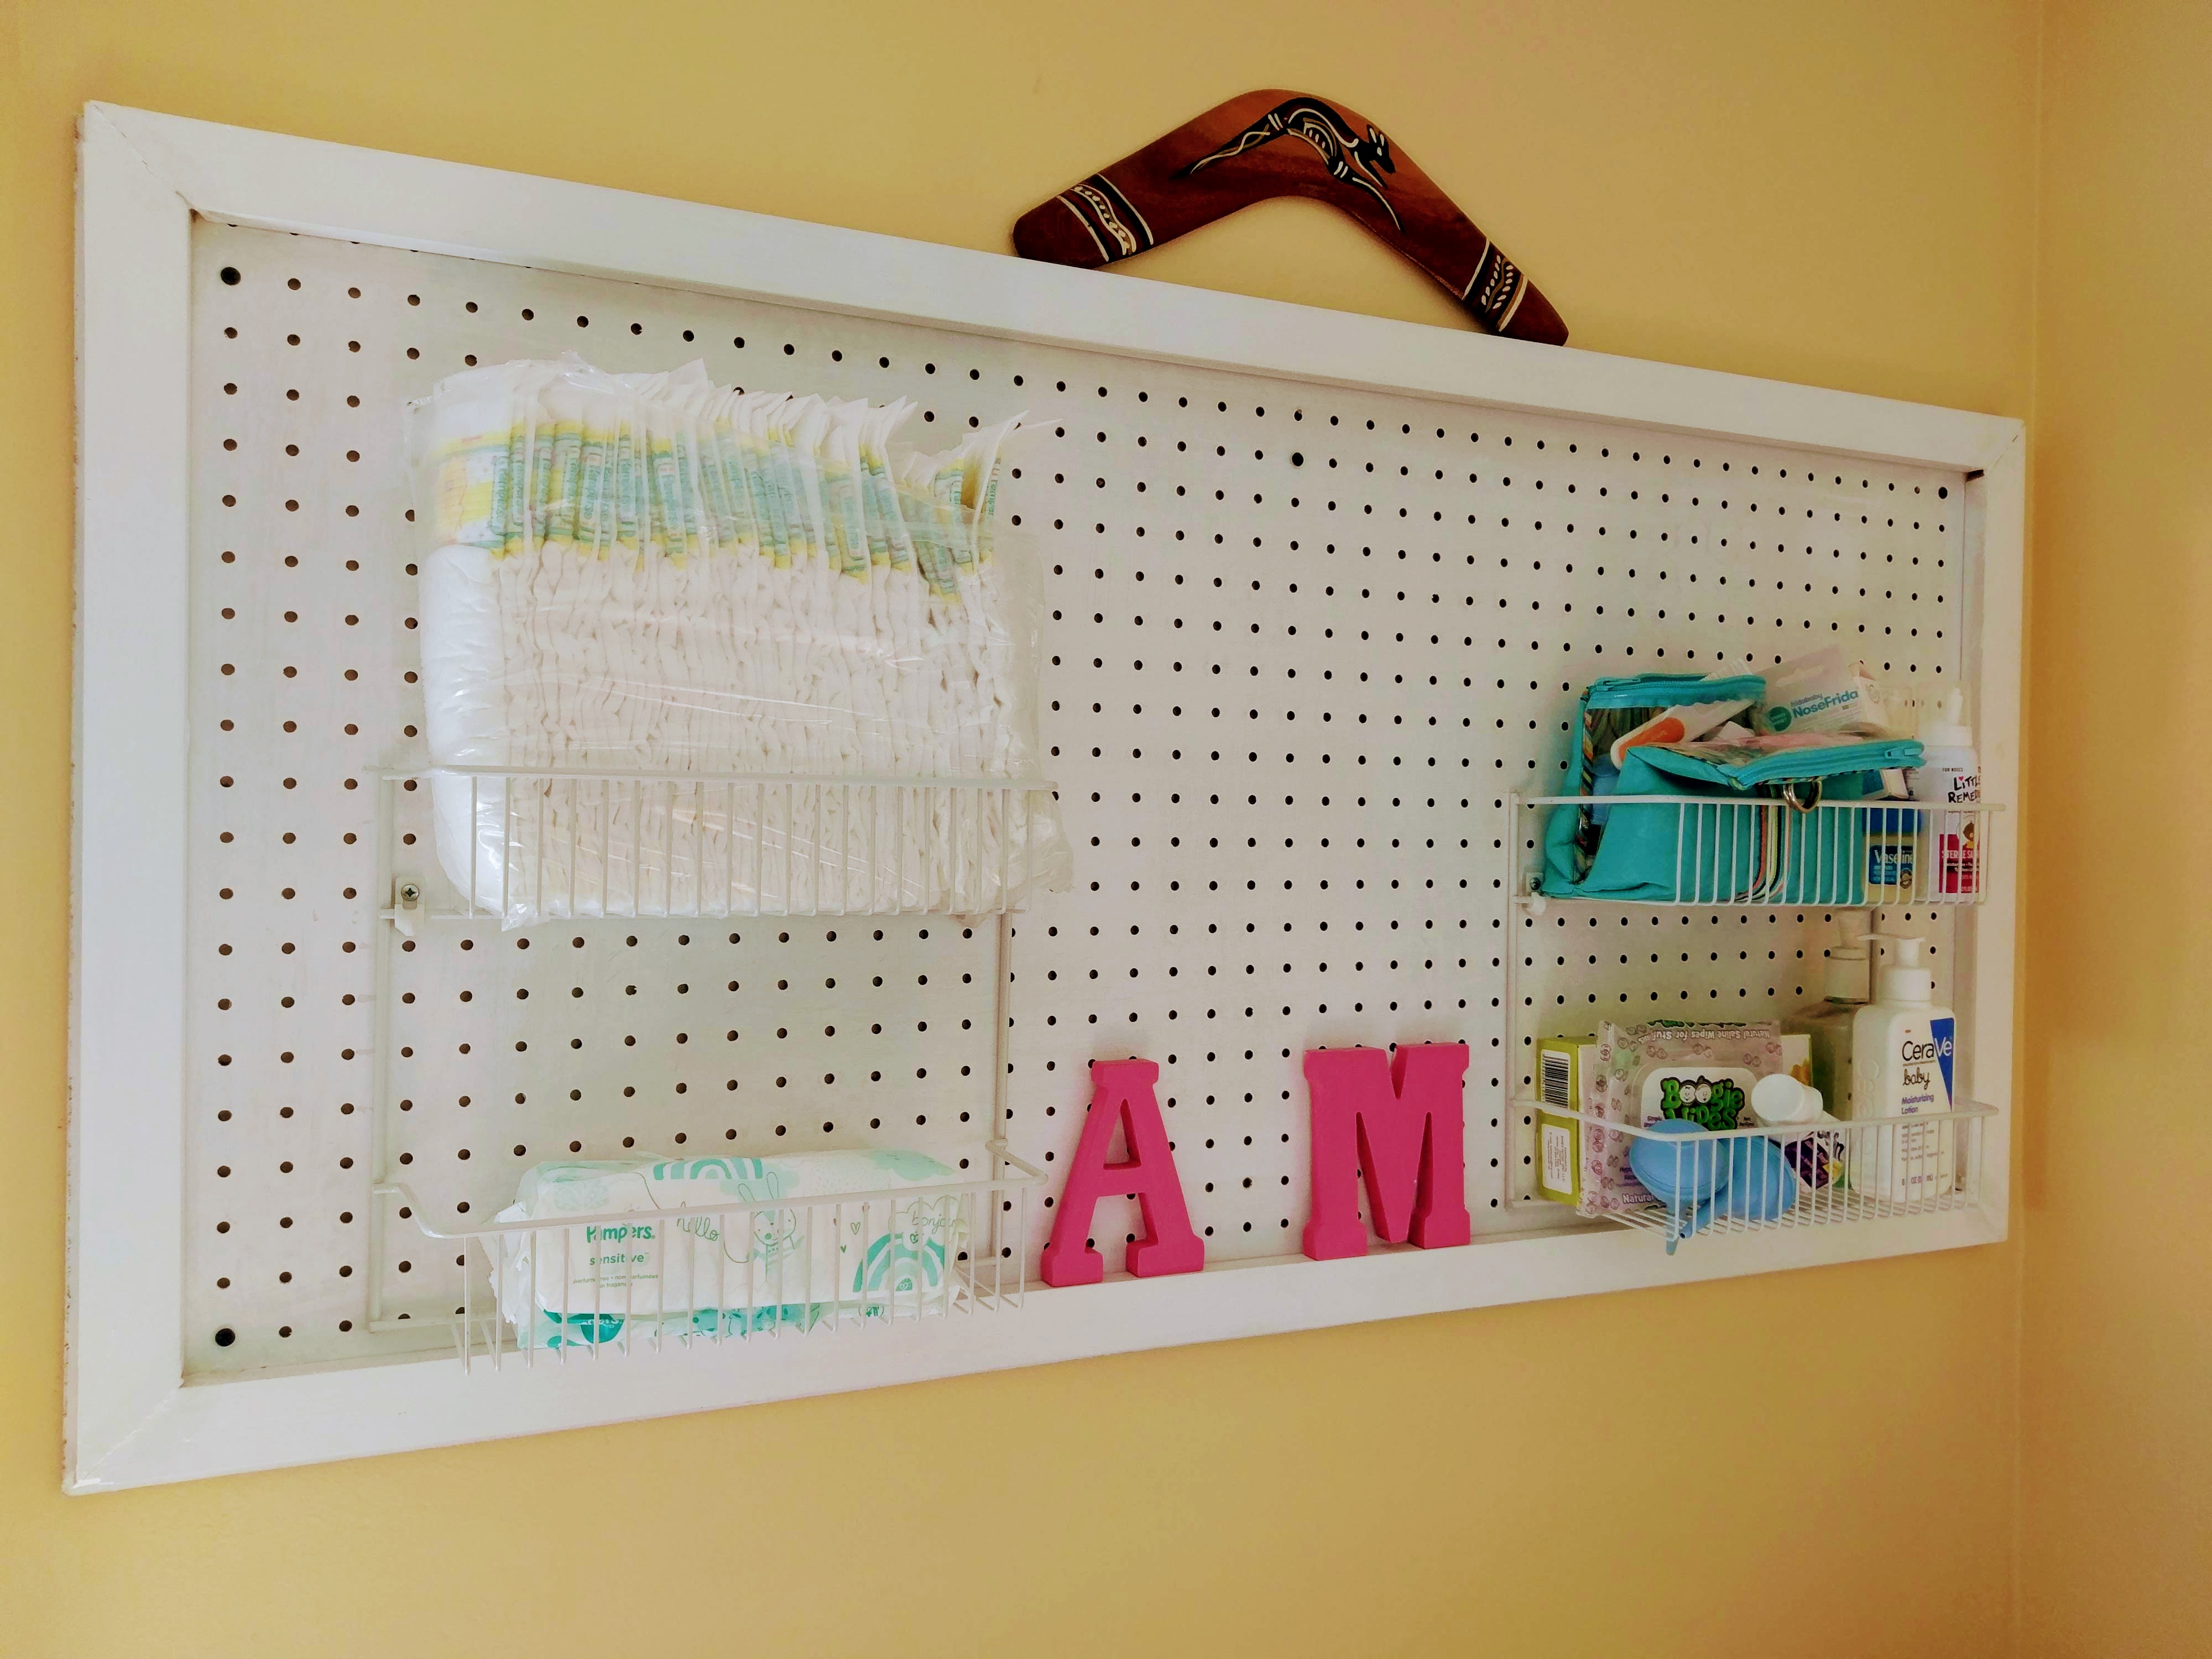
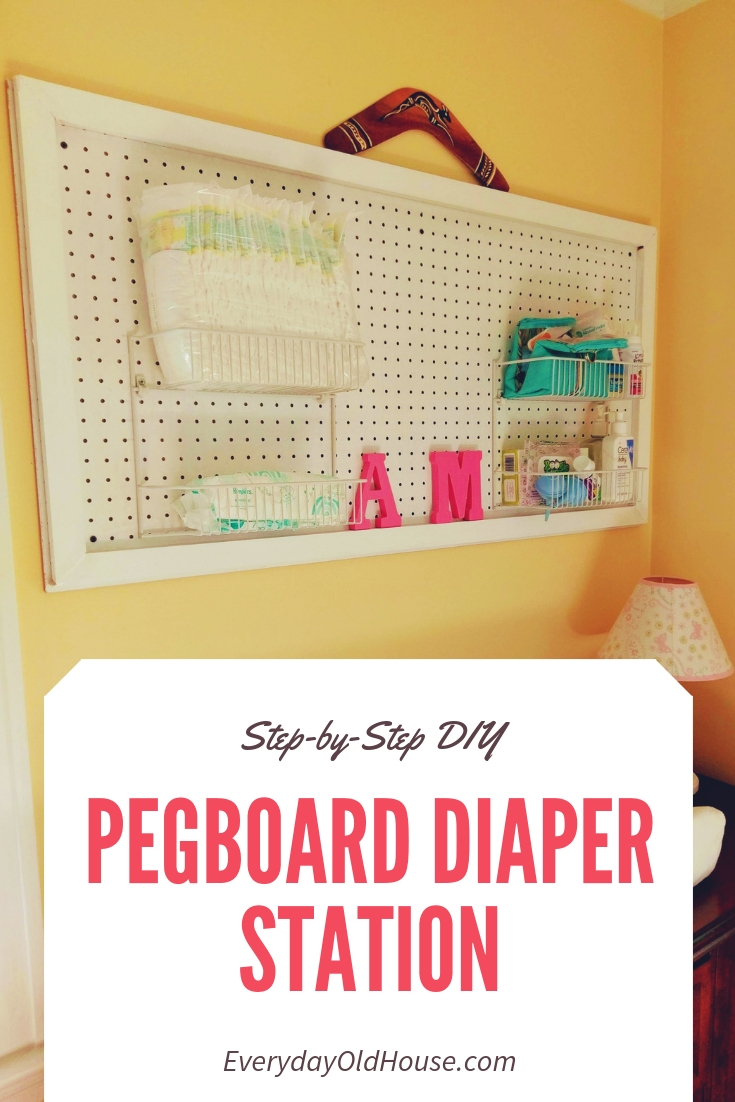
Here’s a close-up with the two shelves of the pegboard diaper organizer, which provides a lot of storage. One shelving unit fits a stack of diapers and wipes, and the other unit holds all the remaining accessories. With my oldest, I used to cram a lot of into the diaper caddy and now I have room to spare. As you can see, the center of the pegboard is empty – I’m looking for a cute bucket which will hold a few soft toys to occupy the girls while I change their diapers.
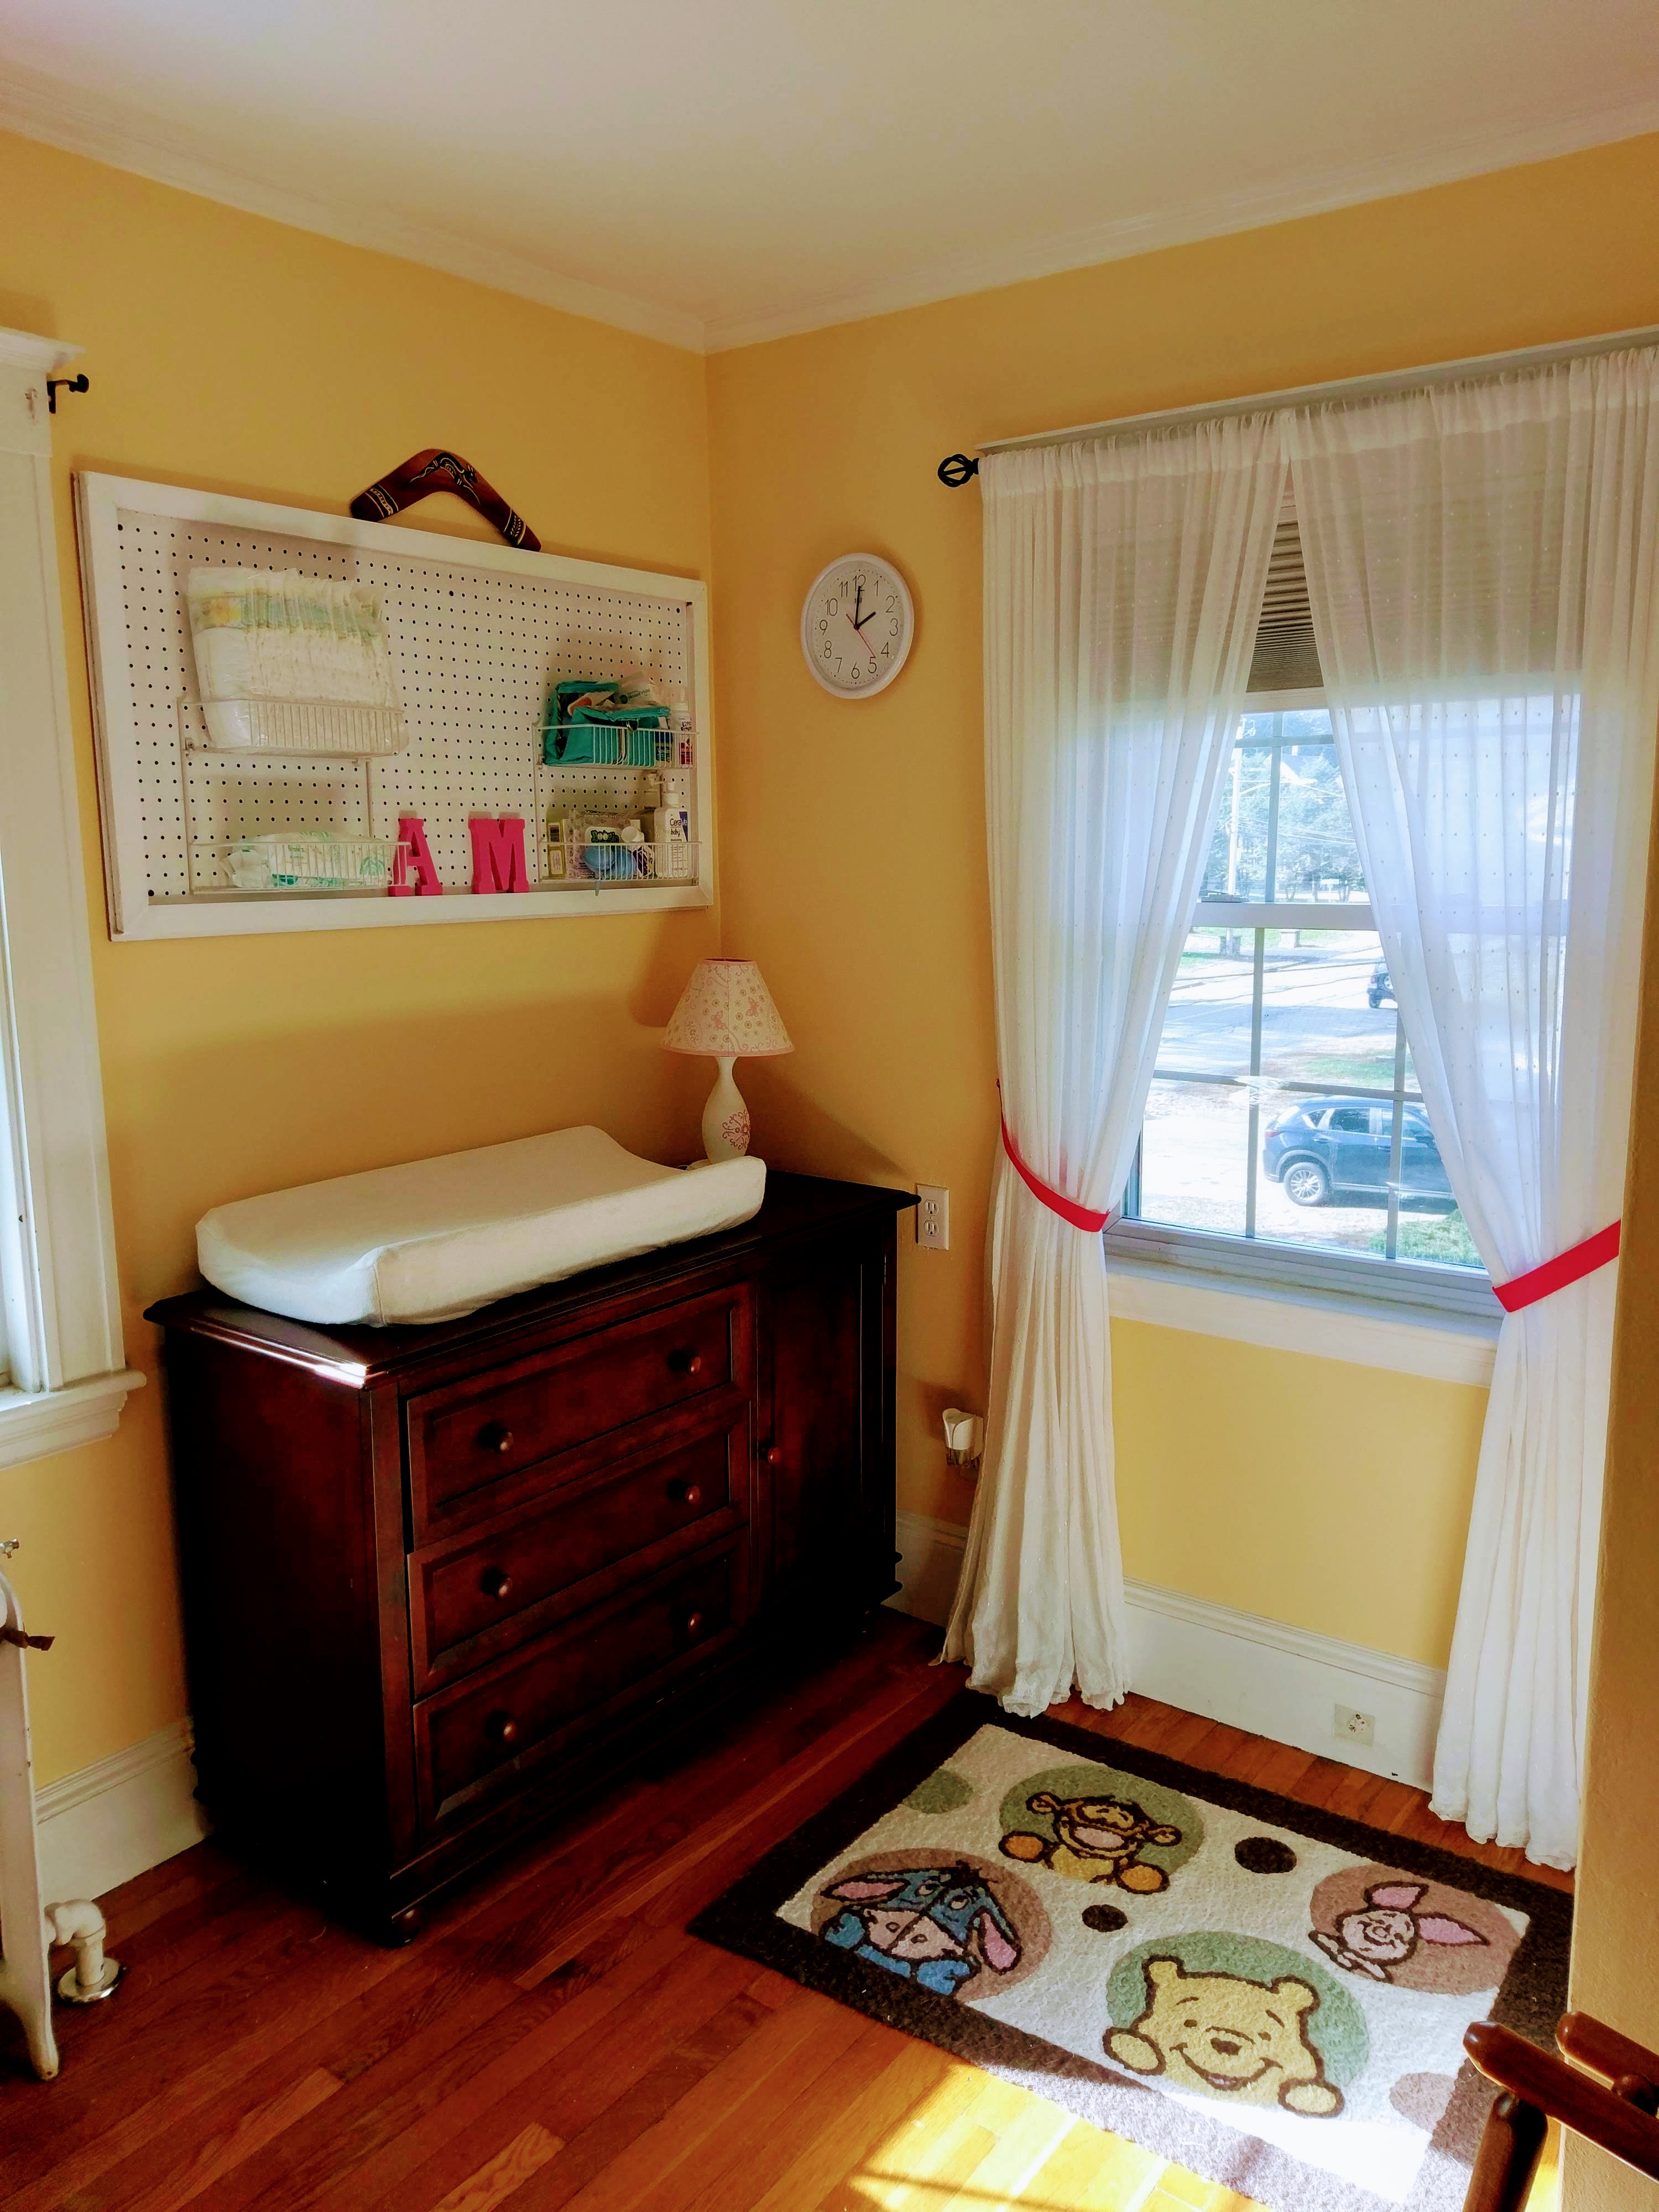
Here’s a pic of the diaper holder in related to the rest of the room. It’s not a big space!
Taryn also inspired using the first letter of the twins names (A for Audrey and M for Madison) to decorate. I picked those up, as well as pink paint, at Michael’s Crafts. We had our oldest paint the letters. We were a bit concerned about her transition from being an only child to suddenly being 1 of 3 children, so we included her in setting up the nursery as much as possible. Plus she is 5 years old and learning her letters, so having her paint and turning that into a lesson on how to spell her sisters’ names was an added bonus!
The Best Part of This Diaper Organizer?
Why do I like this wall-mounted space-saving diaper organizer so much?
- Easy to build: I have two left thumbs, so if I can create it, so can you. (ok, ok, I admit my husband helped with the cutting…)
- Dimensions: As per the instructions below, you can cut the pegboard and frame to fit over any size dresser.
- Tailored Design: You can tailor this project to match any nursery décor. Change the pegboard color, add a different style or size frame, etc. You could paint the pegboard one color, the frame another. You could stencil the frame. Put your own DIY touch on this organizer.
- Versatile: The racks can be moved or changed out for a variety of hooks, buckets or shelves. Heck, you could make these for other rooms and other uses. Uh, hello, mail and family organizer in the kitchen anyone????
- Long lasting: I envision this pegboard growing with my girls. With a few tweaks, I envision it as an organizer for toys, barrettes, hats and gloves, homework, etc…
Have you built a pegboard diaper station? Did you enjoy it? Post a pic in the comments!
Update – Converted to Toddler Bedroom!
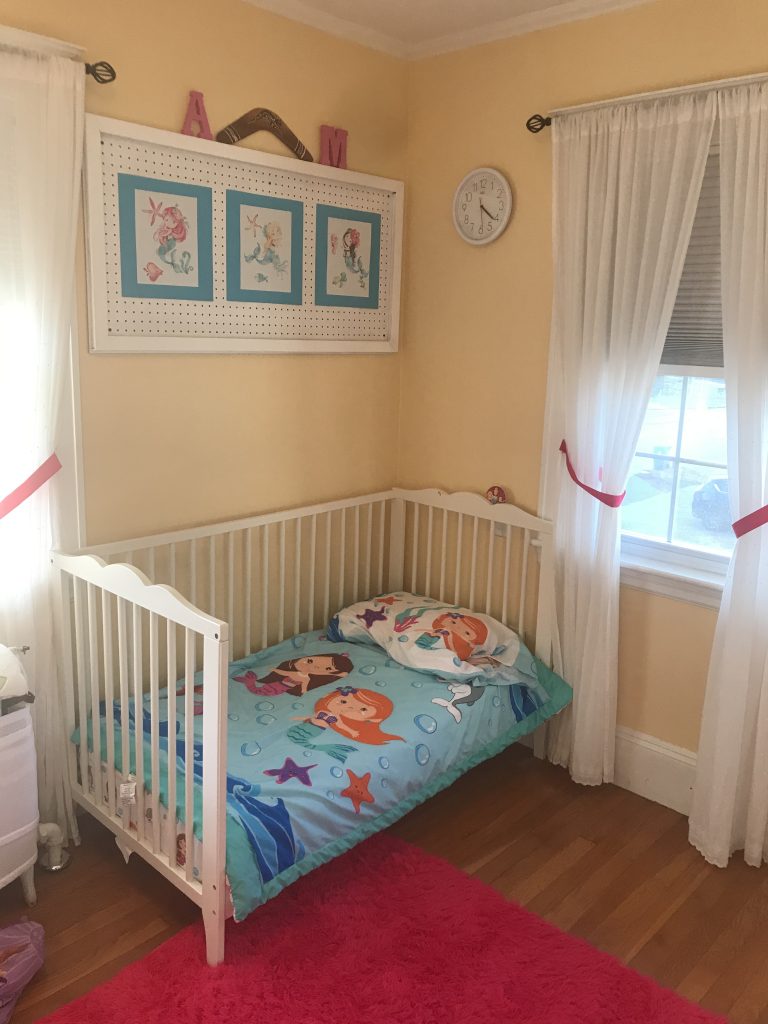
My twin girls are now 3 years old! Time flies. As babies, the girls slept in two mini-cribs in one corner of the room, with the changing table and pegboard changing station in the other corner.
But then the girls outgrew their mini-cribs and we transitioned them to 2 toddler beds. We needed to move the bureau with the changing station out of the room. And we needed to come up with a solution for the pegboard.
At first, I put an assortment of cute little stuffed animals on the wire shelves. But the girls were only standing on their toddler beds and reaching for the shelves. So we removed them and put them in storage until they are a bit older and won’t hurt them selves trying to reach them
Instead, we found mermaid-inspired canvas prints, double-taped them to 12 inch x 12 inch cardstock, and then double-taped them to the pegboard.
Want to be the first to know about new posts? Be sure to follow me on Pinterest, Facebook, Instagram or Twitter of even Etsy! Or better yet… Subscribe below!
My monthly (admittedly sometimes more, sometimes less….) emails are like receiving a unexpected letter from an old friend WITHOUT needing to put on your slippers and walk out to your mailbox…. See? I got ya, my friend!)
[Note: My posts are proudly connected to these amazing link parties full of DIY ideas and inspiration!]
Related Posts