Last Updated on January 25, 2024
Here’s what I learned recently – success in every vegetable garden takes more than sufficient water and sunlight. It also takes good quality soil. Soil health determines whether plants thrive or die, and whether you grow a bountiful harvest. The best way to determine your vegetable garden bed’s health? A soil test kit. Last year, I had my soil tested for the first time, and was surprised at what I learned by soil testing my veggie garden. Here’s my story.
Backstory
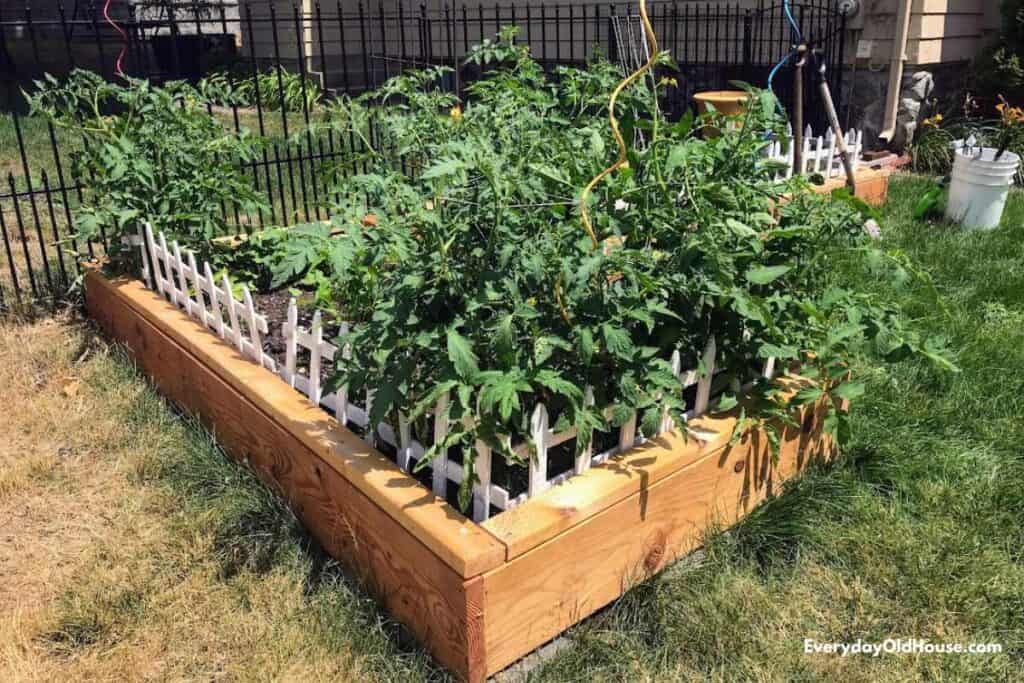
Two years ago, my husband built me a new set of raised garden beds for my vegetables. We bought raised bed garden soil and amended it with a variety of compost from the big box improvement store.
And my vegetable garden, for the most part, was successful. Abundant cucumbers, bushy green beans, and juicy tomatoes.
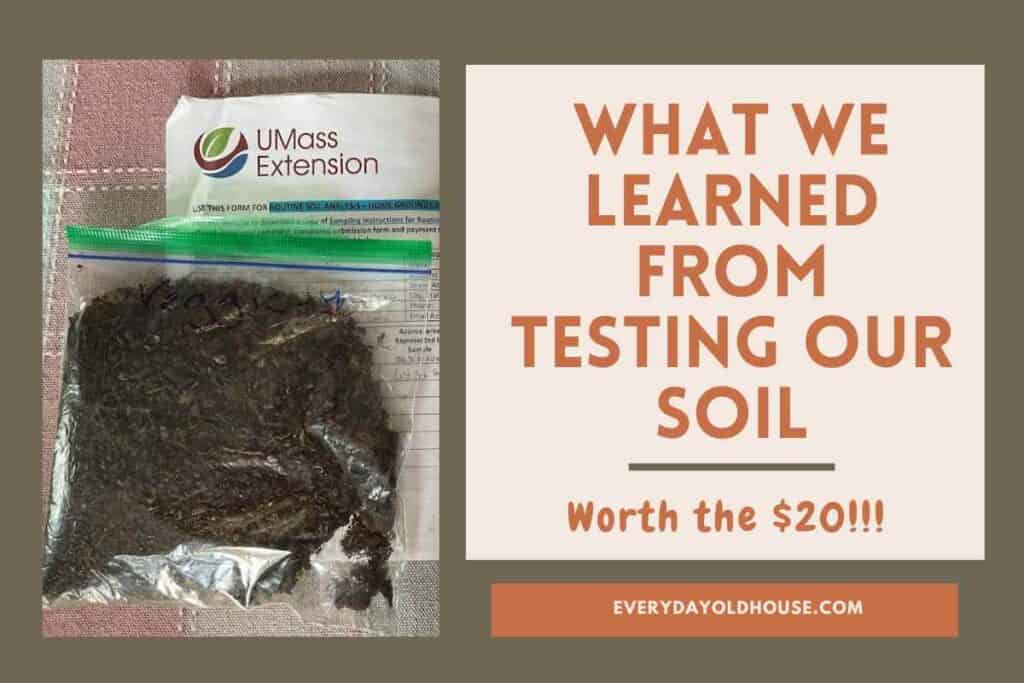
But there were a few vegetables that grew but didn’t produce fruit, like peppers. I wondered if there was something wrong with the raised bed soil – a deficiency – and concluded that I needed more fertilizer. After doing some research online, I came across my state college’s cooperative extension school offering soil testing for only $20. Hmmm…
I decided to give it a go and sent in a soil sample. And I’m so glad I did.
As you’ll read later, soil testing my veggie garden showed me that I had OVER-fertilized the previous year. And over-fertilization can have the same effect on compromising vegetable plant health.
If I had gone ahead and applied more compost instead of testing, I probably would have made matters worse.
Why Should I Test My Soil?
Now I know that soil testing my veggie garden is a crucial aspect of a successful garden. In simple terms, without healthy soil, it is very difficult to have a successful garden.
A soil test kit serves as your garden’s health check, offering insights into its condition and requirements. Consider it a “taste test” of what the plants in your vegetable garden need to not only survive, but to thrive.
Once you have details on your soil quality, you can:
- Diagnose plant issues
- Make informed decision on type/ amount of fertilizer/ amendments
- Improve plant growth and increase harvest! (our ultimate goal, right?)
Where Do I Buy a Soil Test Kit?
There are two main ways to test soil: 1. homes test kits and 2. mail-in tests.
Home Test Kits
These DIY soil test kits are easily available online or at local gardening centers. Kits range in complexity as well as price. Some kits are simple ph indicator strips (remember middle school science anyone?) while others are capable of comprehensive chemical analyses.
Mail-in Tests
This method involves packing a soil sample and shipping it off to a soil lab. Most state universities in the USA have local cooperative extension offices that provide excellent, affordable soil testing. Here’s a list of the states with cooperative offices with soil testing labs.
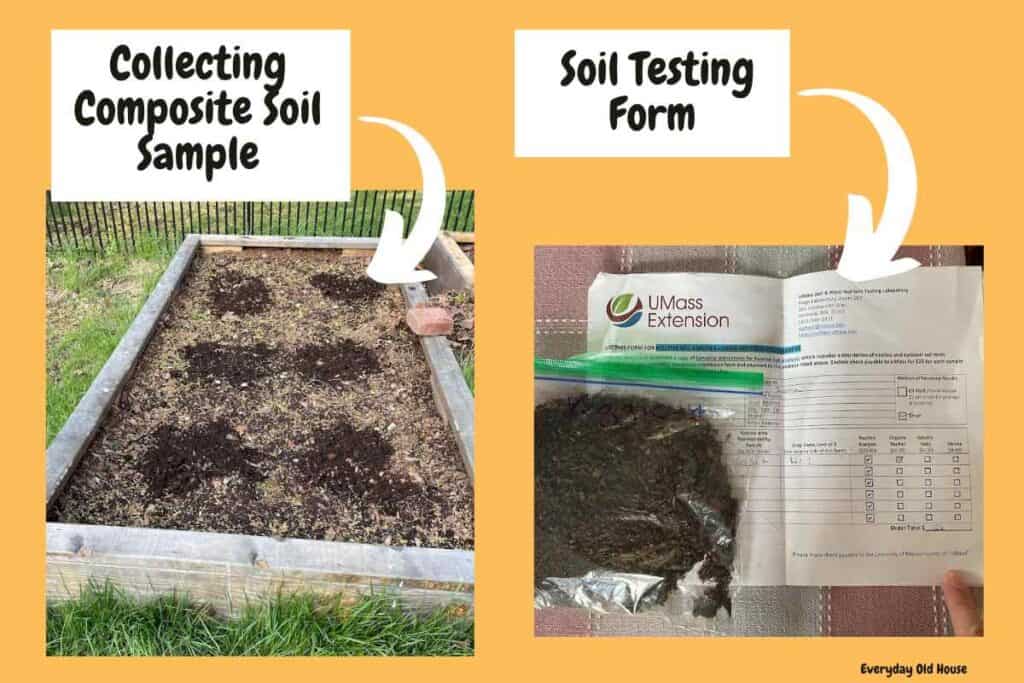
My state’s soil lab provided detained instructions on how to collect and send a soil sample. It involved collecting a composite sample, drying it out, and completing an form with various information, such as square feet of garden.
What Will I Learn from a Soil Test?
Soil test kits vary, so you will get limited or comprehensive results depending on which test you have.
With mail-in soil test kits, you will be emailed or snail-mailed a report by soil testing labs. This report should contain 1. comprehensive breakdown of the characteristics of your soil sample and 2. suggestion on how to fix any issues, especially fertilizer recommendations.
A good soil test kit will evaluate a soil sample for the following three things so that you can make the proper improvements to your garden and optimize garden growth.
- Acidity (pH) levels
- Nutrient content
Acidity Level (pH)
This is the measurement of the acidity or alkainity (aka basic) of your soil sample. No need to get too deep in the weeds. You just need to understand that the right soil pH levels is essential for nutrition uptake. Plants can’t take up and absorb the proper nutrients from the soil if the pH level is off.
If the soil sample pH is too high, the plants can’t absorb many nutrients (like phosphorus and iron). If your soil sample pH is too low, it can be toxic to plants. It’s all very Goldilocks and the 3 Bears – the soil pH needs it be just right.
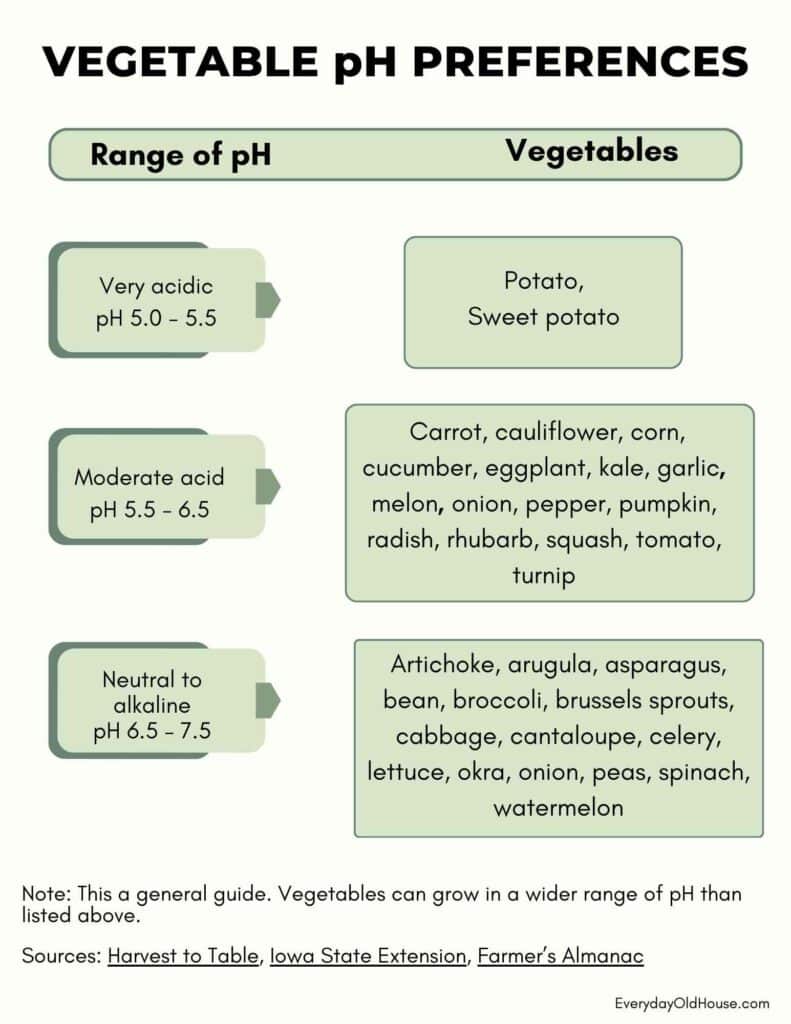
Acidity levels are measured on a scale of 1 to 14 with 7 being neutral. Most vegetables grow well in a pH range of 6.5 to just above 7.0.
A general rule of thumb, according to OSU Extension, soils in climates with high rainfall (East of the Mississippi River and Pacific Northwest — tend to be acidic. West of the Mississippi, where less rainfall occurs, soils are more alkaline.
As you can see from the chart below compiled from various sources, some vegetables, like eggplant, potatoes, and rhubarb will tolerate soil with a lower pH, while cauliflower, broccoli, arugula can handle more alkaline soils. Note that this chart is a very general guide for beginners.
Nutrients
I won’t get all science-y on you, but to thrive, plants need 14 essential nutrients from soil. These essential nutrients are grouped into these 3 categories:
- Primary Macronutrients: Nitrogen, phosphorus, and potassium. They are considered primary since they are needed in larger amounts.
- Secondary Macronutrients: Magnesium, sulfur, and calcium. Still important, just not in as huge amount
- Micronutrients: The remaining 8 nutrients, such as iron and copper, are necessary in much smaller amounts.
For this post, I don’t think it’s necessary to get into micronutrients. But I feel it’s important to elaborate on the macronutrients and how they affect vegetable soil growth. Here’s some info I gathered:
Nitrogen (N) – Nitrogen is essential for chlorophyll formation and therefore, photosynthesis. When there’s a shortage of nitrogen, leaves wilt and lose their color, which leads to dropping off the stem, typically starting at the bottom of the plant. Too much nitrogen causes an abundance of leaves and less fruit.
Phosphorus (P) – Phosphorus helps in mineral absorption, strengthens stems, and boosts disease resistance. A deficiency leads to weak roots and reduced fruit yield. Be cautious about excessive phosphorus, as it could impact surface water quality.
Potassium (K) – Potassium regulates water flow in plant cells and is crucial for flowering, fruiting, and disease resistance. A lack of potassium results in weak stems, stunted growth, as well as making them more vulnerable to diseases.
Calcium (Ca) – Calcium is essential for plant cell walls and membranes (whoa! Just had a 6th grade science flashback to cell biology!). Insufficient calcium in the soil can lead to problems such as leaf deformation, poor fruit quality (blossom-end rot, which we discuss below), and increased susceptibility to diseases.
Magnesium (Mg) – Magnesium works with phosphorus to optimize plant metabolism. And is a component of chlorophyll, essential for photosynthesis. Insufficient magnesium in the soil can result in poor plant growth and yellowing of older leaves (apparently called chlorosis).
Sulfur (S) – Sulfur helps regulate photosynthesis and is involved in nitrogen fixation (which sounds like an important process, but I’m not 100% what that means….) Insufficient sulfur in the soil can lead to decreased chlorophyll production, resulting in yellowing of leaves (chlorosis).
How Do I Interpret Soil Test Results?
Now you have your garden soil test results, what’s next? Most soil testing labs will provide guidance on how to interpret the soil test results with recommended next steps.
If you’re still not sure how to decode the soil’s report card, consider joining your local Garden Club or even regional Facebook garden club page. They can provide resources and help answer your questions.
What I Learned from My Soil Test
OH MY GOSH!!!! I wish I had tested my soil years ago when I first started vegetable gardening. Before receiving my soil sample results, my expectation was that my soil was deficient in something, and that we would have to add fertilizer or a particular amendment to fix.
But soil testing my veggie garden told me something very different! I wasn’t deficient – I had TOO much nutrients! Yikes!
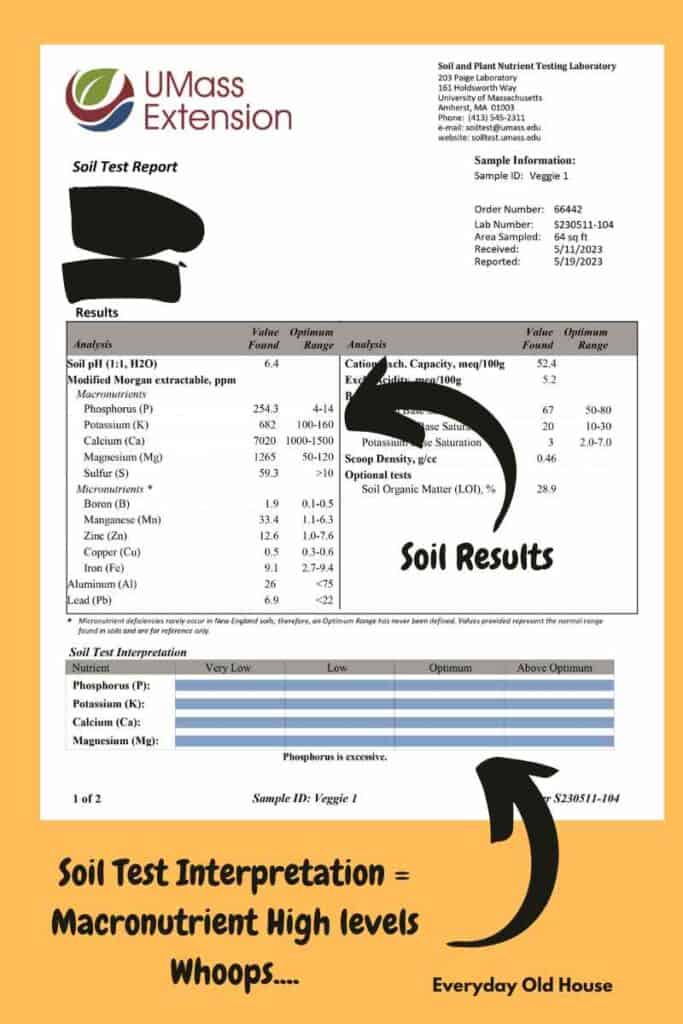
Soil Test Results
Here’s my results…..
Acidity Level
My soil sample pH was slightly acidic (6.4), but that’s common for New England soils.
Macronutrients
The macronutrients in my vegetable garden soil were through the roof! The phosphorus concentration was around 200x higher than optimum range, potassium was about 6x higher, calcium was 7x higher, and magnesium was 10x times higher.
You probably didn’t notice, but did you see that the report didn’t mention anything about a particular primary macronutrient? Yup – NITROGEN!
Soil nitrogen levels will NOT be reported on soil tests. Why? Soil nitrogen levels can significantly fluctuate over short time periods due to weather, so it’s only useful for predicting immediate fertilizer needs.
Micronutrients
Three of the 5 micronutrients tested were above range – boron, manganese, and zinc. Copper and iron were in line.
Remaining Tests
As you can see from the test result image, the soil in my vegetable garden was also tested for other features as well, like lead and base saturation, scoop density, etc…. For this post I’m sticking to just soil pH and nutrients. Those results I’ll discuss in a future post.
Soil Test Interpretation
The Soil Test Interpretation at the bottom of the first page was very clear: the amount of phosphorus in my vegetable garden soil was excessive!
Why was that? It took me a minute or two to have my a-HA! moment. The previous year we had a problem with our tomatoes. Our tomatoes grew with huge, ugly brown spots on the bottom. Ick!

Turned out to be tomato blossom-end rot, which occurs from lack of calcium uptake (sometimes related to lack of watering. Whoops.). I found a potential solution on YouTube – addition of lime.
BUT I know see that by adding lime meant I ALSO added phosphorus. So, it seems that based on the skyrocket-high phosphorus levels in my soil, apparently I over did it on the lime application..
Double whoops.
But in my defense, the tomatoes that grew after lime application (with more diligent watering) didn’t present blossom-end rot and were delicious!!
Fertilizer Recommendations
UMass concluded that since my phosphorus and potassium were above optimum (to put it nicely), I should only apply a source of nitrogen this year. They recommended dried blood (aka blood meal) or urea applied twice during the growing season – early spring and mid-June.
What Did I Learn from Soil Testing My Veggie Garden?
I learned SO much from this experience. I’ve learned about soil quality, and the importance of having essential nutrients, especially the “big 3” balanced in my garden.
Soil testing gave me an insight into what healthy soil should look like. And that mine, well, my soil sample demonstrated that my garden soil was a bit on steroids with all the excess nutrients. And while I love me some big biceps, in the case of my vegetable garden, it wasn’t ideal.
Understanding my garden soil helps me make informed decisions on future application of fertilizer and soil amendments. Meaning, some years I might not even need anything. Some years I might.
And maybe it’s coincidence, and maybe its not BUT last year, none of my peppers grew. And this year after two applications of blood meal, drum roll please…… green peppers. And large ones at that!!
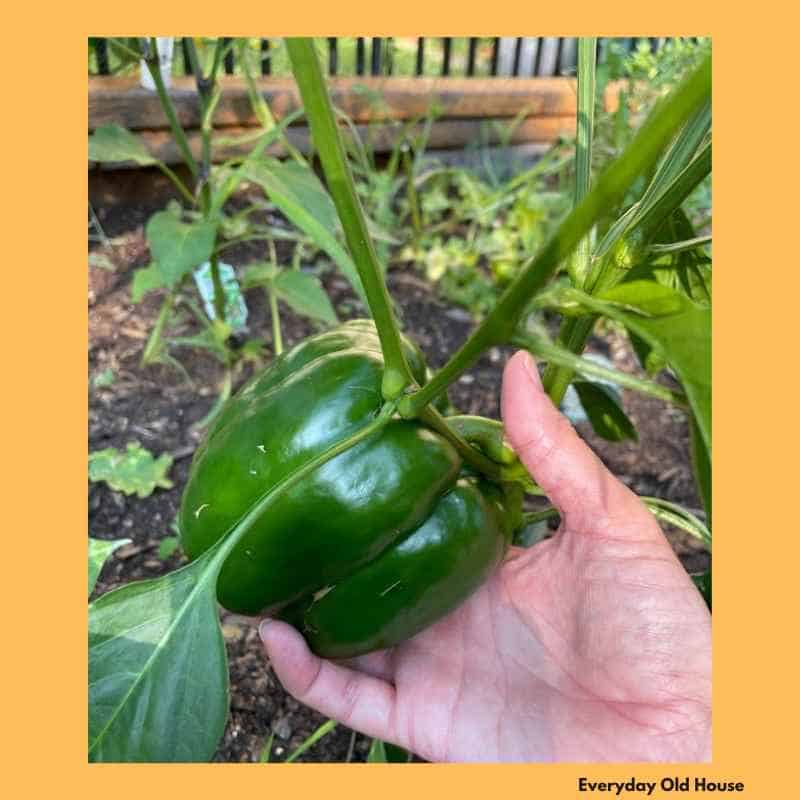
Does this mean my garden is cured? Nah….I’m confident that I have MANY growing seasons before those macronutrients lower to optimal range. BUT this pepper gives me hope that I’m moving in the right direction.
I also learned that at the beginning of every gardening season, I should probably soil testing my veggie garden every year. Now that I have a baseline, I’m excited to test again next spring and see if there are any changes. Hopefully the application of dried blood will help, and I will see reduced phosphorus and potassium levels.
We shall have to wait and see. I’ll be sure to report back!
Soil Texture
After doing all this research, I also learned that understanding your soil texture can also help create a successful vegetable garden. Soil texture affects how well soil retains nutrients, which affects nutrient plant uptake.
In general, soil type can be categorized as:
- Sandy soil – Water flows through quickly, not ideal for vegetable plants with a high water-need
- Loamy soil –Not too sandy, not too clay. It’s the perfect middle ground for a variety of plants.
- Clay soil –It holds onto water longer, so plants who don’t like a lot of water aren’t a good option.
There are several ways to determine soil texture, from simple DIY methods to sending to a soil sample to a soil lab. Once you’ve determined, it will help me better understand how much and when to water. But that’s a post for another time….
Related Posts
Want to be the first to know about new posts? Be sure to follow me on Pinterest, Facebook, Instagram or Twitter of even Etsy! Or better yet… Subscribe below!
My monthly (admittedly sometimes more, sometimes less….) emails are like receiving a unexpected letter from an old friend WITHOUT needing to put on your slippers and walk out to your mailbox…. See? I got ya, my friend!)
[Note: My posts are proudly connected to these amazing link parties full of DIY ideas and inspiration!]