Last Updated on March 22, 2024
I’m a sucker for old furniture abandoned on the side of the road. It’s so hard not to grab every sturdy abandoned piece I encounter, begging me to give it a new lease on life.
But I’m not an expert at DIY vintage table restoration (or any type of antique furniture for that matter). So I have to be picky on what I drag back home to ensure I’m not biting off more than I can chew.

And few months ago, I found an easy and simple table restoration project. One afternoon while driving on my way to the grocery store, I saw a side table on a neighbor’s sidewalk. It was standing right next to the rubbish bins awaiting the next day’s trash pickup.
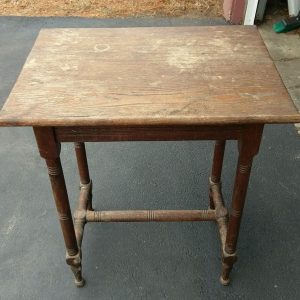
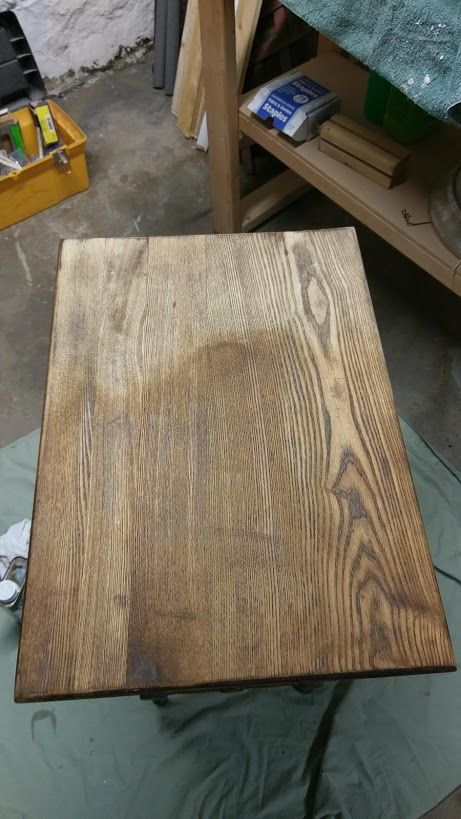
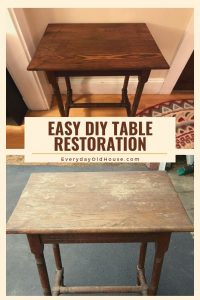
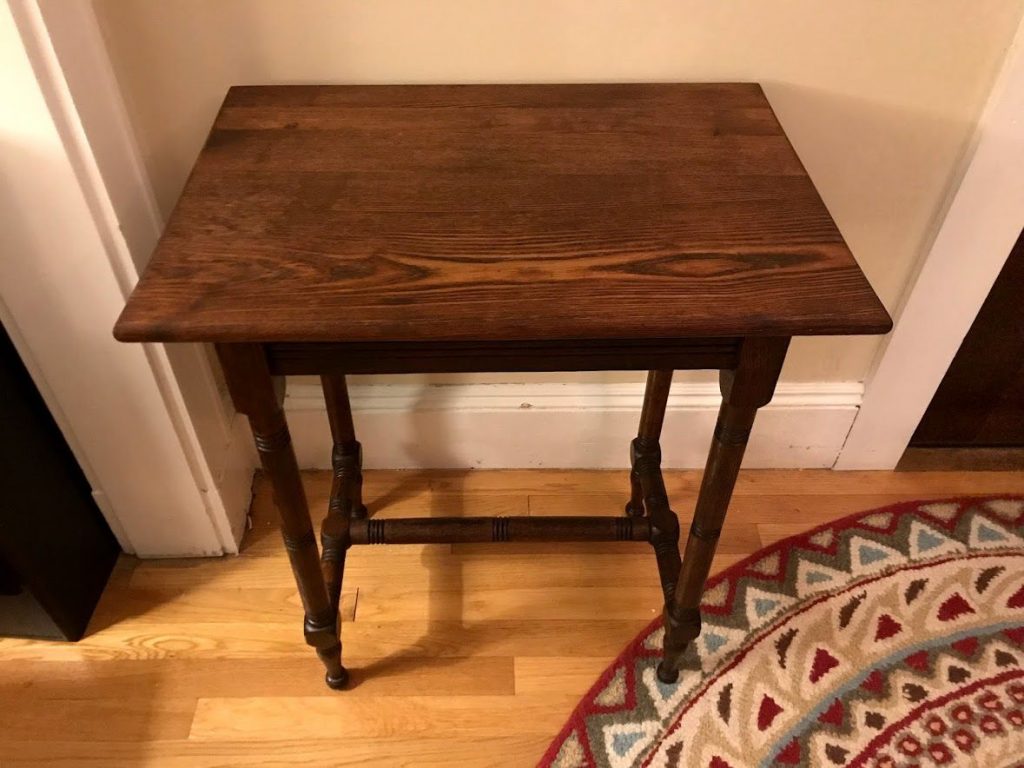
The table legs looked sturdy and in good shape, but the table top looked a bit worse for the wear. Like it had gone a few rounds with Rocky Balboa. And didn’t win….
It was worn all the way down to bare wood, several scratches and had a decent-sized watermark.
It wasn’t sure how to exactly do it, but my gut told me that this table could easily be brought back to its former glory. I just had to figure out how to do it.
So I stuffed this cute side table into the back of my car’s hatchback, pulled a U-turn, dropped the table off in my driveway and zoomed off to the supermarket.
[BTW – Click here to see the 7 best places to find free antique furniture to restore].
This post contains affiliate links, including but not limited to, Amazon Associates. As such, I earn from qualifying purchases. Full disclosure located here.
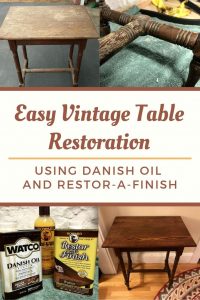
DIY Vintage Table Restoration using Danish Oil and Restor-A-Finish
To date, I’ve restored only a handful of wood pieces, so I wasn’t quite sure where to start. It was a case of knowing that there was probably an easy way to fix this table, but not knowing exactly what that way was….
So I posted a picture of this antique side table on Instagram to engage the community for information, restoration ideas and inspiration. Help with a DIY vintage table restoration!!
And I received some great leads that put me on the path to finding a simple way to restore table. To those on Instagram who took the time to respond – THANK YOU!!!
Isn’t it great how a on-line community on like-minded folks congregate on social media like Instagram or Facebook and support each other in their endeavors by providing knowledge, support and motivation?
And because of them, this vintage wooden side table is back to its former glory and absolutely beautiful!
As I mentioned above, the table top was in worse shape than the legs. I knew that would involve using different strategies to restore each.
As you will be below, I first restored the table top, then the table legs. Depending on your project, you might need to employ just one method or both on different parts of the piece you are restoring.
In just a few steps, this table gained a whole new lease on life!
Materials and Tools/ Supplies
- Drop cloth – canvas or plastic (or even just an old sheet or towel depending on size of your project)
- Orbital sander – as mentioned below, I love my Porter Cable 380 1/4 Sheet Palm Sander
- Sandpaper (80 and 150 grit)
- Clean, soft rags, such as tack cloth
- Watco Danish Oil – note that this Amazon link gives you a variety of stain colors and sizes. I bought a pint of Medium Walnut.
- Rubber Gloves – note these are sold by size
- Murphy’s Oil Soap
- Scotch-Brite No-Scratch sponge
- Old toothbrush
- Squirt bottle
- Howard Restor-A-Finish – note that there are a variety of colors. I bought Walnut
- Howard Feed-N-Wax
Table Top Restoration Instructions
I decided to tackle the table top first. Originally, I thought it would be more time-consuming and challenging, but it was actually quite easy!
How? I was able to conquer this restoration in these 4 easy steps.
1. Protect work surfaces
Cover your work bench or floors. Some folks use canvas or plastic painter’s drop cloths. Personally, I have a pile of old sheets and towels that I use as drop cloths for all my DIY projects. I’m a slob. If there’s a mess to be made, I assure it will be made in my work area….
2. Sand the table top with orbital sander
Sure, I could have been an overachiever and hand sanded the table top, but who am I kidding? I’m lazy. There. I admit it. In writing. I’m lazy. I love my palm orbital sander and will use it any chance I get. It makes things go, uhem, smoother? ?
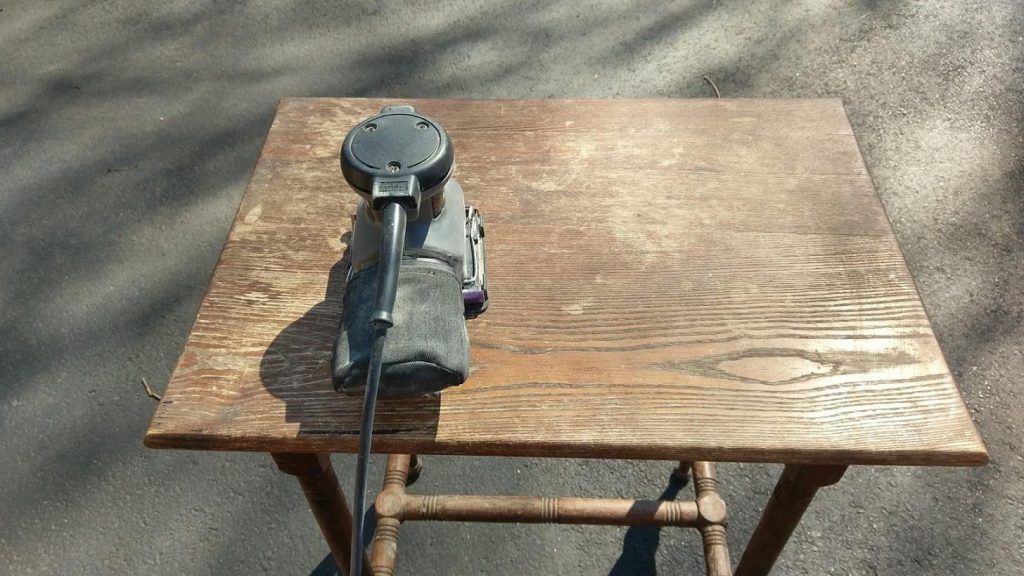
First, I sanded using 80 grit paper, then again with 150 grit paper. Tip: Remember the Number 1 rule of sanding.
What is that rule?
Always sand with the direction of the wood grain, never against it.
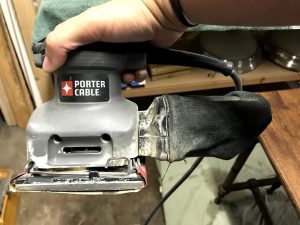
If you are in the market for a small but mighty orbital palm sander check out this Porter Cable 1/4 sheet orbital palm sander. Easy-to-use, budget friendly at around $35 (on sale from $68), and currently receives 4.5 out of 5 stars on Amazon.
What do I like about it?
- It’s not huge so I can easily keep and maintain a grip on it.
- It’s small size is not intimidating for less experienced DIYers like myself.
- I don’t have to measure out pieces of sandpaper to fit. Instead I just fold the 9″ by 11″ sheets of sandpaper into half twice, cut across both folds and and Wah-lah! Four pieces of sandpaper guaranteed to fit.
- I do most DIY projects inside the house so the optional dust collector is key. This contraption stops dust from going everywhere and making a mess in my basement.
3. Wipe the surface with a soft cloth
Remove the dust generated from sanding by wiping down the table top with a soft cloth. There are a variety of cloths available, including tack cloth. Personally, I cut up and use old swaddle cloths from when my kids were babies that work amazingly.
4. Apply Danish Oil
Before I get in this step, I want to talk a bit about Danish oil.
When I first started this project, I assumed that I would stain and apply polyurethane to the table top, but a comment on my Instagram post made me pause and do some research that ultimately led me on a different path.
The comment suggested that I check out Racheal Jackson at Banyan Bridges who had just restored a nightstand with boiled linseed oil. As I researched online, I came across a few articles that talked about alternatives to polyurethane and was found an option that seemed like a match for my table – Danish oil.
What is Danish Oil?
Danish oil is a unique combination of an oil (e.g. tung oil) and varnish. The thin oil part penetrates deep into the wood to bring out the wood grain’s depth and beauty, while the varnish resin portion provides sealing and protection against wear and tear.
I bought Watco Danish Oil, which is within the Rust-Oleum family (Watco may be spelled with all caps, I’m not entirely sure. Apologies if mis-spelling).
It also comes in a variety of colors – up to 9 different colors – that’s a lot!! For this project, I chose Medium Walnut. And it comes in a 3 sizes (pint, quart and gallon) so that you can buy only what you really need.
FYI – I read somewhere (and of course now I can’t find the source) that if you are debating between two colors, chose the lighter shade.
What are the Pros and Cons of Danish Oil?
There are two things I really enjoyed using Danish oil.
First, I liked how easy it was to apply. This blend of oil and varnish allows DIYers to stain, seal and protect wood furniture in one easy step! I didn’t have to stain and then apply polyurethane (although in in hindsight this article staining over polyurethane may have convinced me). I love it when I can save time on projects and not compromise on quality (who doesn’t?).
Second, the look of the wood is amazing. I like how Danish oil seeps down into the wood rather than merely sits on top. It penetrates into the wood and protects from within. The oil enhances the natural look of the wood and results in a richer piece of furniture without leaving a film on the surface.
Unfortunately, the lack of film on the surface brings us to the con of Danish oil. Because Danish oil doesn’t build a film finish as thick as polyurethane, it’s not as durable.
So Danish oil is not the best option to use on wood that will be constantly exposed to liquids or scratches. Not the best choice for kitchen tables and bar tops. But Danish oil is perfect for furniture that won’t see a lot of wear and tear.
Ok, ok, I admit that I’m not 100% convinced that Danish oil is the perfect option for this side table. But that’s only because I have twin 2-year toddlers that seem to make messes everywhere. While I don’t anticipate this table to be located in high traffic area, it doesn’t mean that a sippy cup sneaked out of the kitchen won’t find it’s way onto this table and leave a watermark.
BUT I decided to give Danish oil a shot and see what happens. And honestly if there is damage, I’m not overly concerned.
Why?
- If there is an accident like a watermark, I can reapply the Danish oil after a little wet sanding to restore it.
- If I want to protect the table top further, I can always apply polyurethane over the Danish oil (I just need to ensure the table is sufficiently dry).
- I’m not sure I’m keeping this table. I might sell it. And since the Danish oil gives such a beautiful richness to the table top without the poly shine, I can possibly get more money for it.
How Do You Apply Danish Oil?
As with every product, read the directions! ( I learned that the hard way….)
I found that applying Wato’s Danish oil to the table top was quite simple. As per directions, I poured the oil directly and liberally onto the wood, flooding the area. Using a soft cloth (my husband’s old T-shirt) I pushed the Danish oil around the entire tabletop in the direction of the grain to ensure the oil was evenly distributed. If a particular area seemed to absorb the oil quicker, I poured a little more into that area. After waiting a few minutes, I wiped off any excess to avoid puddles (otherwise it might dry tacky).
Watco Danish oil can be used as an “easy one-coat penetrating finish”. And I could see that for other projects I might only use just one coast. But for this particular table, I wanted a few more coats to build up the varnish and bring out more of the wood’s beauty.
The directions on the back of the Watco can suggest waiting 30 minutes before applying another coat. However, woodworking websites suggest that since Danish oil dries slowly and to apply no more than one coat per day.
For me, it worked best for me to wait overnight. I squeezed this project in during my twin’s 1-2 hour afternoon nap and around all the house chores (i.e. folding laundry and vacuuming the house).
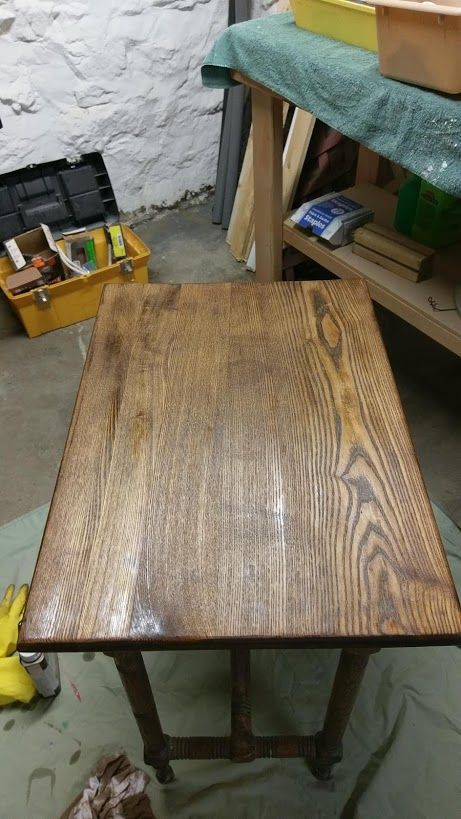
I wasn’t sure how many times I should re-apply the Danish oil. It seemed to go on thin, so I decided to do 4 coats.
As a warning, Danish oil generates heat when it dries. Wadded-up rags soaked in oil can spontaneously combust. I admit, that seems a bit scary for me. So make sure you place your rag in a cool, dry space and spread the rag out to dry.
Here’s the finished table top. You’re drooling over that rich color, aren’t you?! Sure it’s not perfect, but isn’t that the point of restored vintage furniture? To haves character and charm?
Personally, I think owning old wood furniture is like owning an old houses (and actually, like having an aging body….). You learn to appreciate the imperfections and quirks, since that’s where you’ll discover rich, unique stories and character.
What’s Next?
I was actually quite amazed at how closely the color of the Watco Medium Walnut on the table top matched the the legs. My original plan was to try out milk paint on the legs. It was recommended on Instagram by a few of my followers. I like the look of milk paint, but had never tried.
I discussed the process with Sam at Swank Surroundings, an artisan who is very familiar with upcycling pieces with milk paint. And after talking with Sam, I was convinced I was going to try it, but after seeing how closely the table top matched the legs, I felt like it was a sign to postpone milk paint for another DIY project.
I have to give a virtual high-five and thank you to Sam for passing on her tips and tricks for working with milk paint. Sam’s passion for vintage and antique treasures is rooted in nostalgia…happy memories from her Grandma’s home. She loves giving discarded treasures a second chance by making them over and finding them a new home, so they can become part of another family’s happy memories.
If you are in ever the Chesapeake, VA area, check her out her pieces at Hickory Salvage Co. and Hickory Trading Co. She’s completed some amazing restorations and makeovers.
OK – onto the table leg restoration!
Table Leg Restoration Instructions
1. Clean the grime
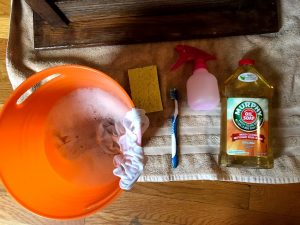
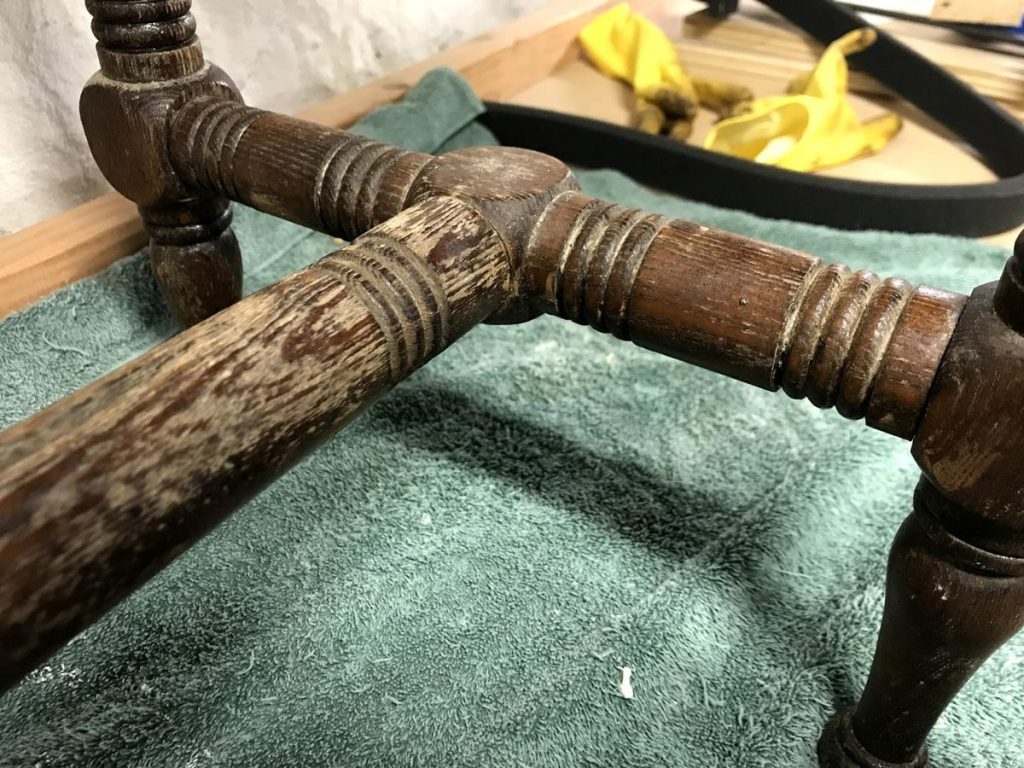
After decades of use, this old table had some dirt and grime build up, especially in the groves and crevices of the legs.
For cleaning all things wood – from my kitchen cabinets to floors to furniture – I’m a huge fan of Murphy’s Oil Soap. Plus I love the smell ?.
Just remember to follow the directions and dilute Murphy’s Oil Soap appropriately.
For cleaning tools I love the basics – Scotch-Brite Non-Scratch Scrub Sponges and a toothbrush. These kitchen sponges have a scouring pad on one side and absorbent sponge on the other. The scouring pad is good when you hit a dirty spot that needs a bit more elbow grease. I also like these sponges since they are very flexible and I can mold it to get into crevices.
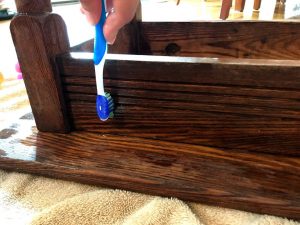
But sometimes the sponge doesn’t get into crevices as well as I’d like, so I use a squirt bottle filled with diluted Murphy’s Oil soap followed by a scrub with an old toothbrush.
(As a side note, depending on how much grime or stickiness you’re fighting, consider having Goo Gone on hand. This stuff works miracles!)
2. Apply Howard Restor-A-Finish
I fell in love with this product while restoring my mom’s wooden rocking chair with a leather seat insert. In the past I gone through the painstaking process of stripping with mineral spirits, staining and then sealing. (I still have nightmares…)
But Howard Products has a finish-penetrating product Restor-A-Finish that restores wood finishes while blending out minor scratches and blemishes, including white heat marks, watermarks, sun fade, and smoke damage. This product with the tagline – “Restore It – Don’t Strip It!” has been on the market from over 50 years. In one step and in a few minutes, wood is permanently revived and restored to its original color and luster.
It’s available in 9 different colors (I bought Walnut). (Ironically Danish oil also comes in 9 colors. I’m tempted to research if these two products come in the same colors.)
And from personal experience, Howard Products have great customer service. Back when I posted a picture of the abandoned table on Instagram asking or ideas and inspiration, I also emailed a picture to Howards asking for tips. They quickly responded.
And it was clear that I received and email from an intelligent person (not a robot) who was deeply familiar with the company’s products. They confirmed that Restor-A-Finish would be a perfect candidate for the table legs. And they honestly noted that another strategy might be best for the table top. In addition, they went the extra mile and volunteered helpful tips on how to restore and maintain the table.
I don’t know about you, but I like to support companies who recognize the value of effective customer service and who funnel resources to enhance customer experience. It irks me when I reach out to a company and in return only receive an automated email. Or just as worse, an email from a customer service representative that doesn’t have a basic handle of the English language nor the product they are supporting.

Ok, back to the actual application of the product.
Similar to Danish oil, it can be applied with a soft cloth. I used an old washcloth. (I have quite a pile of mis-mashed rags – old baby blankets, old T-shirts, towels….). But unlike Danish oil, don’t directly apply to the wood. Apply first to the cloth (or super fine – 0000 – steel wool). Then work into the wood rubbing with the grain.
Wipe off any excess and let dry. You only need one coast – no need for a second.
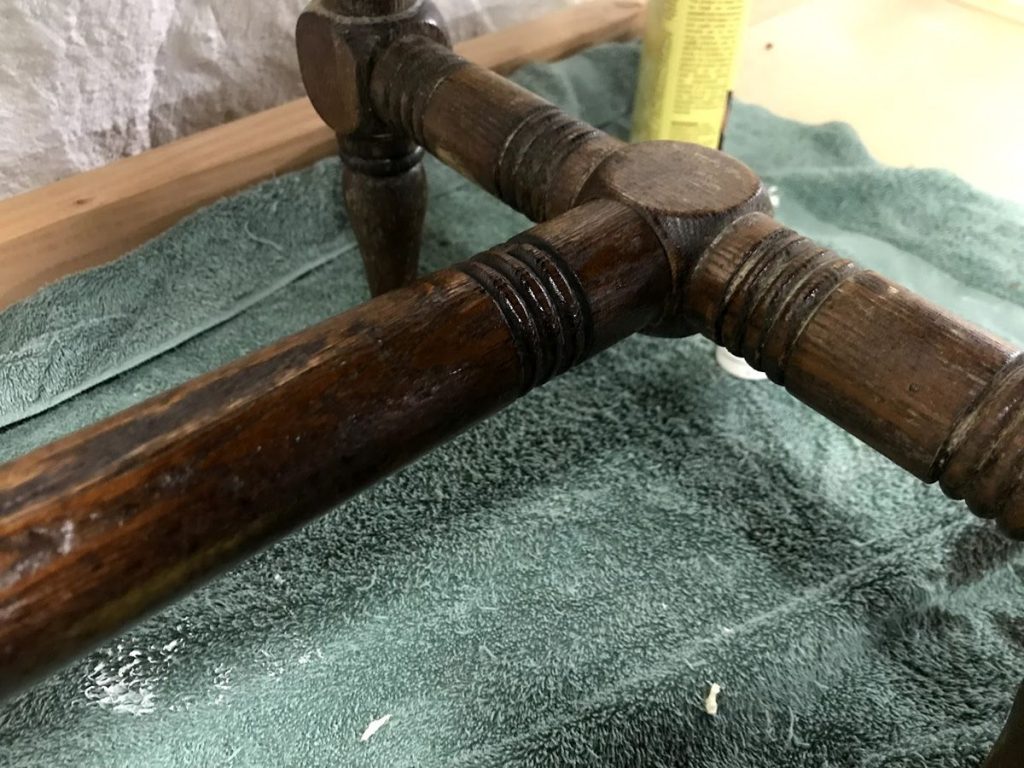
Grooves and crevices can be challenging. For this piece of furniture I was able to get into the grooves just by using my fingernail under the facecloth.
3. Apply Howard Feed-N-Wax
Feed-N-Wax (also made by Howard Products) is a polish made of conditioning oils that “feed” the wood while providing a protective coating of beeswax and carnauba wax. Its goal is to preserve and keep the wood from drying out, fading, or even cracking.
This step is as easy as the others. After letting the Restor-A-Finish dry, I saturated a new rag with Feed-N-Wax and wiped onto the table legs AND the table top. Under the FAQs on Howard’s website, Feed-N-Wax “is compatible with all cured (fully dry) clear coat finishes including; tung oil finish, polyurethane finish, varnish, and lacquer wood finishes.”
After application, wait at least 20 minutes (I waited overnight since the twins woke up early from nap) so that it can soak into the wood. Then with a new clean rag, buff the tables legs to remove excess and give it a beautiful shine.
In their email to me, Howard Products recommended that Feed-N-Wax be re-applied whenever the wood looks or feels dry (every 3 months or so).
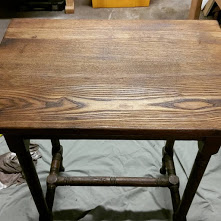
Waaaa-laaaa! Here’s the finished piece! I admit I started and stopped this project over a couple of months. But if I had been a tad more focused and organized (and toddler-free), it would have taken only 15 minutes each day for about a week.
Think my neighbor might want her table back???
Now that my DIY vintage table restoration is complete, I haven’t quite decided if I’m keeping or selling it (if you’re in the Boston area and interested, give me a shout). I have yet to dive into how to sell or flip any of my restored vintage furniture, but when I do I’ll check out fellow blogger Forrest McCall’s Complete Guide to Flipping Furniture.
Have you used Danish oil before? What had been your experience? What challenges and successes have you encountered in restoring old furniture? If so, I’d love to hear about it – please use the comments section below.
Interested in more easy DIY vintage furniture restoration projects? Check out one of my most popular posts – How to Replace a Leather Seat in an Antique Rocking Chair.
Want to be the first to know about new posts? Be sure to follow me on Pinterest, Facebook, Instagram or Twitter of even Etsy! Or better yet… Subscribe below!
My monthly (admittedly sometimes more, sometimes less….) emails are like receiving a unexpected letter from an old friend WITHOUT needing to put on your slippers and walk out to your mailbox…. See? I got ya, my friend!)
[Note: My posts are proudly connected to these amazing link parties full of DIY ideas and inspiration!]
Post also viewable via the link parties at A Morning Cup of Joe, Farm Fresh Tuesday and Waste Not Wednesday.