Last Updated on May 26, 2024
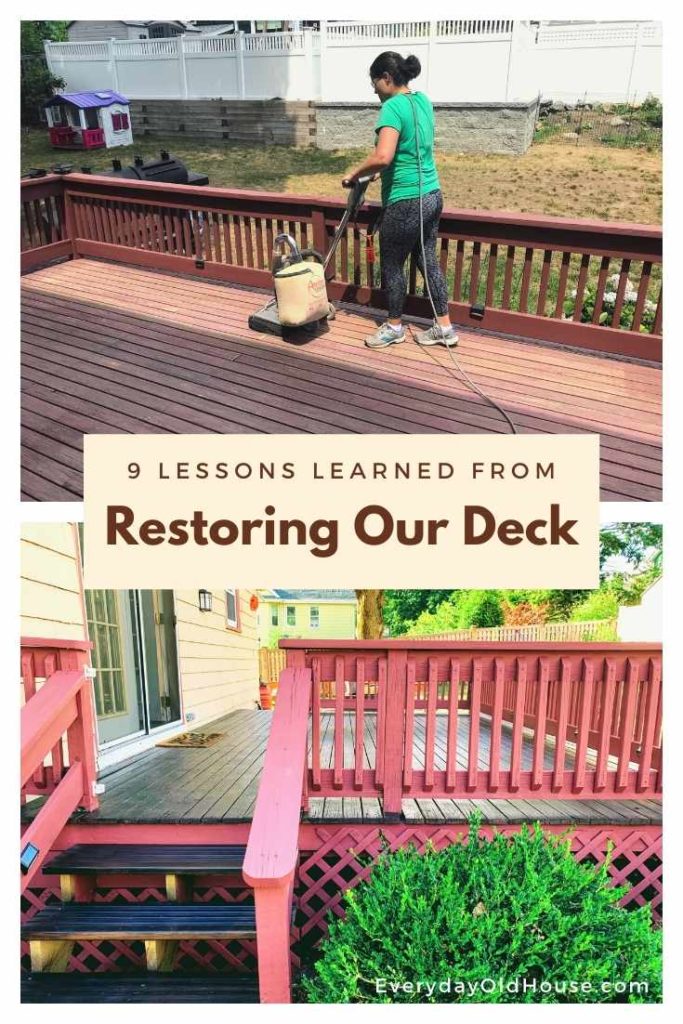
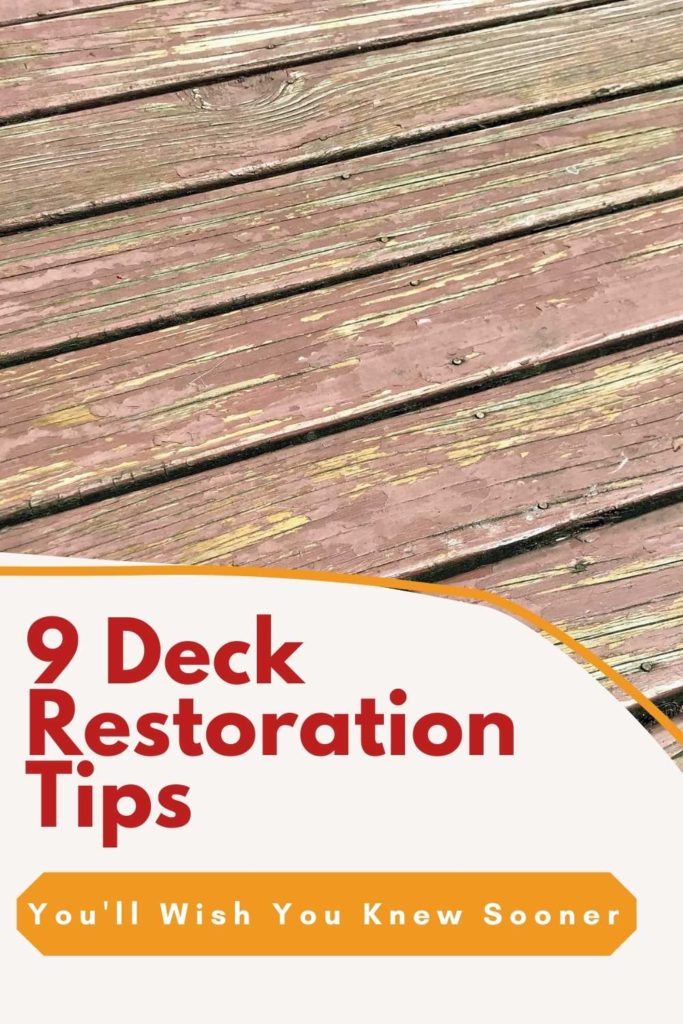
Considering restoring your tired, flaking deck? We felt that way this past summer and decided to tackle this DIY project on our own. It was a tougher project than we anticipated, but it was also one of the more gratifying! Check out these 9 tips for restoring an old deck to save you time, frustration and transform your deck into a backyard showpiece.
This post contains affiliate links, including but not limited to, Amazon Associates. As such, I earn from qualifying purchases. Full disclosure located here.
Backstory
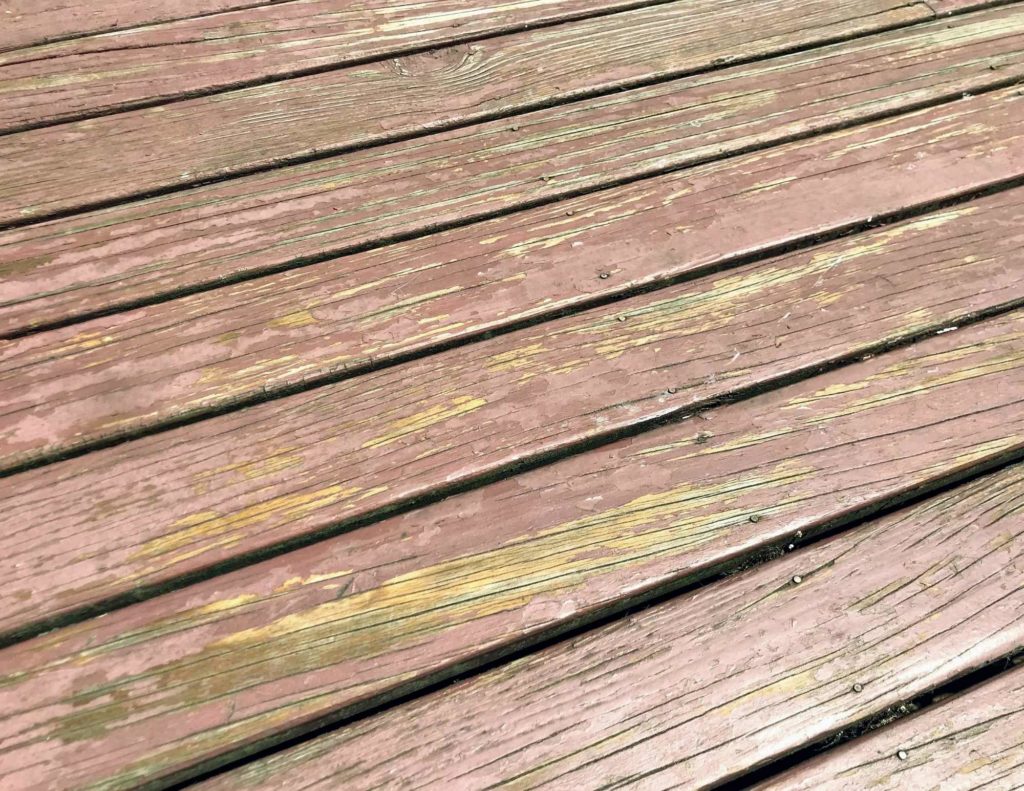
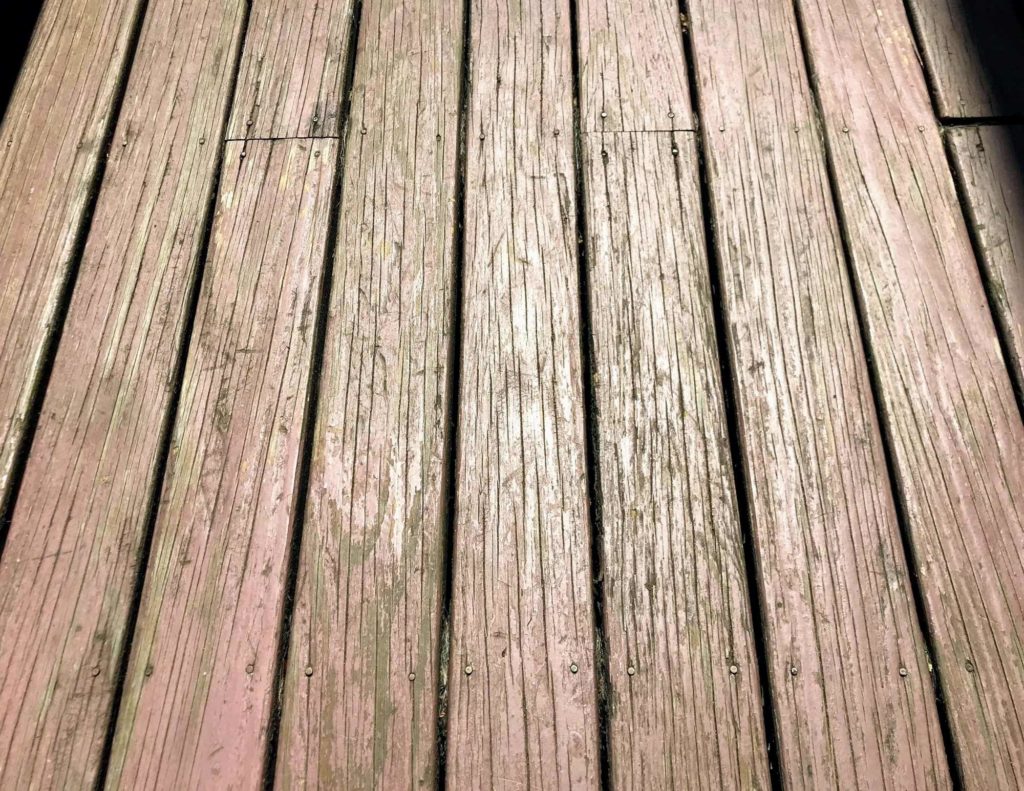
Our deck desperately needed some TLC. It had seen a few harsh winters (and a couple of little kids and dogs trudging over it every day). And it wasn’t a situation of it just being dirty and needing a pressure washer. The deck floorboard paint was flaking and the exposed wood was turning a weathered, greyish color.
We originally tried to hire a contractor, but nobody wanted the job. I reached out to 3 contractors. Two never responded, the third replied “Sorry – booked solid”.
So we tackled restoring our old wood deck ourselves. And we made some mistakes……Here’s our 9 tips for restoring an older deck so that you don’t make the same mistakes….
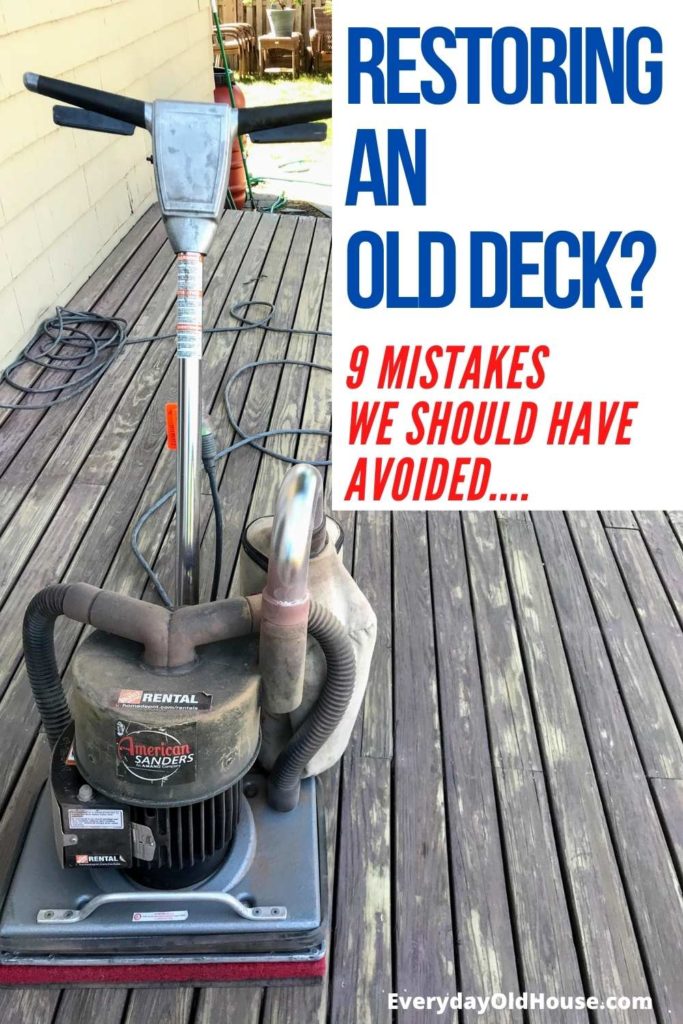
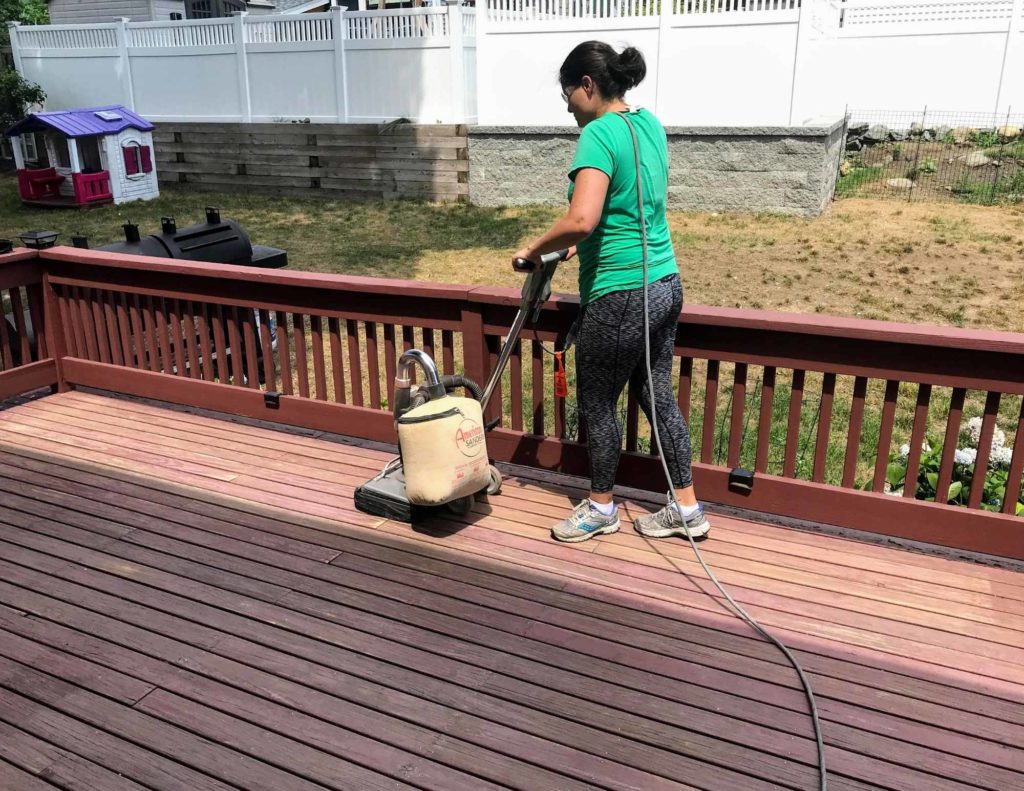
Tip #1: Larger Deck? Rent a Sander
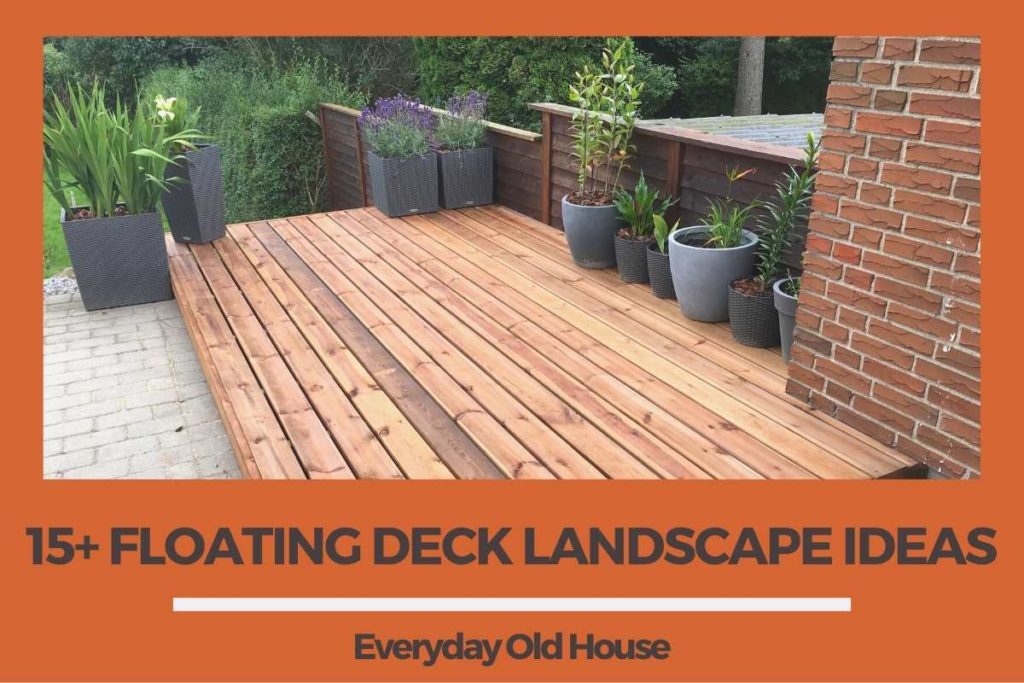
We have a older, larger deck plus a smaller new low profile, or floating deck, that we built in 2019. Two decks? We definitely needed to rent a sander. No way I was hand sanding TWO decks!
Apparently, there are two basic options for sanding decks: drum sanders or orbital sanders. These two vary in sanding action, time, and labor, and user difficulty.
We expected to rent the recommended orbital deck sander on Home Depot’s website. But when we got to the store, the customer service rep (Dave) asked for details about our project and recommended a different sander that would suit our project much better – the American Sander Square Buff Floor Sander.
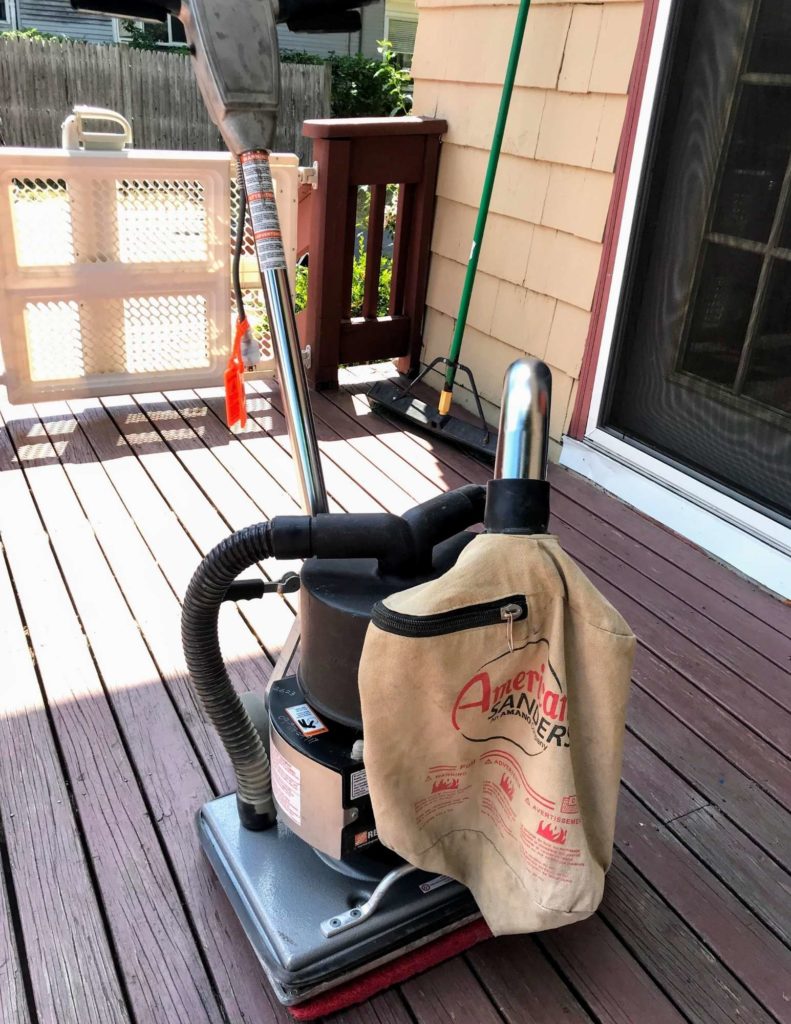
So I’m glad he asked us about our project and volunteered his recommendation.
I’ve never used a large sander before and truth be told, I was intimidated. But within a few minutes of using this sander, I was impressed. Why?
- Simple to control. It wasn’t overpowering, and easier to maneuver that I expected.
- Simple to prep and change out sandpaper pads
- Less noisy than expected
- Less dusty than expected
I especially liked that we could walk this sander along the floorboards as well as across them. In other words, this sander doesn’t require you to sand with the grain. I felt like that enabled the sander to get access to more grooves in the old floorboards and remove more of the old stain.
Tip #2: Buy a Variety of Grit Size Sandpaper
Based on online research, apparently the rule of thumb for sanding deck floorboards is to use sandpaper with grits no smoother than 60 or 80.
As a DIYer who sands wood furniture, this seems like an awfully rough grit. But for decks, sanding with a finer grit will smooth the deck wood to a point where it won’t absorb the stain or sealer efficiently.
When we rented the sander at Home Depot, we intended to buy 60 and 80 grits paper. But the Dave (the same one who recommended the sander) also recommend we buy a variety of grit, starting as low as 20 grit.
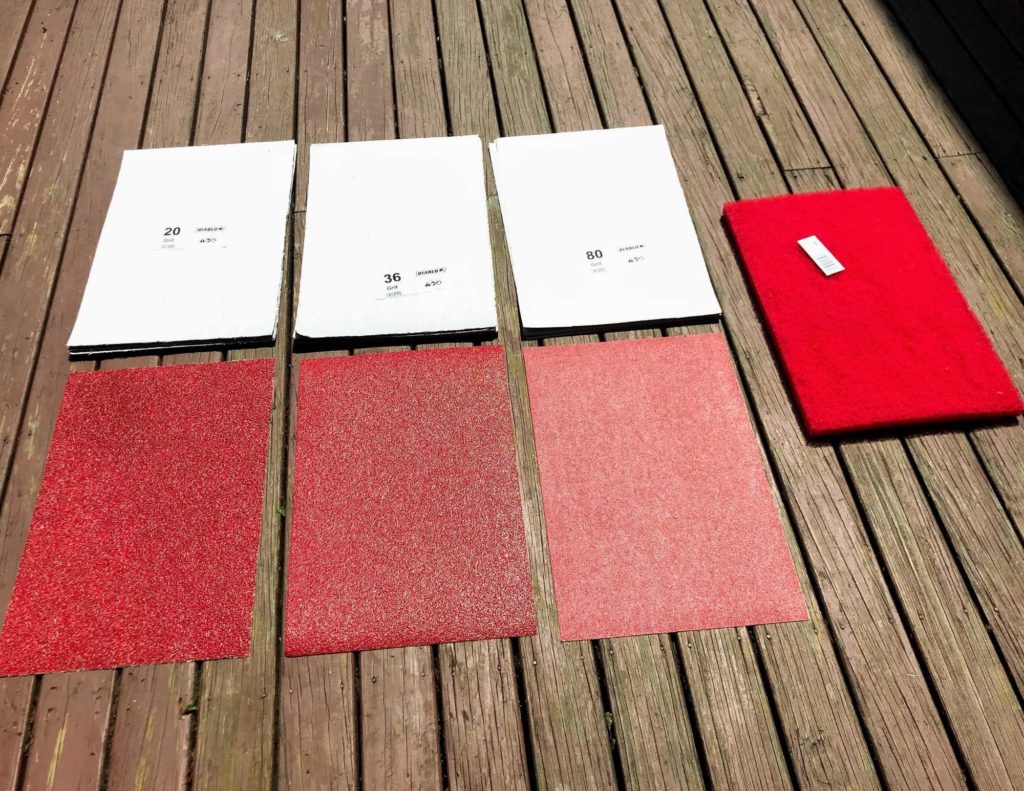
And he was right! (I’m really starting to like Dave). The 36 grit was the most effective as removing the old stain (more so than the 20 grit, which seems a bit weird). We did the use the 60 and 80 afterwards to finish up the deck.
While this may seem like a small tip for restoring an weathered deck, it can save a lot of time and frustration. Buy a few different grit sizes and try them out to see what works best on your deck.
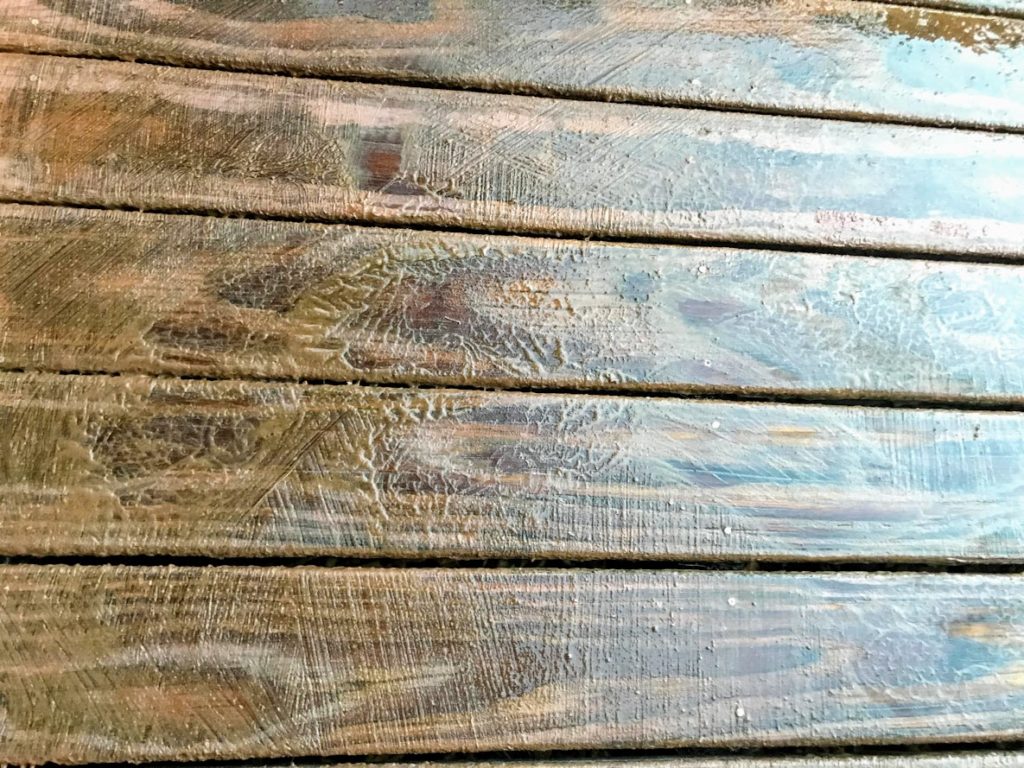
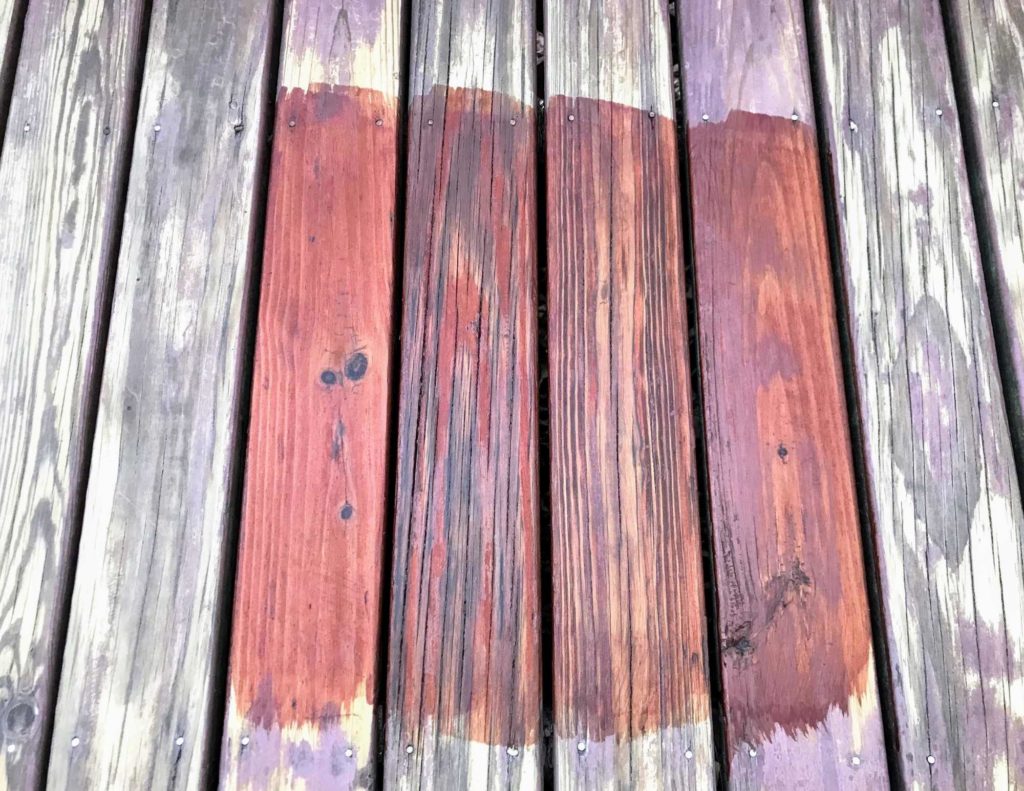
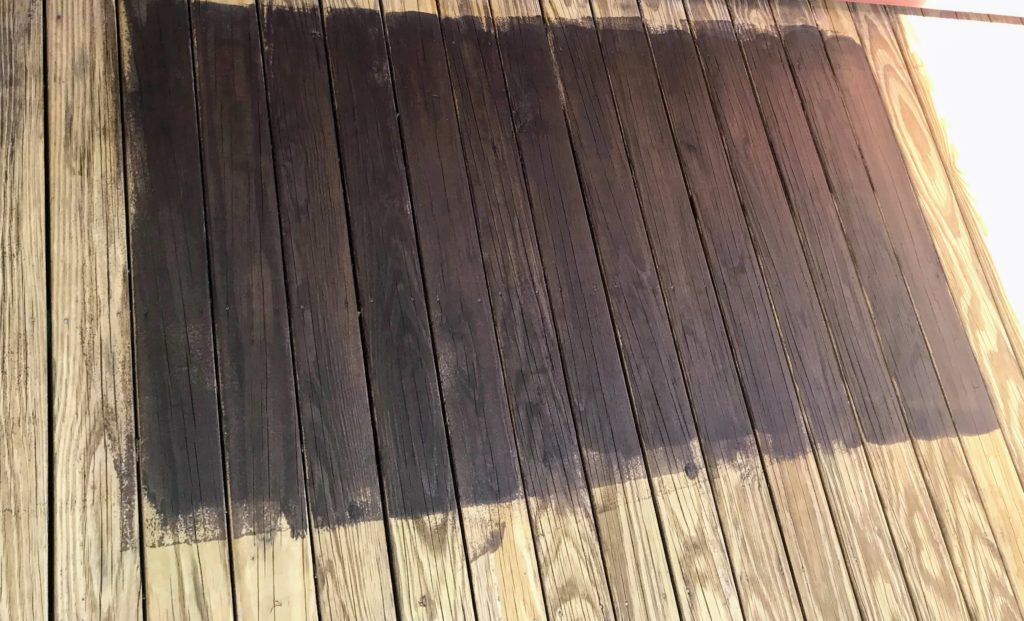
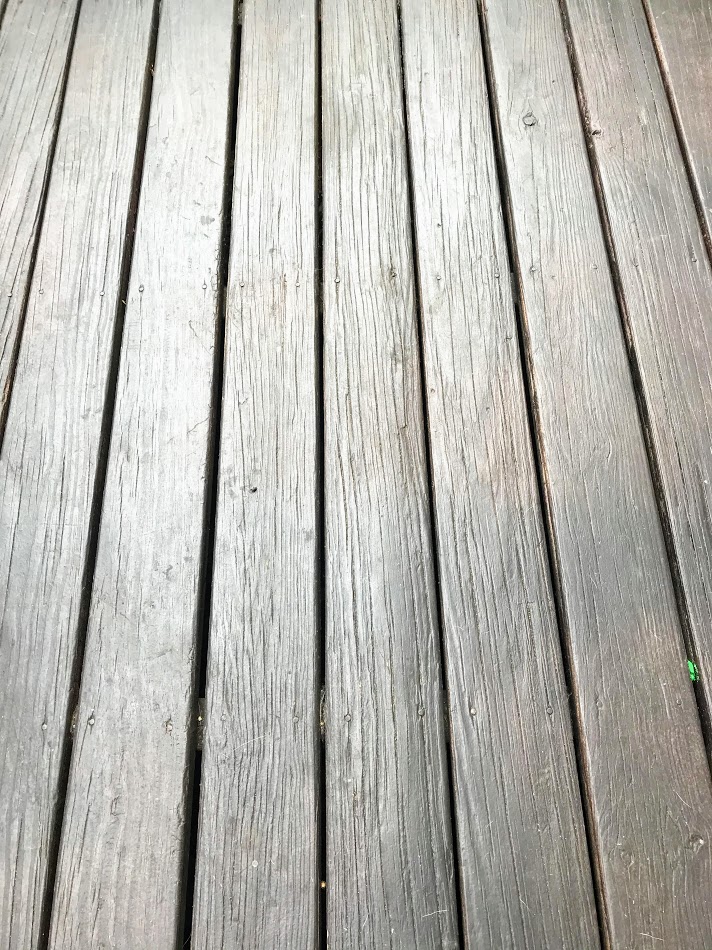
Here’s a pic of the deck after we finished sanding.
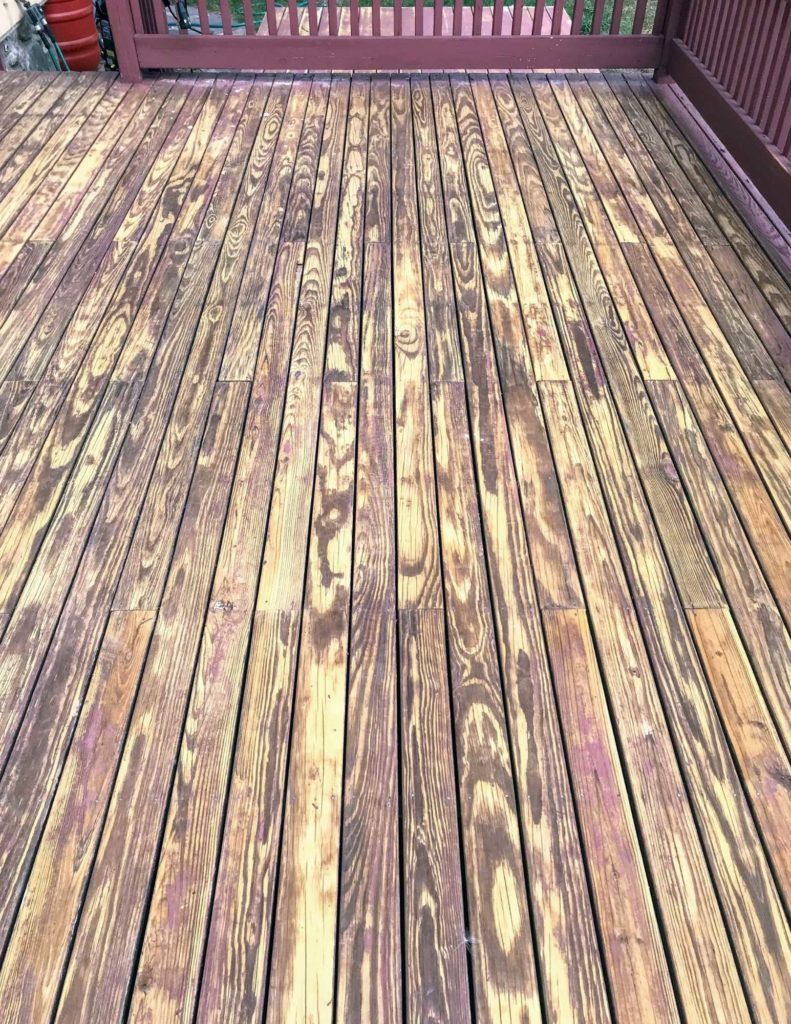
And as you can see, the sander did remove a significant amount of old stain BUT there was still some stubborn stain left on the decking boards.
So, how did we fix it?
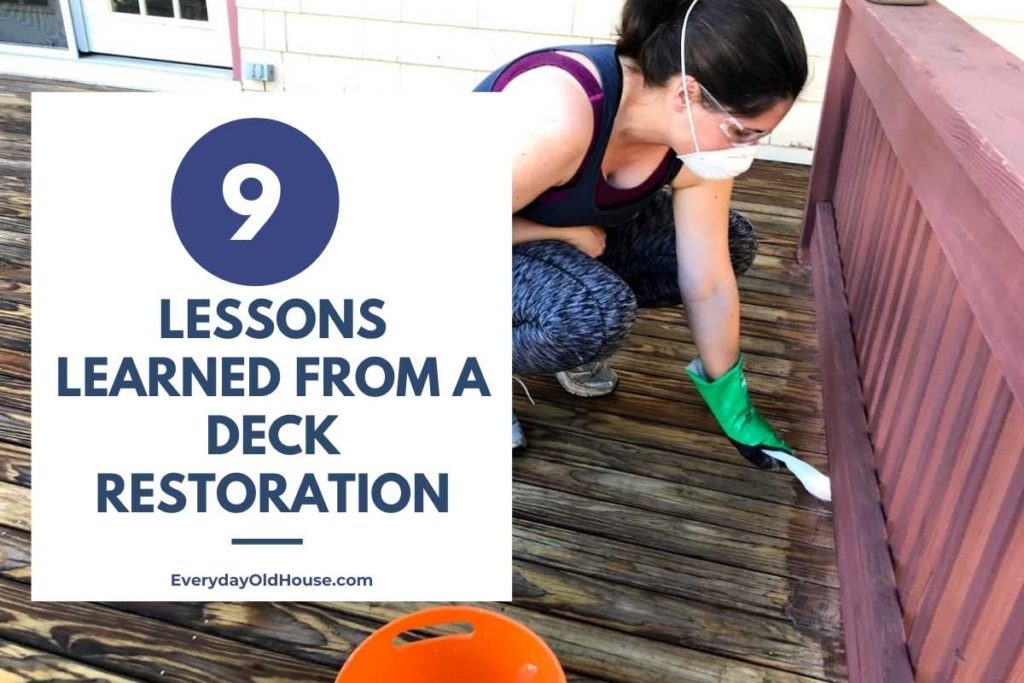
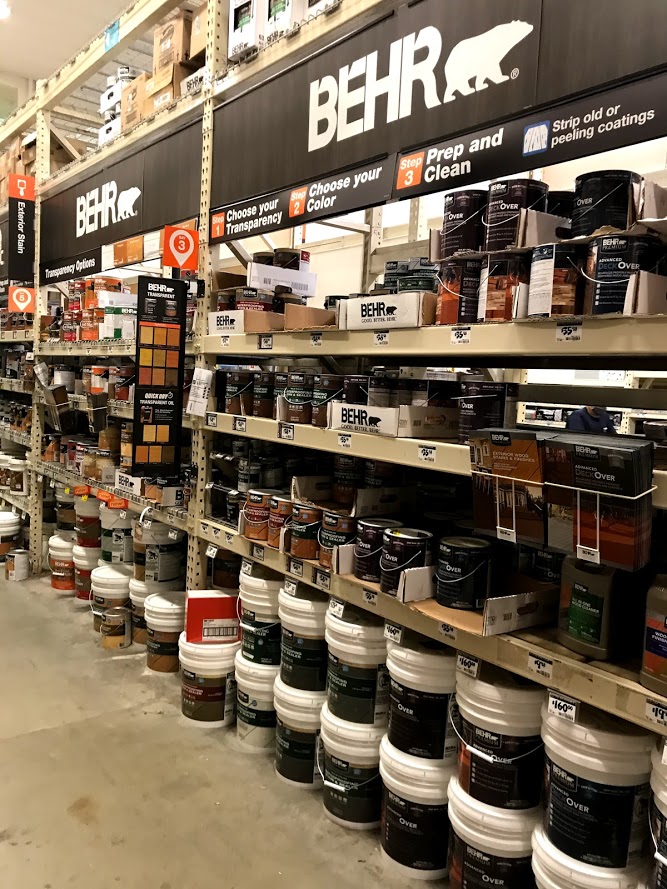
Tip #3: Ever Considered Stripping?
Ok, ok, I couldn’t resist using a stripper pun at least once in this post. Apologies. No more puns, I promise….
When I initially researched tips for restoring an weathered deck, the results pointed to sanding first. So that’s what we first did. But apparently there was another option….
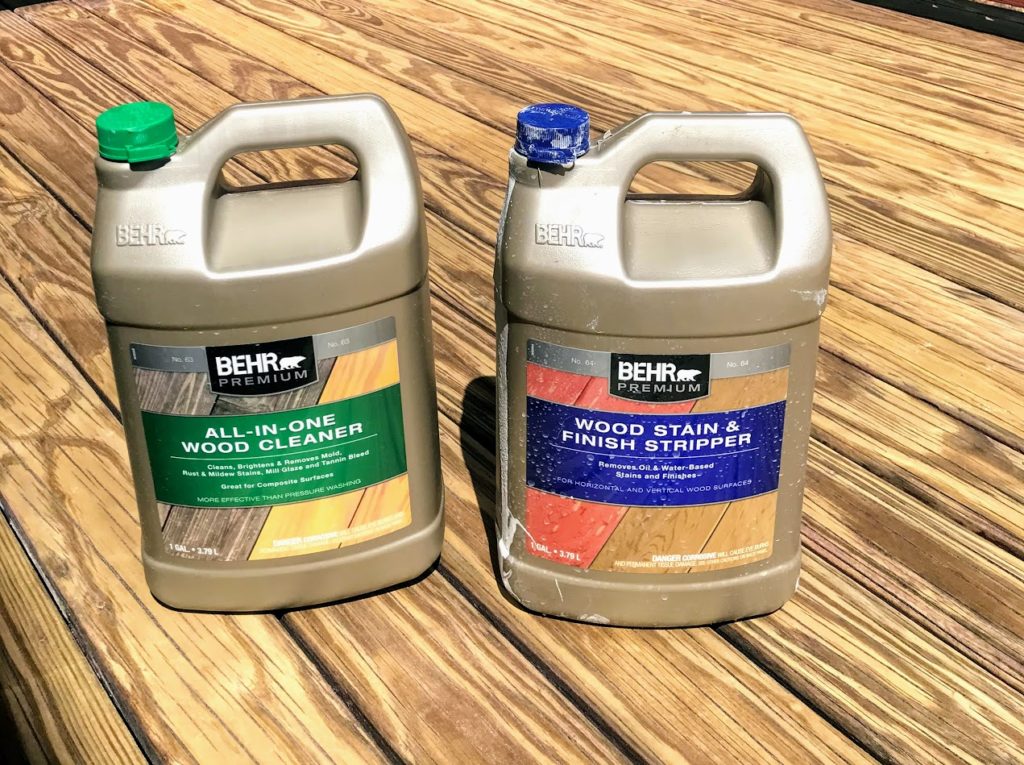
Chemical stain and finish stain stripper. Whoops…
So back to Home Depot we go….where we found Behr Wood Stain & Finish Stripper. This product is intended to remove weathered stain without sanding. (Followed by Behr All-in-Wood Deck Cleaner – more on that later).
I was a bit hesitant to try it since in all honesty, the reviews were mixed. For some customers, the product worked perfectly. And for others, not so much…. My take-away of the reviews? The product works great removing certain old stains and not so great with others.
We decided to try it and see if it worked. Couldn’t hurt, right? Plus it was reasonably priced.
The Behr deck stripper and wood brightener removed a good portion of the stain remaining after sanding. BUT it took a lot more time (2-3 applications), and double the amount of stripper than we expected.
Ultimately for our deck, the best way to remove the stain and get down to bare wood was to sand AND apply a stripper.
Tip #4: Watch Your Step!
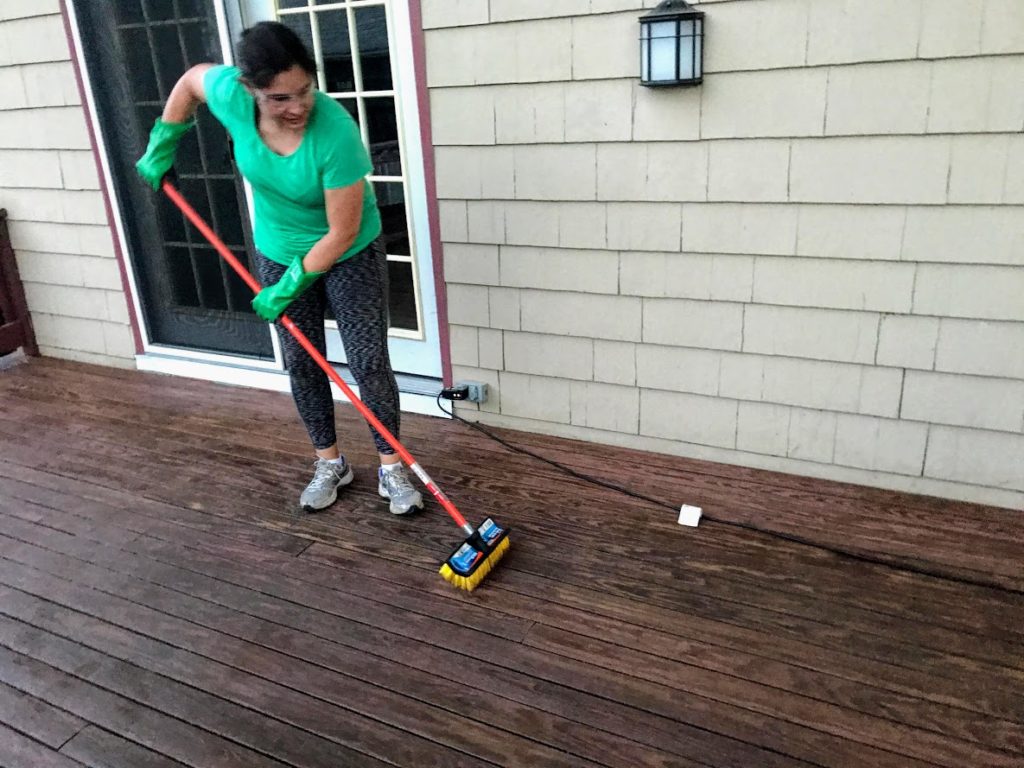
Following Behr’s directions, we liberally applied the chemical wood stripper directly to the floorboards using a long-handed nylon stiff bristle brush.
It’s a thick gel – it’s incredibly slippery! I almost went flying. Behr’s warning wording “surface may become slipper when wet” is no joke!
After the deck stain stripper was applied, we watched and waited. Since it was August, we anticipated it drying out. So we misted every 10 minutes with the lowest setting on our pressure washer to keep moist.
After watching and waiting for about 45 minutes (with power washer misting), the old stain was lifting from the floorboards. I’d call it “frothy”.
Then we scrubbed the whole deck using the long-handed nylon brush, and pressure-washed in direction of grain.
Here’s a few additional tips for restoring older decks with Behr’s stain stripper:
- Shady and cooler weather: For best results, Behr recommends applying their deck stain stripper when shady and cooler than 90 degree. Otherwise the stripper will dry out faster than you’d like. Unfortunately we had to do this project in sunny, humid August, so we dealt with dry-out.
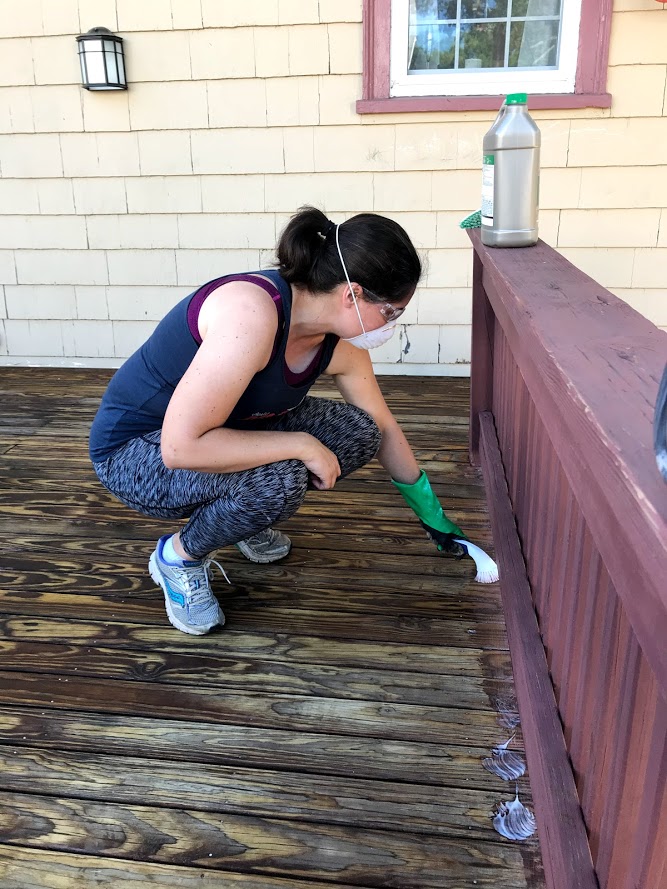
- Wear protective equipment: This stuff can burn your skin. As you can see from our pics, we have various levels of protective gear on. Honestly, some days it was on the hotter side and we couldn’t handle working in long pants, shirts and respirators. I know, I know. For those parents out there reading this, think of it when you tell your kids “Do as I say, not as I do”….
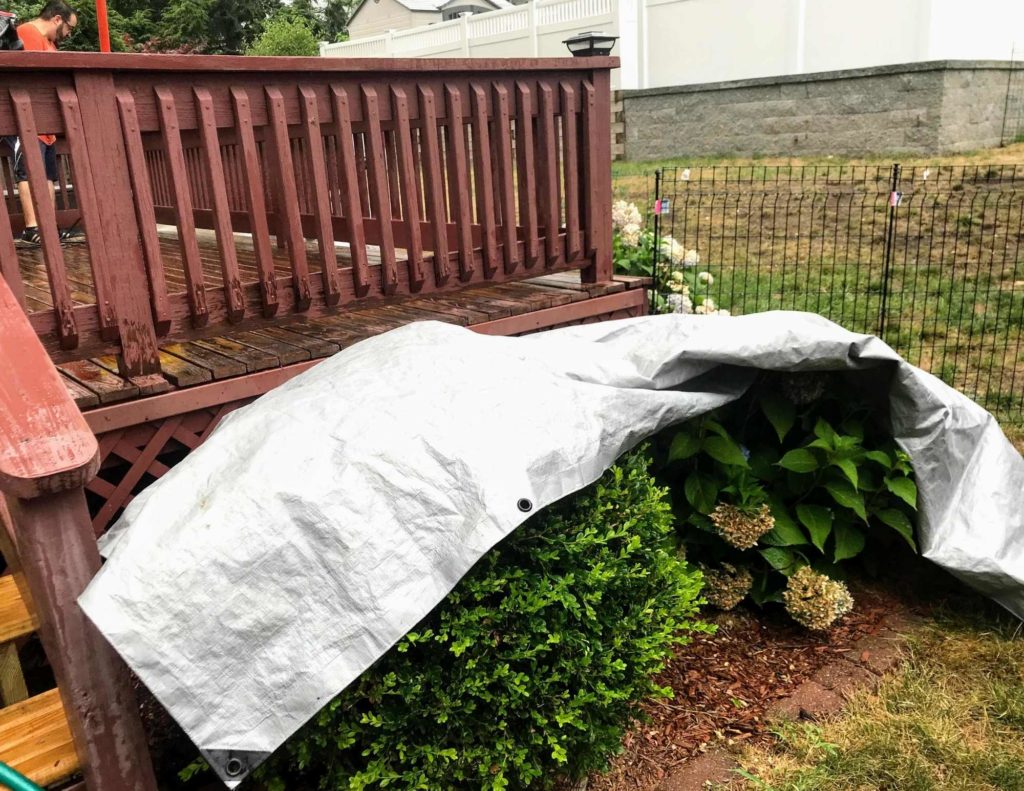
- Landscaping: If you have plants around the deck, be sure to mist then and cover with plastic sheeting or a tarp. Otherwise, they might die. And then you have yet another home improvement project on your to-do list…
Tip #5: You WILL Use More Stripper than Estimated
Behr estimates that one container of their deck stain stripper provides 50-150 square feet of coverage. Based on the size of our deck surface, we estimated needing 2 containers.
It took 4-5 containers of deck stripper. Why? Two reasons.
- The first round of application didn’t remove enough of the stain. Ultimately, we applied the stripper twice to the entire deck. And, in some places, three times.
- A good portion of the stripper fell through the spaces between the floorboards.
Save yourself an extra trip to Home Depot for more stripper. The best way is to buy double the amount of whatever you estimate. You will probably use it. (Or return unopened containers with receipt).
While we were off on the amount of Behr Wood Stain & Finish Stripper we needed, our estimate on the Behr All-in-Wood Cleaner was more accurate.
While a container of the stripper will cover 50-150 ft2, the deck clean will cover 200 ft2 at full strength, 400 ft2 diluted.
We estimated needing only 1 container. And that’s all we needed.
The purpose of the wood cleaner? It neutralizes the stripper and brightens the wood. We applied the deck cleaner with the nylon brush, waited 15 minutes for it to do its thing, scrubbed, and rinsed using a hose.
Tip #6: Test Stain Color
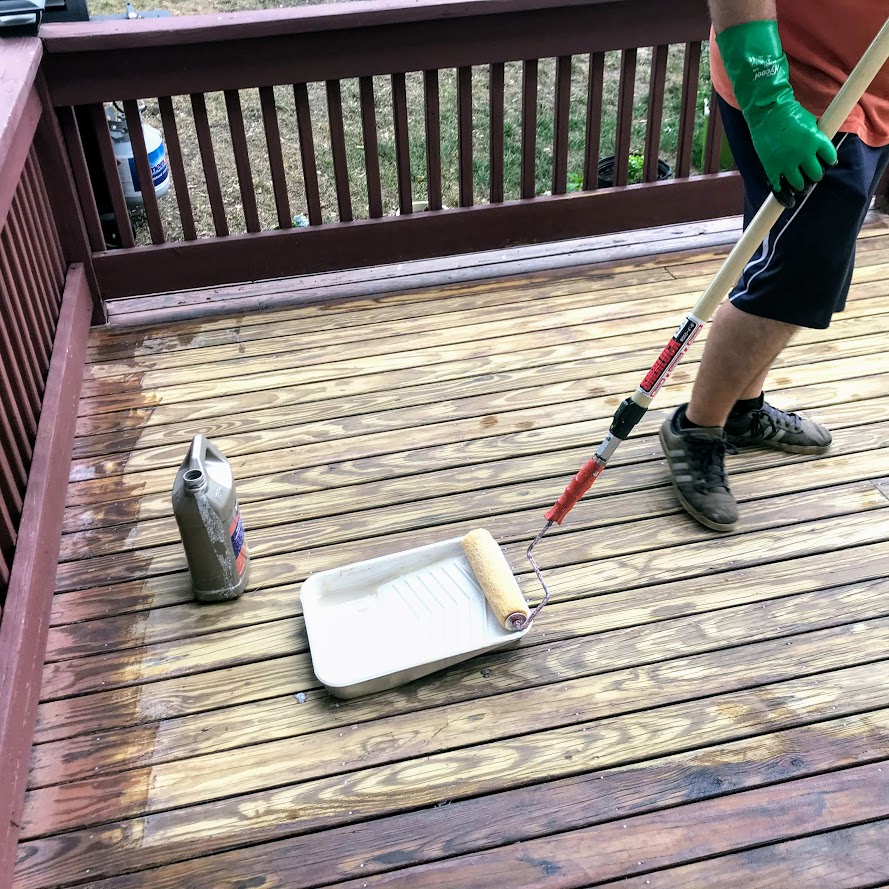
Now for the fun part – the actual painting!!!! It only took 2 weeks (working on and off) to get to this point. #takingforever
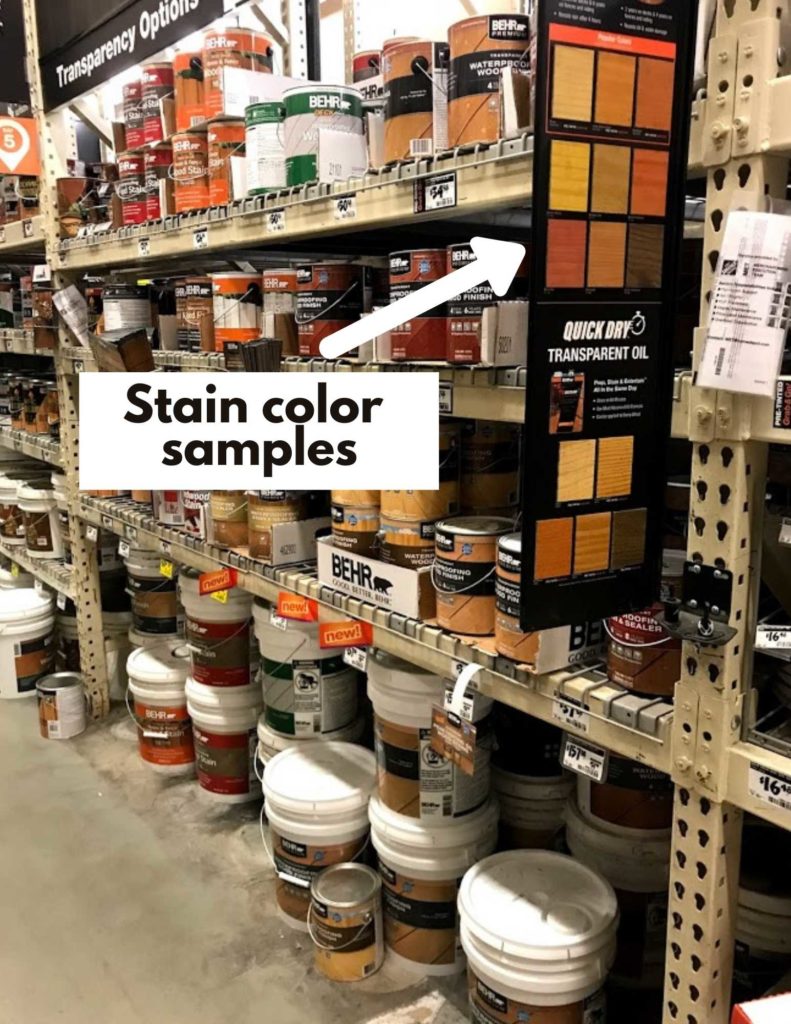
Behr deck stains are available in 3 options: transparent, semi-transparent, and solid color. As you can see from this pic of the aisle, there are TONS of options! It’s a bit overwhelming for a newbie. #firstworldproblems
Originally our deck floorboards were painted with a semi-transparent stain, spindles and railing in solid stain – all in the same color (Beaujolais). But we wanted to try something different this time. Spice it up a bit. Ok, ok, actually it was my husband’s idea. He has a MUCH better vision for color and style with home improvement projects.
Floorboards
For stain, my husband wanted to try transparent stains on the deck. He wanted more of the wood grain in the floorboards to show through. For that we chose Behr Premium Transparent Waterproofing Wood Finish. We like the idea of it lasting longer (4 years on decks) and had better reviews than another option – Deck PLUS Waterproofing Finish (2 years).
This wood stain and finish we chose comes in 3 pre-mixed colors as well as 6 custom colors. We knew we wanted a brownish color to bring out the beige on the house.
Our first try was a pre-mixed color that we could buy right off the shelf – Redwood. Based on the store sample, it appeared to have brown undertones.
But when applied to our decking boards, it was a lot more orange than we anticipated. Not what we were looking for.
So back to Home Depot. This time we had the paint dept mix up a gallon of the Cordovan Brown, which had more brown undertones according to the store color chart.
Here’s a close-up of the store sample of Cordovan Brown.
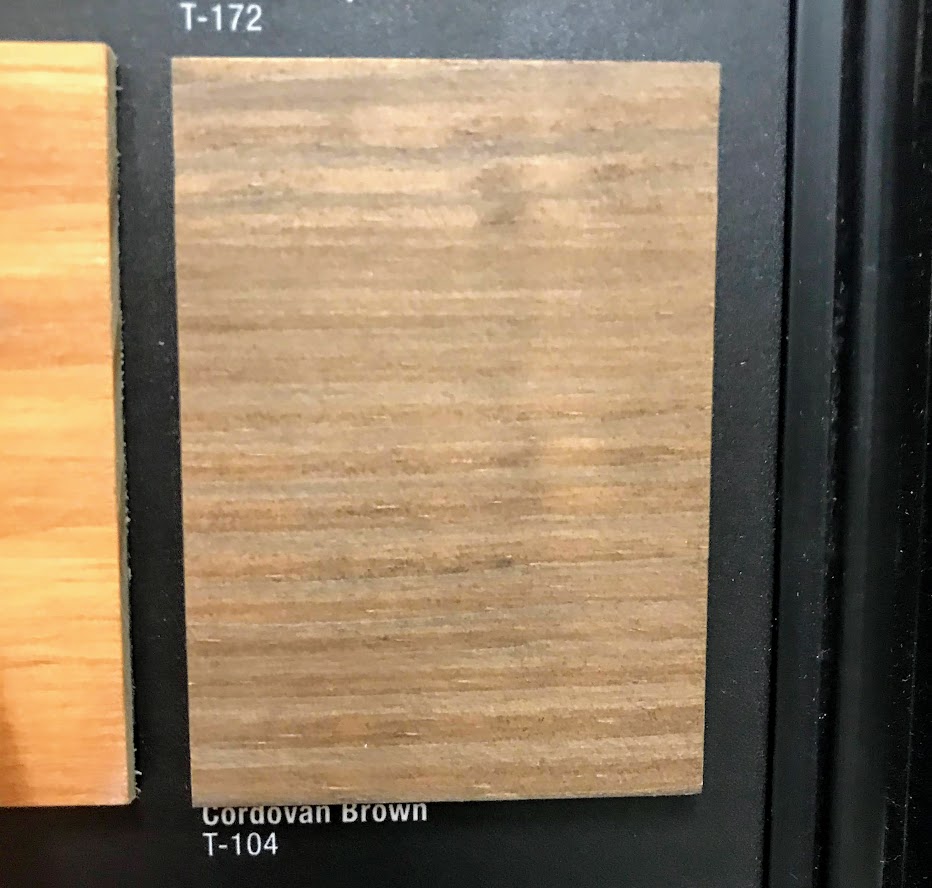
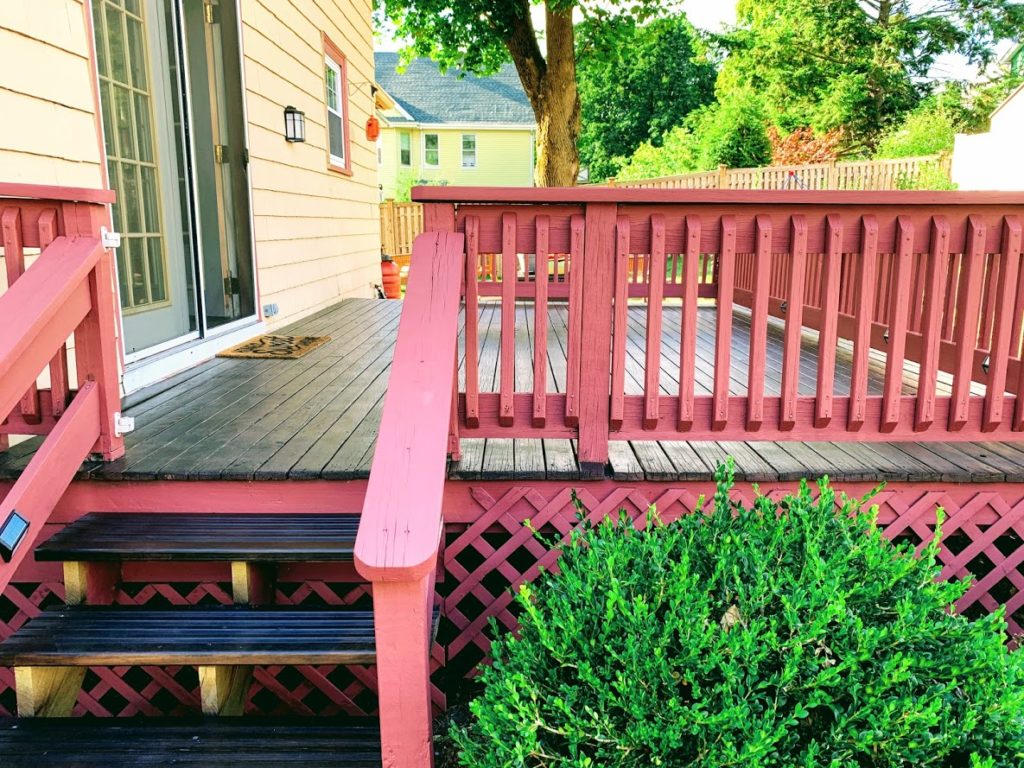
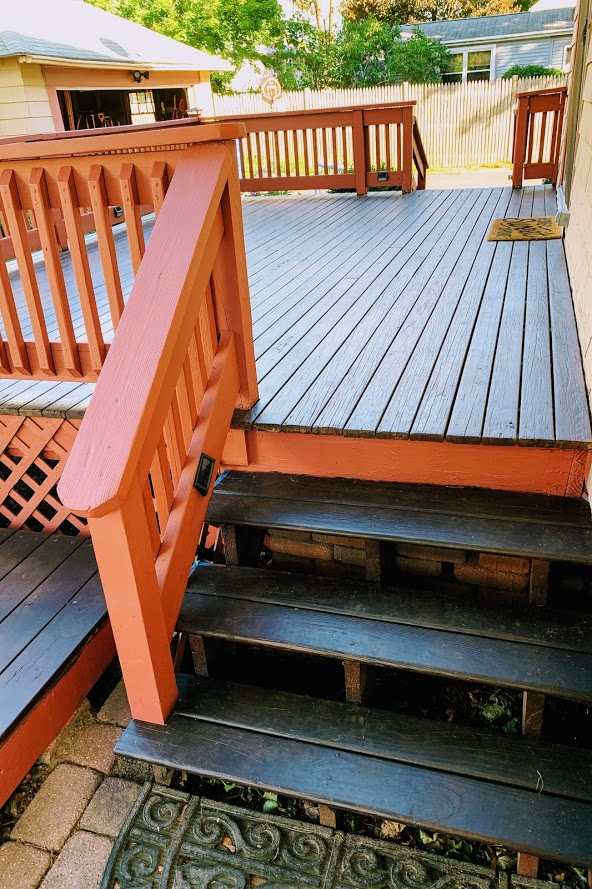
And here is it applied to our deck surface. it was a much richer, deeper brown than we expected. It looks a lot different than the store sample!
Perhaps we did something wrong? We only did one coat. Maybe we were a bit too heavy-handed with the paint strayer? Oh, well. We were losing steam on this project and we weren’t about to try another color.
But it turns out we may have not done anything wrong. As I wrote this post and dug into Behr’s website, I found this great stain and paint tool to help visualize deck colors. I found Cordovan Brown on this tool and saw that our deck floorboards closely matched!
So perhaps one of the tips for restoring olders deck here is not to rely completely on the paint display samples in the store…
[Regardless, we ended up liking the darker color. As you’ll see in Tip #9, it all worked in our favor!]
Spindles and Railings
For the spindles and railings we stayed with a solid color stain. I had zero, I repeat zero, interest in applying a paint stripper or sanding so many spindles. We went with Behr’s Solid Color House & Fence Wood Stain and had it tinted to match our house trim color.
Tip #7: Paint Sprayer or Patience – Pick One
Our deck has a lot of spindles – 104 to be exact. And sanding and painting every single one of those spindles plus deck railings takes a very loooong time. I may be smiling in the below picture, but I hated sanding these spindles!

Mind-numbing work. I was already dreading the second coat of paint when I hadn’t even finished the first coat. Plus I hadn’t even tackled painting the lattice around the deck.
And clearly from this photo I had management (aka Dulce the DIY Dog) making sure I didn’t miss a spot.
My husband being the gem that he is, took pity upon my situation (or perhaps didn’t want to hear my complaints anymore…) and surprised me with a paint sprayer the very next day.
If your deck has several spindles or lattice, spare yourself the tediousness of using a brush. Buy a paint sprayer. The rest of painting took a fraction of the time to complete.
I love my paint sprayer. And don’t worry, you will use it again. The very next week I used it to refresh my front door.
Tip #8: Mother Nature Will Join the Paint Party
All strippers, paints and stains have a recommended temperature and humidity for use. For example, Behr recommends using the Deck Stripper between 40-90 degrees and dry weather for best results.
Unfortunately with 3 young kids, we have to work around our jobs and available babysitters. And that was August. Hot, humid August. But at least when we started this deck restoration project, the weather apps called for no rain. Humid, but no rain.
But of course, that would be too easy.
Within 4 hours of staining the deck floorboards with Behr Premium Waterproofing Wood Finish, a freak storm blew into town. The type with 60+ wind gusts, town-wide power outages, and hail the size of X.
I kid you not.
Hail in August in Massachusetts.
Apparently it was a “microburst”. Our town made the New England news. Trees were down, flooding in the street, power out for over 24 hours for some residents. Nearby towns? A sprinkle.
Mother Nature has a sense of humor.
But, to Behr’s credit – the deck stain was not impacted! There was not obvious damage from the rain or hail.
Thank God.
Tip #9: Embrace the Imperfections
Like with most DIY projects (or at least mine), they are never perfect. This project was no exception. And I struggle with that, especially when I’m knee deep in the project.
When upclose to the deck, I can see old paint between deck floorboards that the stripper didn’t remove or didn’t take up the new stain.
But when I stand up and take a few steps back, the imperfections go away.
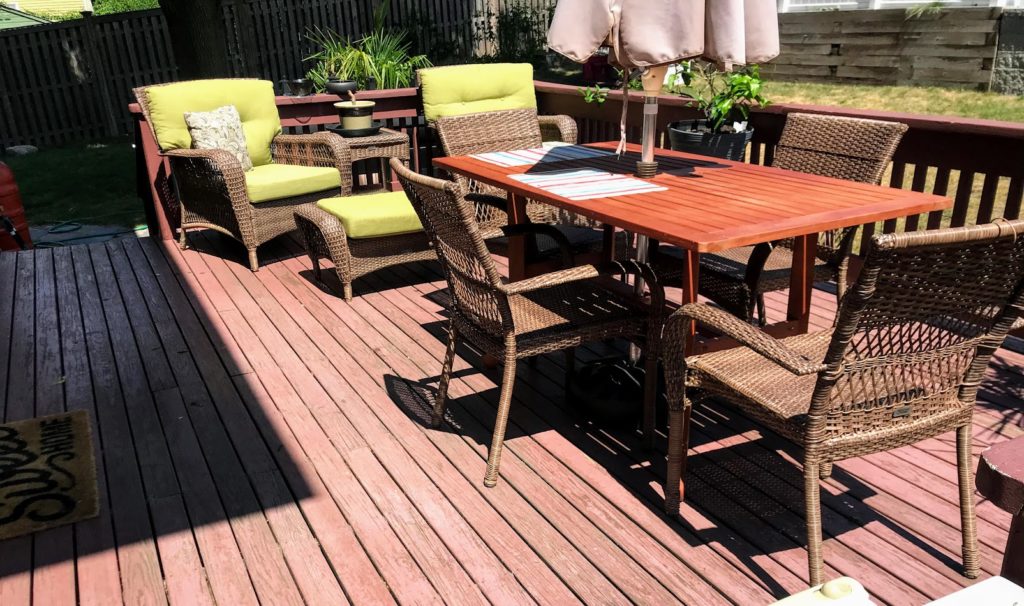
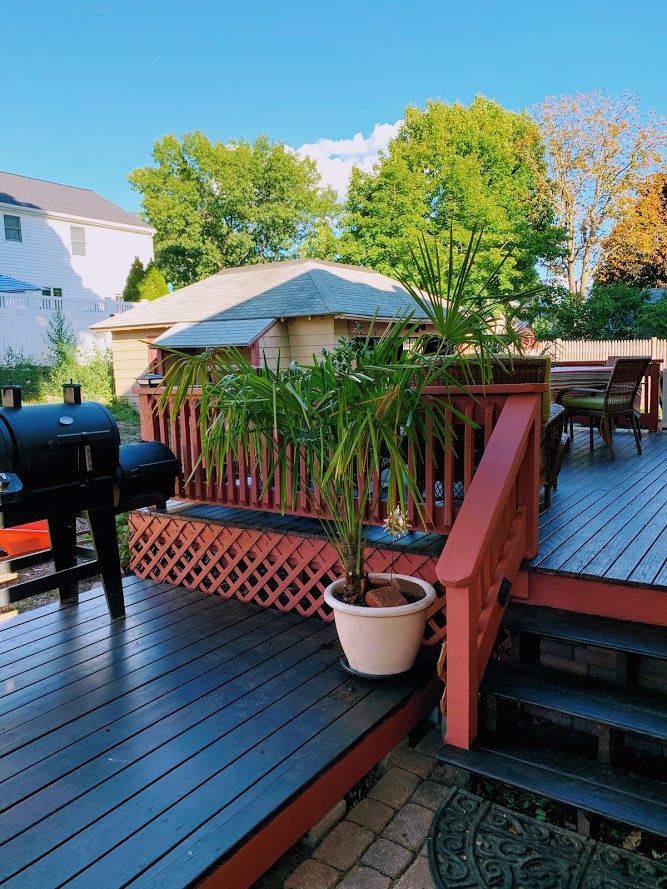
And our deck is beautiful.
Restoring our deck was a ton of work, but I’m so happy we did it. Looking back, it is one of my more gratifying DIY projects.
Here’s a close-up of before and after.
When we get a moment to sit and relax on the deck, I look around and fall in love all over with our restored deck.
Do you have an older deck? Refinished it? If so, what tips for restoring an weathered deck would you recommend?
Related Posts


Want to be the first to know about new posts? Be sure to follow me on Pinterest, Facebook, Instagram or Twitter of even Etsy! Or better yet… Subscribe below!
My monthly (admittedly sometimes more, sometimes less….) emails are like receiving a unexpected letter from an old friend WITHOUT needing to put on your slippers and walk out to your mailbox…. See? I got ya, my friend!)
[Note: My posts are proudly connected to these amazing link parties full of DIY ideas and inspiration!]