Last Updated on April 16, 2026
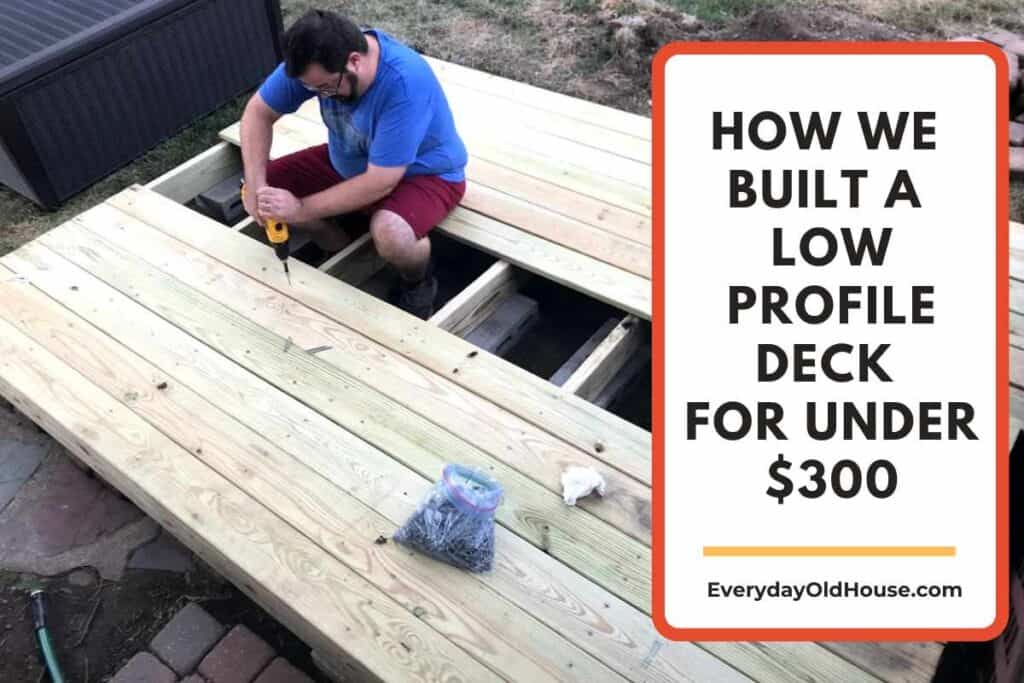
Building a low deck is an easy and inexpensive way to add functional space to your backyard. And who doesn’t love a bit more outdoor space for entertaining and relaxing with friends and family? Here’s how we built a low deck (also known as floating deck) for around $300 in materials.
2026 UPDATE: With the current economy, I feel the need to add a disclaimer that if we were to build this deck today, it would be over $300. HOWEVER, I firmly believe that this DIY project is still doable at a reasonable cost.
This post contains affiliate links, including but not limited to, Amazon Associates. As such, I earn from qualifying purchases. Full disclosure located here.
Backstory
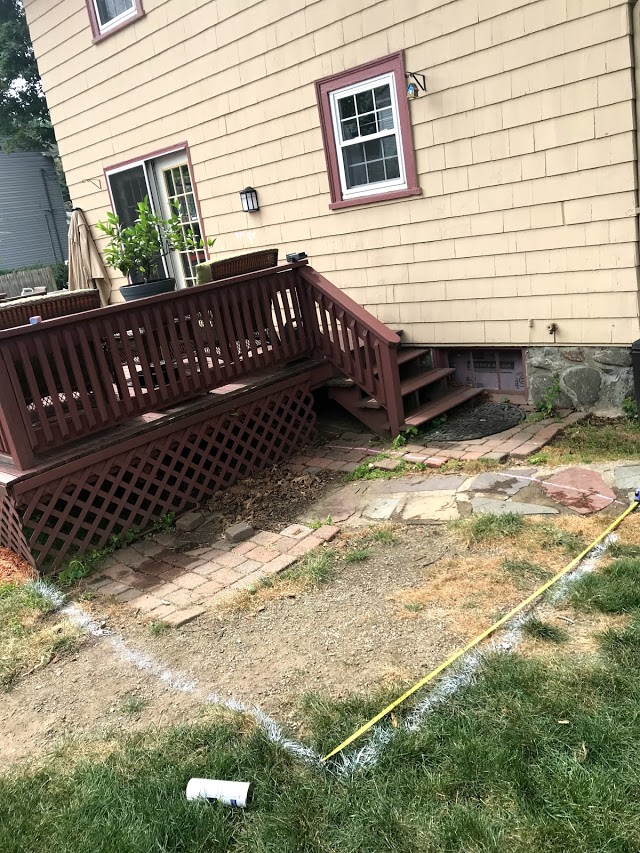
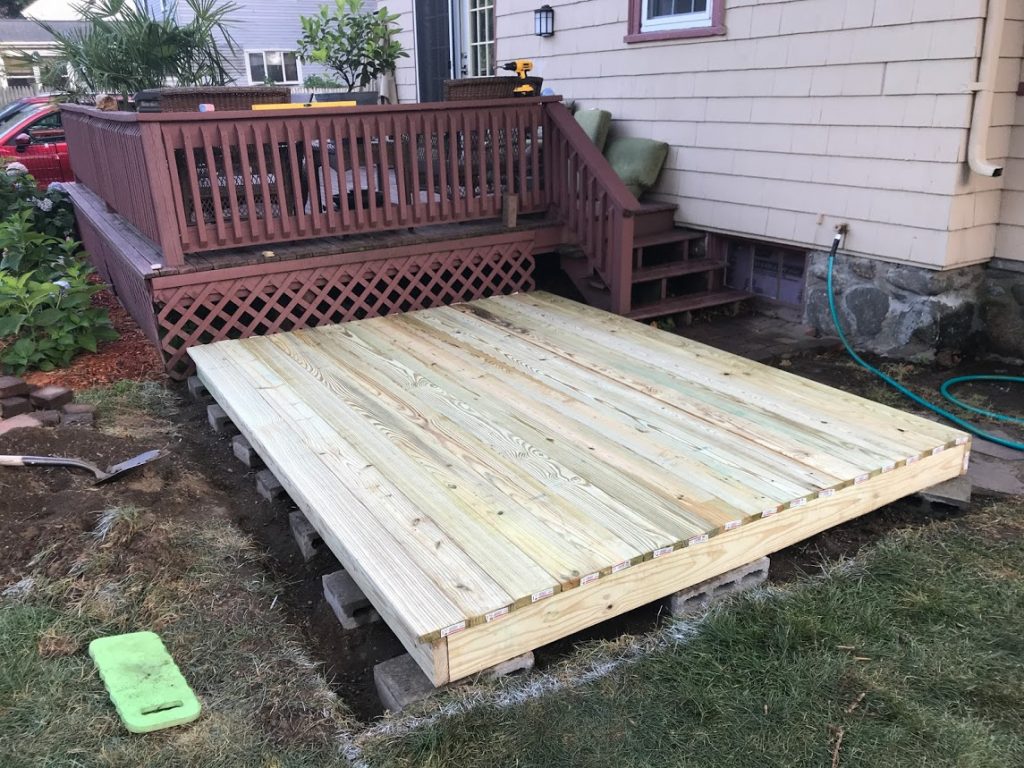
There used to be a hideous spot in our backyard that desperately needed some TLC. It was about an 8 ft by 8 ft square adjacent to our older raised deck.
It’s so hideous that not barely even weeds grew there.
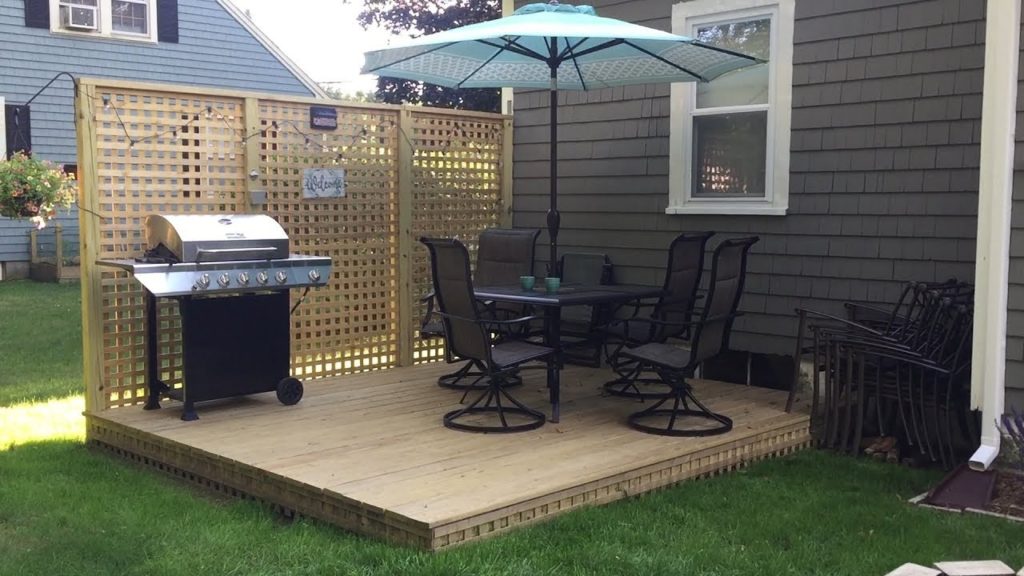
After some research (aka scrolling through Google, Pinterest and YouTube) we found the perfect solution to transform this wasted space into a space where our family could congregate.
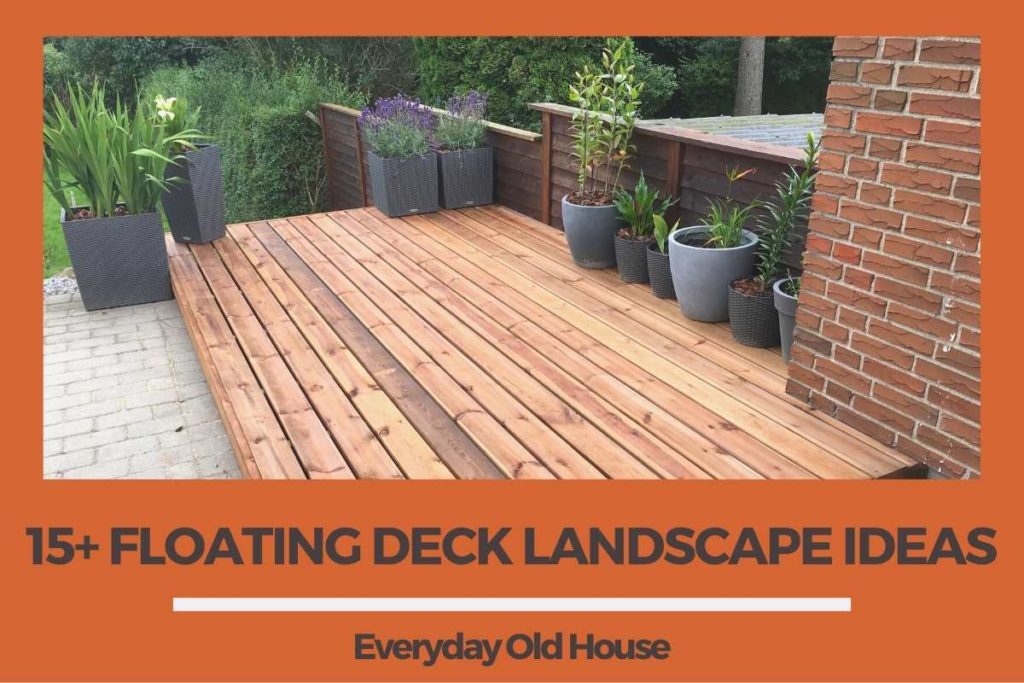
What did we do? We built a low, otherwise called, floating deck.
What is a Low or Floating Deck?
A low deck is called many things, including a “floating” or “freestanding deck”. Whatever you want to call it, basically it is a deck constructed in a way (usually sits on concrete blocks) that it appears to “float” on top of the ground.
Pretty clever, eh?
In addition, since it’s low to the ground, these decks don’t need handrails or stairs. This keeps building a low deck not only easier for DIYers, but also keeps material costs down.
Do You Need a Permit for Building a Low Deck?
Constructing traditional decks attached to your home usually requires building permits. However, low decks usually don’t require a permit as long as they:
- Are truly “low” (i.e. less than 12 inches above the ground)
- Covers only a small portion of your yard
BUT please check with your local building department to confirm! I’m NOT an expert in this area!
Supplies for Building a Low Deck
Here’s of list of tools and materials we used to build our low deck. We already had the tools, so the materials cost us the $300. Note that material quantities are for building a 8 ft by 10 ft low deck. Please modify based on your desired deck size.
Tools
- Spade, Rake and/or Shovel
- Tamper
- Pencil
- Tape measure
- Level
- String or Twine
- Framing Square
- Circular Saw
- Cordless Drill
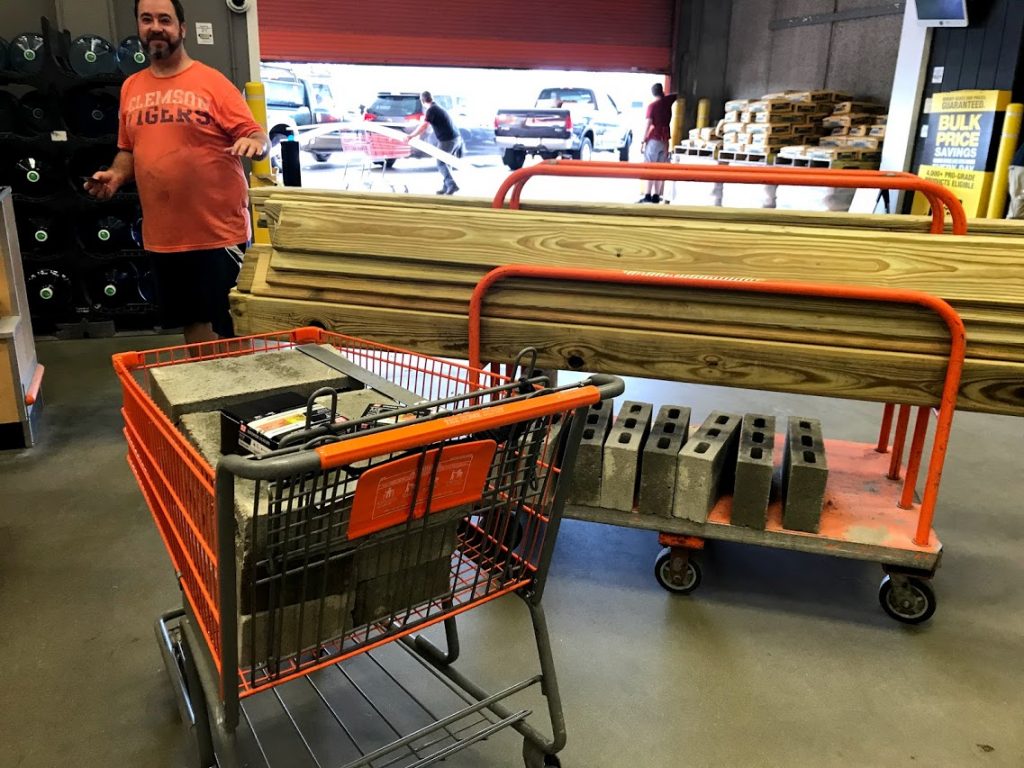
Materials
- Spray Paint
- 21 Concrete Blocks (4in x 8in x 16 in)
- Deck screws – 3 1/2-inch and 2 1/2-inch
- Seven 8ft long pressure-treated lumber (2in x 6in)
- Two 10ft long pressure-treated lumber (2in x 6in)
- Seventeen 10ft long pressure-treated 5/4in x 6in deck boards
- Landscape Fabric and/or Gravel (optional)
- Wood stain or sealer
For ease, here’s a pdf of the tools and materials list to print and take to the hardware store. This free pdf also provides area for measurements and notes that will come in handy.
How Long Will It Take to Build a Low Deck?
Everyone’s DIY pace is different. But for us, we built our low deck in a weekend in about 8-10 hours, including the trip(s) to the store.
How Much Does It Cost to Build a Low Deck?
When we built this deck a few years ago, it cost us under $300. But lumber prices have skyrocketed. So I expect the cost of building a low deck to be well above $300. I’ve included links to some tools and materials below under “Shop this Project“
However, it might still be possible. I tallied up the materials in 2024 using the Home Depot website and it came in around $300. BUT don’t be surprised (and don’t write me nasty notes) if your cost is higher!
Here’s what I calculated:
| Material | Amount Needed | Price per Item (Approx.) | Total Cost (Approx) |
| Spray Paint | 1 | $6.50 | $6.50 |
| Concrete Blocks | 21 | $2 | $42 |
| Deck Screws – 3½ inch | 1 pound | $17 | $17 |
| Deck Screws – 2½ inch | 1 pound | $18 | $18 |
| Lumber – 8ft (2in x 6in) | 7 | $7.50 | $52.50 |
| Lumber – 10 ft (2in x 6in) | 2 | $9.50 | $19 |
| Deck boards – 10 ft (5/4in x 6in) | 17 | $8.50 | $144.50 |
| Grand Total (w/o tax) | $299.50!!! |
For ease, here’s a pdf of the tools and materials list to print and take to the hardware store. This free pdf also provides area for measurements and notes that will come in handy.
Instructions for Building a Low Deck
Our first step was research. How could we build a low deck to cover this hideous part of our backyard? My husband took on the role of going to the ends of the internet and back again to figure out how to build a low deck.
There are several free low and floating deck plans, YouTube videos, etc. online. And I highly recommend you do your research and check those out.
For us, the best plan for ultimately tutorial from The Spruce that we slightly modified. Unfortunately, this exact tutorial is no longer online.
If you want to replicate how we built our low deck, here’s what we did…
1. Prepare the Area
First determine where you want to construct your low deck, measure, and mark with spray paint. For example, we marked out an 8 foot by 10 ft deck since those dimensions worked best for the space.
Next, clear the ground and remove grass, weeds and rocks using various garden tools (spade, shovel, etc…). Be sure to clear a few inches beyond the footprint of the low deck to leave room for concrete block overhang (one of our learned lessons).
Eyeball the ground to check if the ground is level. If not, dig or compact soil to flatten it out. Once the ground appears relatively flat (don’t worry, we will level more in the next step), tamp it well with your feet or with a tamp tool.
We had an added challenge of an old concrete walkway going through the area. We didn’t quite realize it was there until we started clearing the dirt. Fortunately, it was level so it worked in our favor.
Optional Task
Lay down landscape fabric and/ or a layer of gravel to prevent weed growth under the deck. Since we couldn’t grow grass in our patch, it didn’t make sense to us.
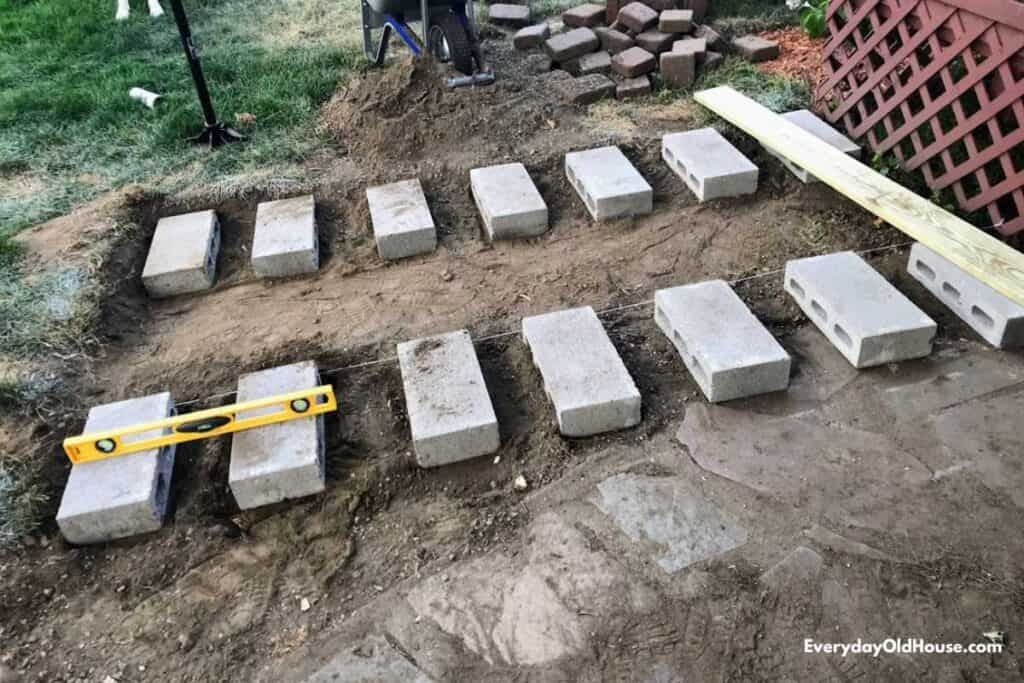
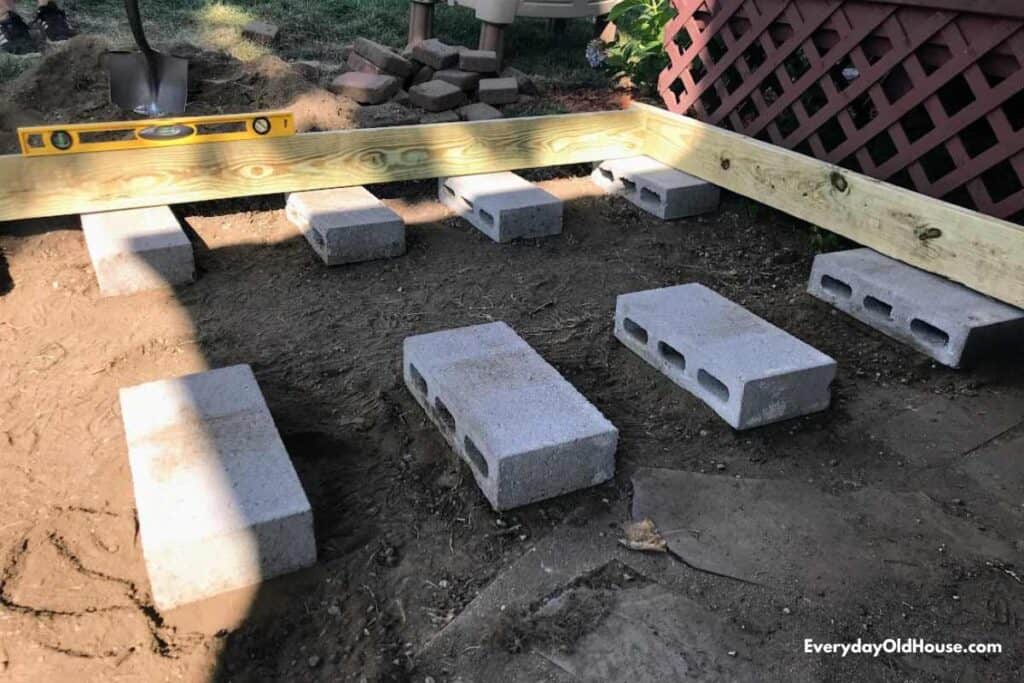
2. Lay Concrete Blocks
Now that we have a clean, level area, it’s time to lay the foundation (aka setting concrete blocks on the ground).
For our 8 x 10 low deck, we created 3 rows with 7 concrete blocks each. To do that we first placed 4 blocks in the corners of the deck area – 10 feet apart on the long sides and 8 feet apart from the short (measuring from the center of the concrete blocks).
Next we arranged the remaining blocks (evenly spaced) between the 4 corner blocks and added the third row. We used string to ensure they were lined up as evenly as possible.
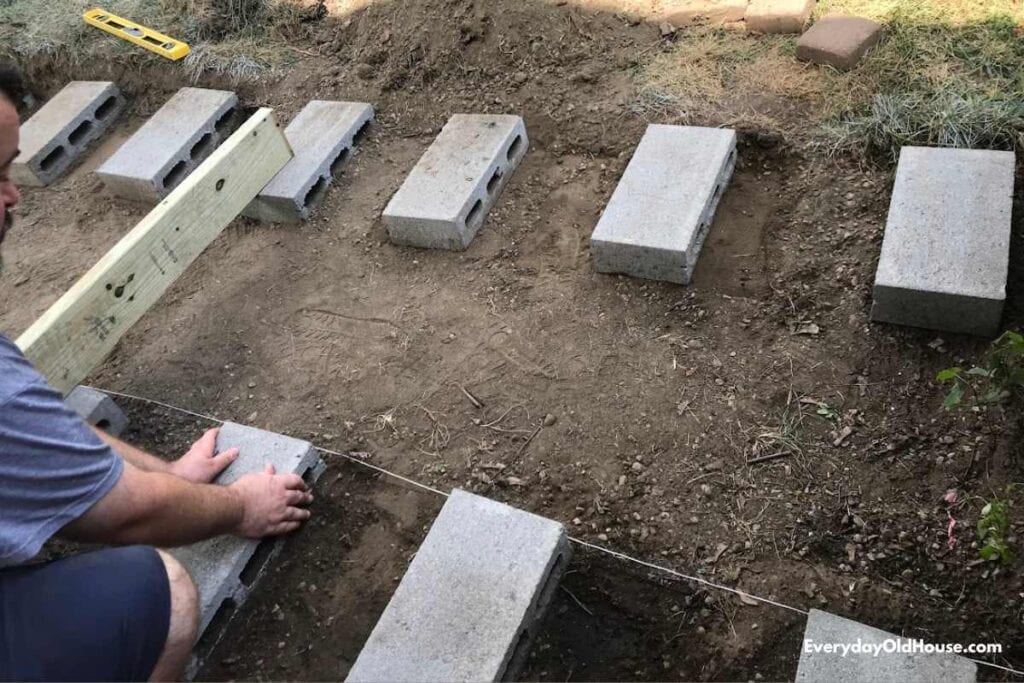
Due to the existing concrete walkway, we had to place one corner concrete block at an angle. It wasn’t ideal, but sometimes with these DIY projects, it’s the best you can do….
Tips
- If you want to be incredible frugal, you can build a low deck directly on the ground or over a bed of gravel. BUT using concrete blocks keeps the wood off the ground and away from moisture. Elevating the wood keeps it drier so that it lasts longer.
- There are special concrete deck blocks available, but they are more expensive. We used standard concrete blocks which did the job just fine.
3. Level Blocks
Now comes the most tedious, frustrating part. The leveling….
There are a few ways to help level the concrete blocks. Obviously, use a level. But you can also place one of the 10-foot deck boards (or run string) on top each row of concrete blocks. It will be obvious which concrete blocks touch the board (or string) and which ones need moving.
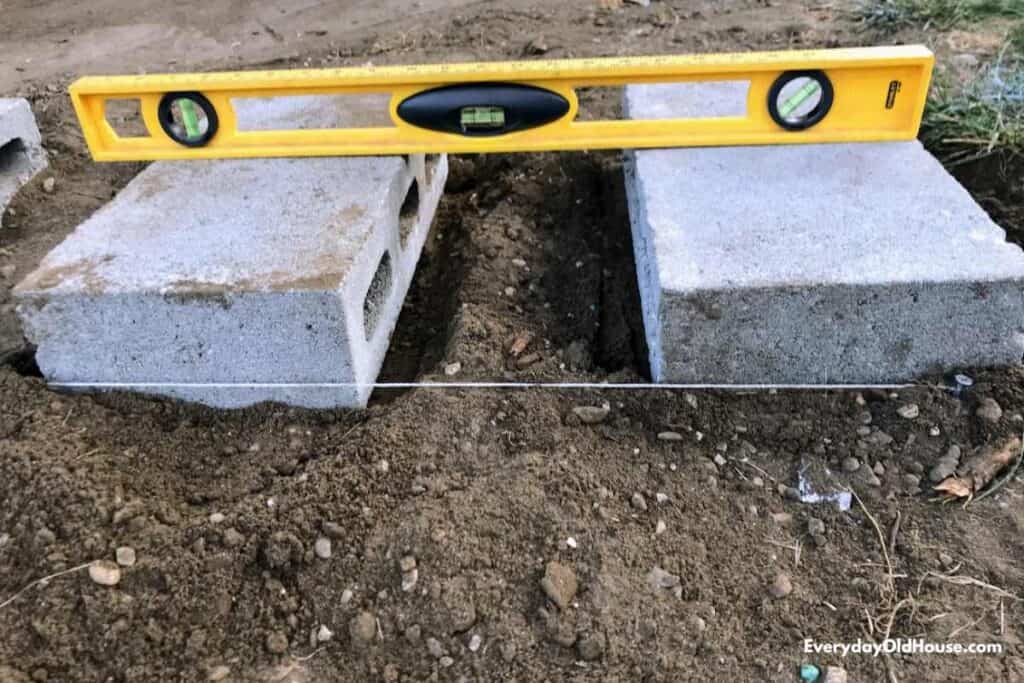
Don’t forget to level the rows with 7 concrete block rows (running lengthwise) as well as the 3 concrete block rows (running widthwise).
It’s incredibly frustrating. Don’t be alarmed if you need to take a break (or two) to get this step right.
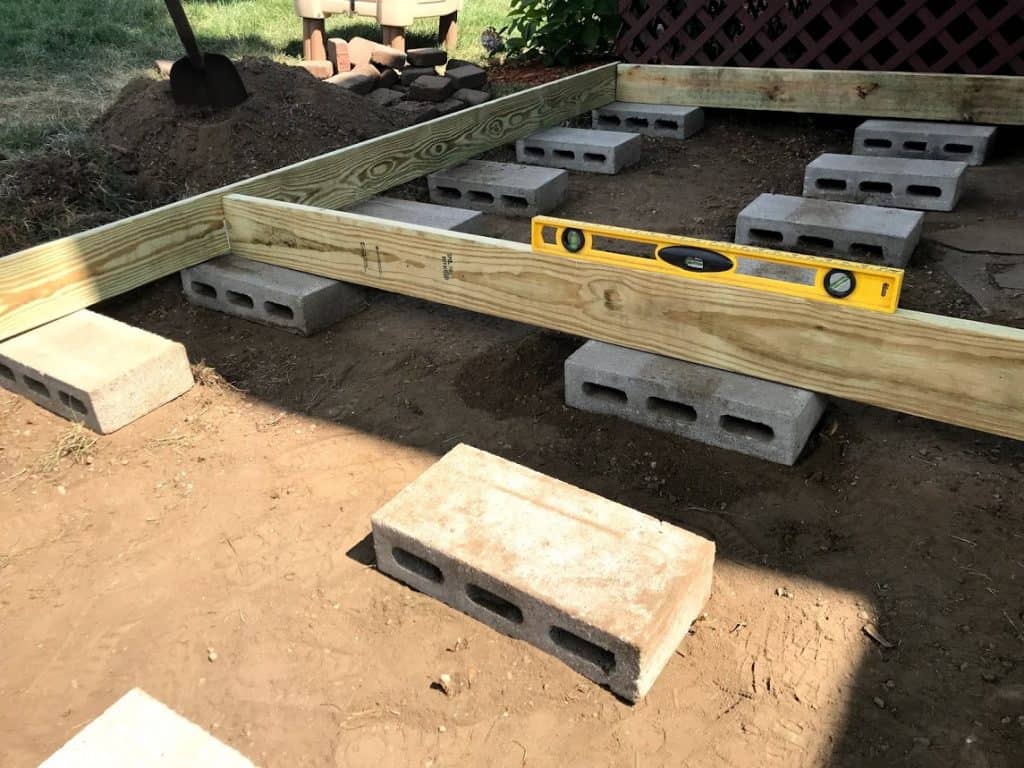
4. Build Exterior Deck Frame
This next step is ideally done in a flat area – the best bet is your driveway. You will need a clear area and some room for this step.
First, build the outside frame with 4 pieces of wood. Measure the two 10-ft 2x6s lumber to ensure that they are exactly 120 inches. Measure two of the seven 8-ft 2x6s lumber are exactly 96 inches.
Sometimes lumber bought at the store can be a bit off length-wise, so if you don’t’ measure and trim, your frame will be off. If not the exact length, trim with a saw.
Create a 96-inch by 120-inch rectangle by connecting the two 10-ft 2x6s with two 8-ft 2x6s.
Secure with three 3 ½ inch deck screws in each corner. If you follow the deck screws instructions, you probably need to drill holes before fastening the deck screws.
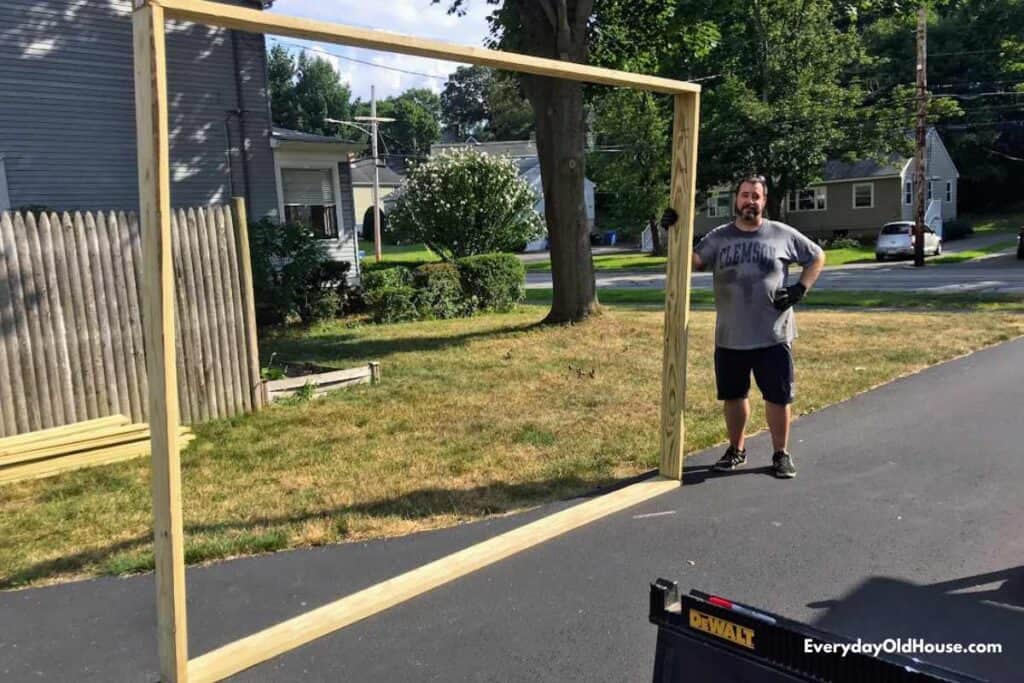
Use a framing square to ensure the corners are at 90-degree angles. If the angles are slightly off, enlist a friend/ spouse/ neighbor to help push from opposite ends until the correct angle is achieved.
5. Install Exterior Frame
Now ask that same friend to help you move the completed frame over to the low deck area and place on top of the concrete blocks. Ensure the frame rests over the centers of the exterior concrete blocks.
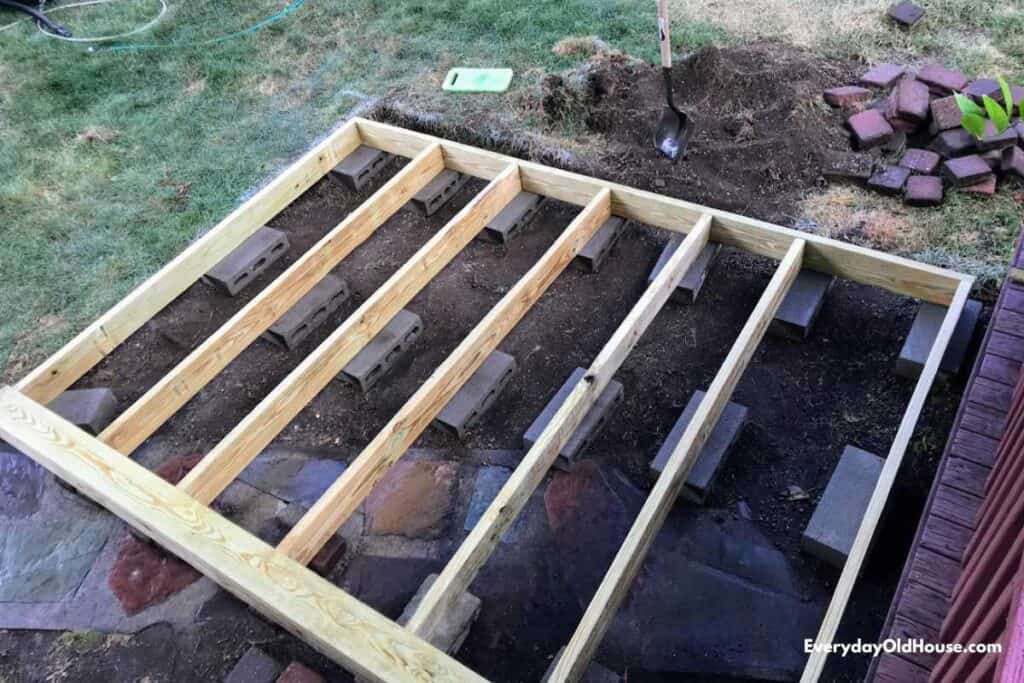
6. Add Interior Frame Support
Next, it’s time to add the wood for inside the frame. Using a pencil and measuring tape, measure up from the inside corner of the 10-foot 2×6 and mark a line every 19½ inches. Do this on the other 10-foot 2×6 as well.
Measure and cut the remaining five 8-foot 2×6 boards to a length of 93 inches so that they fit inside the exterior frame.
Next lay these five boards with the 2 inch side facing up and centered along the 19½ inch intervals. Ensure this lumber is makes solid contact with the concrete blocks underneath and is level (as shown below).
If there are issues, manipulate the concrete blocks (or add soil or gravel underneath) to adjust their height and to achieve a stable, level frame. Even with all our careful leveling of the concrete blocks, we still had some slight rocking that we needed to address.
Last, fasten with three 3½ inch deck screws at each end. Again, you will probably need to drill holes before screwing.
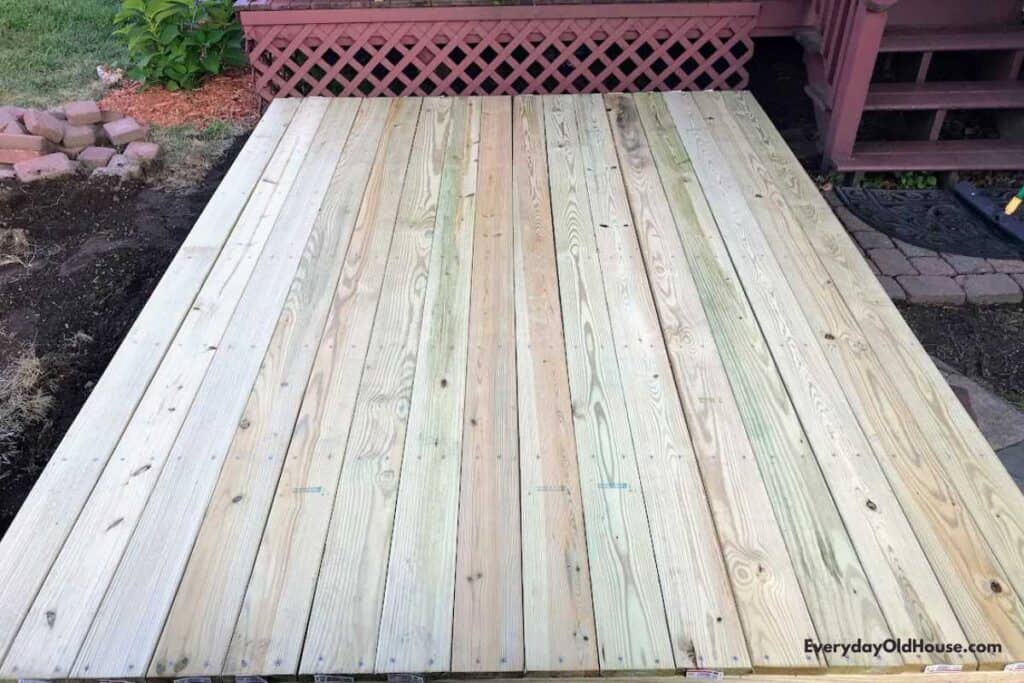
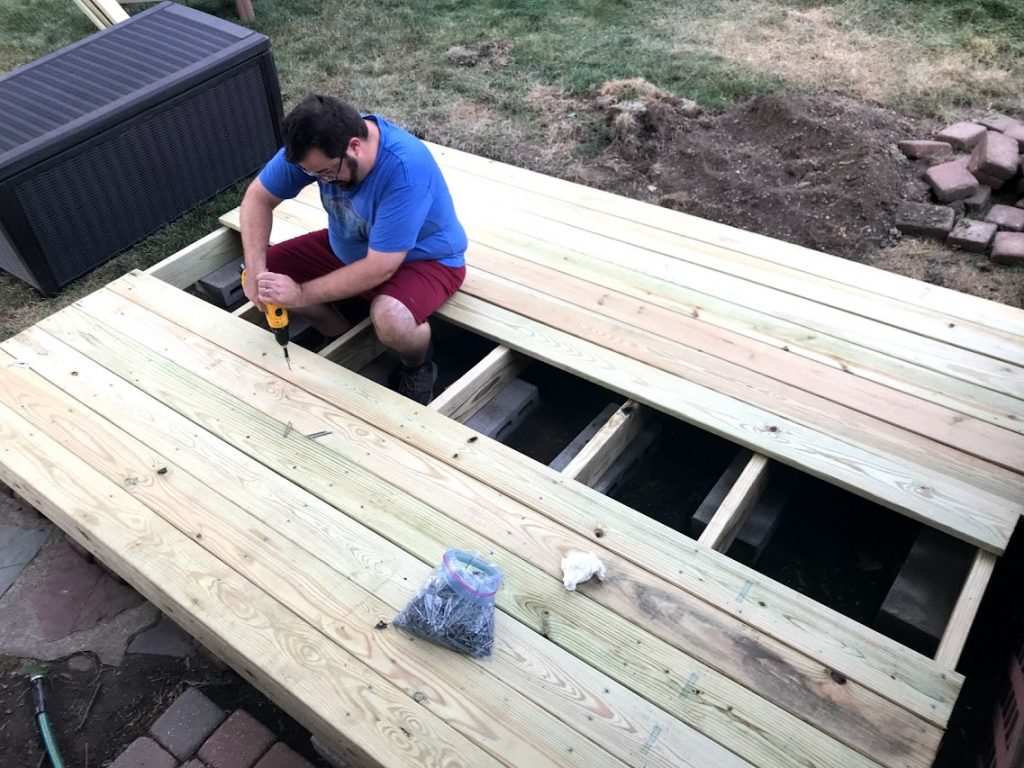
7. Add Deck Boards
Adding the deck boards requires 3 tasks: measure, place, and secure.
Before placing the deck boards over the frame, do a quick measure to ensure they are truly 120 inches long (and trim if not).
Next, place the deck boards over the wood frame. A few things to remember:
1. Drainage
Be sure to leave small and even gaps between each board to create a way for rainwater to run and drain between the boards. You are building a low deck that drains rainwater, not a pool…
Experts indicate between an 1/8 to 1/4 inch gap is best.
2. Irregular Boards
You will inevitably find that some of the deck boards you bought home are slightly bowed and create irregular gaps that make the low deck look sloppy.
Shuffle the deck boards around until the imperfect boards don’t look as obvious while also achieving a consistent configuration of gaps. It’s like putting together a puzzle. It takes a few minutes, but you will get there.
3. Overhang
Another thing to look out for while configuring the deck boards over the frame is to make sure the end deck boards overlap the frame evenly. It’s not a huge issue, but as you read here, we made that mistake. One deck board was flush with the frame, while the other end deck board overhung the frame by 2 inches.
In other words, decide if you want the end deck boards to fasten flush with the frame, over overlap. Ultimately, we fixed the boards and had about a 1 inch overlap in either side.
NOW it’s finally time to remove the deck boards (in order) and secure them to the frame. We are in the home stretch!!!
Fasten the deck boards to the frame with the 2 1/2-inch deck screws. (Note: like the 3 1/2 inch, you probably need to drill holes beforehand). For each deck board, we used two screws at each end of the exterior frame and two screws into each interior frame, totalling 14 screws in each deck board.
That’s it! You built a low deck! Now go enjoy! Yahoo!!!
Shop This Project
Tools

DEWALT 20V Max Cordless Drill Driver Set

DEWALT 20V MAX Circular Saw, Cordless

24-Inch/600mm Magnetic Bubble Level
Consumables
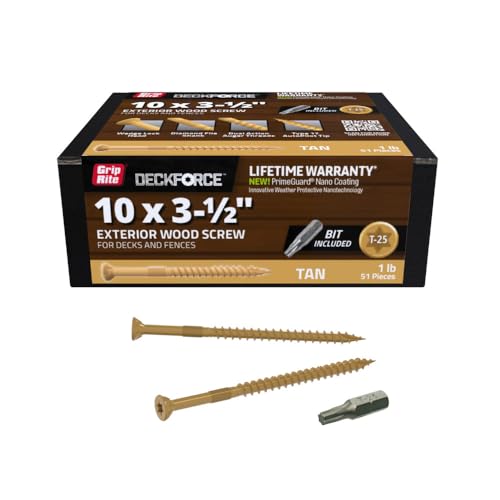
Grip-Rite DeckForce Exterior Wood Screws #10 x 3-1/2″ – 1 Lb Box

4FT x 100FT Weed Barrier Landscape Fabric, 3.2oz Premium Heavy Duty

Krylon COLORmaxx Spray Paint and Primer for Indoor/Outdoor
Finishing Products
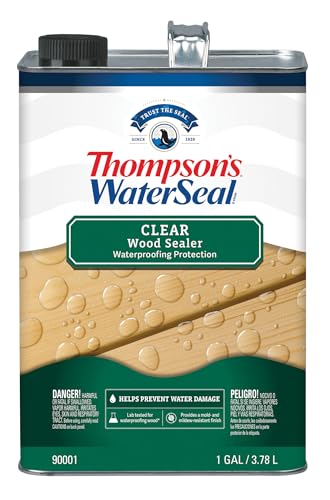
Thompson’s WaterSeal Clear Wood Sealer, Clear, 1 Gallon
Ready Seal 112 Stain and Sealer, Natural Cedar, 1 Gallon

7″ Deck Stain Brush Applicator with 60″ Long Handle, 3″ Paint Brush
Additional Tips for Building a Low Deck
1. Keep It Simple
Here’s what I love about building a low deck. It’s easy, fast and simple. There are no railings or stairs to build. There are no sweeping curves to learn how to build. Low decks are simple, functional, and economical. If you might want a fancy, extravagant deck, hire a contractor.
To keep it even more simple, consider designing your deck around the standard lengths of lumber in the stores. You can’t get any easier than building a low deck that is an 8×10 or 10×10 rectangle.
Plus, not only does it cut down on the labor or cutting lumber, it also reduces waste.
2. Understand Your Materials
For this budget family, pressure-treated wood is the most economical way to build a low deck. However, wood decks do require regular maintenance – usually yearly. And eventually, pressure-treated wood has a shorter lifespan than other materials. It falls subject to fading, warping and water damage than other alternatives.
If you cringe at the sound of “maintenance” you might want to consider building a low deck with an alternative material such as composite decking. Made usually from recycled materials, it’s more expensive, but it cuts down on maintenance and lasts longer (typically about 20-30 years longer) than pressure-treated wood. Here’s a few options…..
3. Protect Pressure-Treated Lumber
While you don’t have to stain and seal the low deck’s frame, you should finish the deck boards with a protective exterior stain and sealer. If not, the deck boards will turn gray quicker and begin to splinter.
We decided to sand and re-stain our older raised deck at the same time we stained our new low deck. (and we learned from lessons from that as well….)

Make Your Deck Look High-End (Easy Upgrades)
Here’s some of my fav Amazon finds (and best sellers!) for finishing your low profile deck.

Outdoor Waterproof & Reversible Rug

10Ft String Light Hanging Lights for Deck

3 Piece Wicker Chairs with Table
Related Posts
Want to be the first to know about new posts? Be sure to follow me on Pinterest, Facebook, Instagram or Twitter of even Etsy! Or better yet… Subscribe below!
My monthly (admittedly sometimes more, sometimes less….) emails are like receiving a unexpected letter from an old friend WITHOUT needing to put on your slippers and walk out to your mailbox…. See? I got ya, my friend!)
[Note: My posts are proudly connected to these amazing link parties full of DIY ideas and inspiration!]